Aberlink provides VES with pace and precision

Based in Crewkerne, Somerset, VES Precision was established in 1991 to provide a range of precision engineering and subcontract machining services to local companies such as Westland Helicopters (now Leonardo Helicopters) and Normalair Garrett (now Honeywell Aerospace), both of which are located in nearby Yeovil.

Recent substantial investments in advanced, high-yield machine tools have enabled VES Precision to significantly increase its output. As this rise in production had started to place a strain on the company’s inspection provision, VES quality assurance manager Steve Trigg recently investigated CNC CMMs.

After evaluating the merits of CMMs from several leading manufacturers, an Axiom Too HS machine was purchased from Aberlink.

“As our new Aberlink CMM is very easy to use, soon after its installation our operators were up and running,” says Trigg.“In addition to the Axiom Too HS’s improved accuracy specification being able to accommodate high-precision parts, the machine’s automated CNC nature and speed of operation has resulted in considerably quicker throughput in our inspection department.

“Not only has the Axiom Too HS satisfied our current inspection requirements, our new CMM’s speed will enable it to handle any foreseeable increases in production,” he adds.“Also, its accuracy specification will enable the inspection of the most demanding of our components now in the future.”

Available in several capacity variants, the Axiom Too HS boasts an aluminium bridge with a very low thermal mass, making it suitable for use ineither controlled environments or within less than perfect shop-floor conditions. For increased accuracy, air bearings of optimised stiffness are employed on all axes, while a granite Y beam allows the preloading of bridge bearings in both directions.
For further information www.aberlink.com

Mitutoyo measures up for Martin Baker

Uxbridge-based Martin Baker is a specialist in aviation ejector seats, making products that have saved more than 7500 lives to date, with 19 pilots saved in 2018 alone.With quality literally a matter of life or death, for the past 25 years the company has been measuring and controlling its seats and critical life-saving components with the help of metrology expert Mitutoyo.

With ejection seats in all areas of aviation from helicopters and light prop aircraft to fighter jets, Martin Baker currently produces more than 40 seats each month plus a complete variety of components for the regulatory maintenance and repair cycle of existing seats in service. Producing everything from spares for seats dating back to 1949 through to more than 700 parts for each Joint Strike Fighter (JSF) seat, Martin Baker has 25,000 live components and beyond 50,000 parts on its inventory list. With components manufactured by 25 CNC machine tools, at the centre of the 800 employee manufacturing site is a four-machine 72 pallet DMG cell that runs 24 hours a day and 364 days a year.

Ensuring that components conform to the exacting standards of Martin Baker, the company has an inspection department with 55 staff that relies heavily on inspection equipment from Mitutoyo. Discussing the relationship with Mitutoyo, inspection manager Darren Smith says: “Martin Baker has had a long association with Mitutoyo, using hand tools like micrometers, calipers and height gauges, as well as CMMs for more than 30 years. As our company has evolved, so has the technology. We now have five Mitutoyo CMMs, three SurfTest machines, a Contracer, two training kits and the Mitutoyo MeasurLink system for SPC.We also have over 300 Mitutoyo handtools and gauges on-site.”
For further information www.mitutoyo.co.uk

RPI saves 40% inspection time

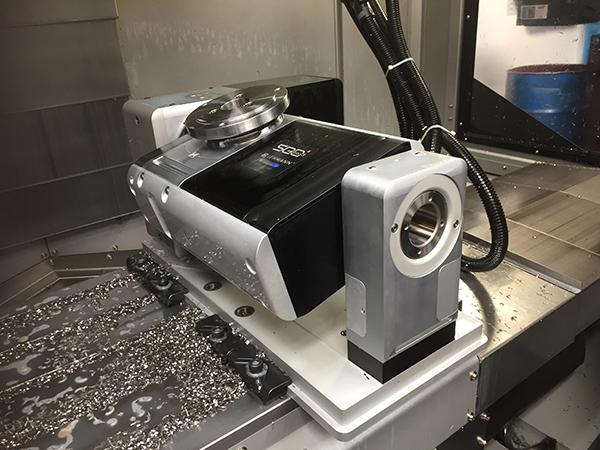
RPI UK, a specialist developer and manufacturer of precision positioning devices for rotary and angular inspection systems, has supplied Wenzel’s Bulgarian distributer with a QuadSlimLine rotary table. Integrated into a Wenzel CMM, the rotary table will enable a European aerospace giant to measure blisks, saving up to 40% in inspection time.

RPI UK, the world’s leading specialist developer and manufacturer of precision positioning devices for high accuracy rotary and angular inspection systems, has supplied Wenzel’s Bulgarian distributer with a QuadSlimLine rotary table. This will be integrated into a Wenzel CMM machine to enable a European aerospace giant to measure aero engine disks, saving up to 40% in inspection time

Specifically designed as a fourth axis, RPI’s rotary tables are accurate to ±0.5 arcs seconds. This precision is equivalent to hitting a golf ball at a hole more than 22 km away and scoring a hole in one every time. Rotary tables also increase a CMM’s available measuring volume, thereby providing greater flexibility in what can be measured.

The installation of the QuadSlimLine on to the Wenzel CMM was carried out by 2M Trading, the Bulgarian distributor for both RPI and Wenzel.

Timothy Matyushin, 2M’s general manager, says: “We installed RPI’s Quad Slimline on to Wenzel’s LH108 NG CMM, incorporating a Renishaw UCC S5 controller and Renishaw MODUS software. The result was a CMM that worked smarter with increased flexibility, capacity and throughput, which resulted in a 40% reduction in inspection time for one of Europe’s major aerospace manufacturers. They’re so impressed that they’ve ordered another two QuadSlimLines to be installed on to their CMM machines later this year.”
For further information www.rpiuk.com

Versatile software extends capabilities of CT

Researchers at the Henry Moseley X-ray Imaging Facility at the University of Manchester are using Nikon Metrology’s programmable Inspect-X software to develop bespoke computed tomography (CT) solutions that integrate third-party analysis software and control external hardware. The 4D (three dimensions plus time) CT laboratory experiments have the potential to open up new avenues in industrial environments.

Parmesh Gajjar is a research associate at the imaging facility who has been discovering the possibilities of the programmable IPC (inter-process communication) interface to Nikon’s X-ray control software and how it can be harnessed to perform temporal (time-related) CT for scientific, non-destructive observation and quantification of processes that change structure over time in 3D. He says: “Nikon Metrology’s programmable CT systems are a gold mine for researchers and manufacturers alike, as it gives users the flexibility to do whatever they choose.”

Andrew Ramsey, a consultant at Nikon Metrology with experience of developing special CT applications in industry adds: “In the aerospace industry for example, when studying accelerated fatigue crack propagation in fan blades, time-lapse CT can be used to replicate years of work in a fraction of the time.”

The fully programmable IPC software interface allows users to write their own code and implement individual functions in Inspect-X. These functions range from simple tasks such as turning the X-rays on and off, to high-level actions like initiating a CT scan with previously stored acquisition parameters, automatically reconstructing a CT volume using stored settings, and running an automatic analysis using stored macros while providing progress feedback throughout – all without further human intervention. The IPC program can create simplified user interfaces for previously cumbersome tasks and acquire data for the non-destructive examination of a 3D sample.
For further information www.nikon-metrology.com

GapGun used on F-25 JSF

A presentation on seam validation measurement at this year’s Co-ordinate Metrology Society Conference (CMSC) in Nevada, USA showcased how Lockheed Martin incorporates GapGun – Third Dimension’s best-selling hand-held laser measurement system – into the company’s quality inspection processes deployed on its F-35 Joint Strike Fighter (JSF).

Lockheed Martin explained how seam validation – the process of measuring the gap and mismatch between body panels – has become a networked process whereby seam types can be measured at a faster rate, repeatedly delivering significant improvements in time saving and reducing the risk of human error.

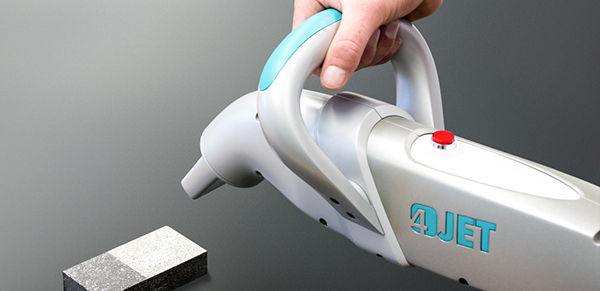
Quick and easy to use, GapGun takes measurements throughout Lockheed’s production line, so problems can be headed off before they arise, thereby accelerating and streamlining the production process.

Using LINK SDK – Lockheed’s customised seam validation management system (SVMS) – check plans can be sent straight to GapGun via the network rather than being manually downloaded. The results are then passed straight back to the SVMS.

Dennis De Roos, chief sales and marketing officer at Third Dimension, says: “We are delighted that Lockheed Martin has chosen GapGun to improve quality control for the F-35 aircraft. GapGun is simple to use and saves manufacturers time and money, while increasing efficiency.”

GapGun is used by manufacturers in the aerospace, automotive and energy industries. The device is sold in 25 countries and has made its developer, UK-based Third Dimension, a two-time winner of the Queen’s Awards for Enterprise.
For further information www.third.com