When three experienced machinists decided to turn their shared dream into reality, they
knew success would depend on making the right technology choices from day one. For Will
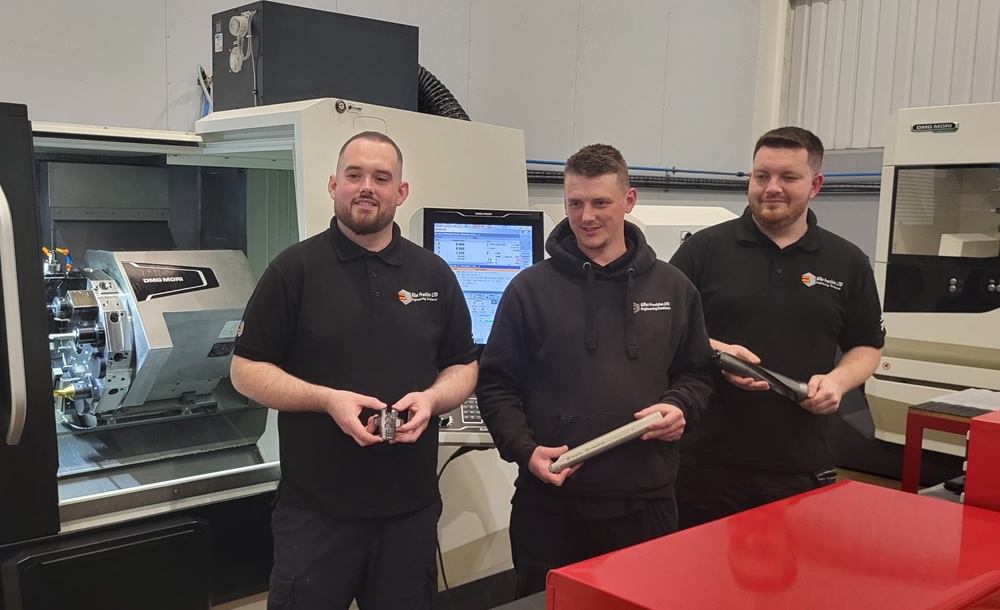
Casey, James Lewington and Ryan King – the founding partners of Billet Precision – those
choices included investing in premium DMG Mori machines and partnering with TaeguTec
for cutting tools that could deliver exceptional performance across diverse applications.
“TaeguTec has been brilliant from day one,” states Casey. “Daily, we probably use 90% of
their stuff. They’re always our first port of call for any questions, and they often have a
solution to any problems or questions that we have.”
The story begins with a chance meeting through a mutual love of cars, leading to a
partnership built on shared engineering excellence.
“We met through a shared hobby – we’re all massively into our cars,” confirms Casey.
“James and Ryan are cousins and have worked together at the same subcontract
manufacturing facility. I’ve known them both for over seven years, so we knew how we’d all
fit into our own business.”
The team’s decision to base the business in Swindon proved strategically sound. Casey’s
analysis of the local market was thorough.
“There are many science and research companies around the area, as well as the Formula 1
teams,” he says. “This has paid dividends as we now serve diverse sectors including
aerospace, energy, science and motorsport.”
Billet Precision’s approach to equipment selection reflected their commitment to hitting the
ground running. Rather than starting small and building up gradually, the company invested
in three DMG Mori machines: two CMX 1100 mills and a CLX lathe with Y axis and driven
tooling capability.
“I know how brilliant my fellow directors are; we just needed the equipment and tooling to
show that to the rest of the world.”
While DMG Mori provided the machine platform, the choice of cutting tools proved equally
critical. The relationship with TaeguTec wasn’t new; Lewington and King had been using
TaeguTec products for years and had built a strong relationship with their technical
representative, Tony Wilkes.
“TaeguTec is very good at a lot of things that we like,” says Casey. “The guys really like all
the tools, to be honest. They’ve tested a lot of cutters from rival suppliers, with TaeguTec
always coming out on top for quality and performance.”
The decision to work with TaeguTec was not just about familiarity; it was about proven
performance.
“Even if a cutter from someone else can come close to the TaeguTec performance level, the
level of service, support and even the price point will make it a non-starter. TaeguTec will
tell you where their cutting parameters or performance ceiling is, but actually, we’ve gone
way beyond and got a lot more out of the tools. We’ll push and see what we can get out of
it, whereas with other companies, we’ve run at their recommended feeds and speeds and,
at the limits, the tools just give up.”
The real value of TaeguTec’s proposition comes through specific applications where the
tools have delivered measurable improvements in performance and efficiency.
King alludes to his experience of applying TaeguTec’s CNMG inserts: “For machining 316
stainless steel, I consistently used the TaeguTec TT9215 grade with impressive results.
However, when encountering a particularly abrasive bar of material that was burning
through tools, TaeguTec engineer Tony recommended switching to the new TT5080 grade,
which is typically used for forged stainless steels or Inconel.
“The results were awe-inspiring, and the performance and longevity of the new grade
improved significantly. Furthermore, we now have the TT5080 grade held in larger stock
quantities, so I don’t need to worry when we get an exotic job that requires a fast
turnaround.”
This performance extends throughout the fledgling business. After trying various brands of
straight parting-off systems with limited success, King tested TaeguTec’s SFC triangular-
bladed parting-off system. The improvement was dramatic.
“The TaeguTec parting system features through coolant with a flow rate that seems to be
twice that of a standard flat-blade tool. This is credit to the design of the holder. It means I
can run at double the feed rate with a much higher speed, all while having a far straighter
cut and an amazing finish. So not only has this improved run times, it has improved the
quality of any job that needs parting off.”
When King needed to improve drilling performance on exotic materials while achieving
better dimensional accuracy, TaeguTec’s Wilkes recommended the Drill Rush range.
“The P+ insert was fantastic and exceeded any expectations I had. On Inconel, the cutting
performance was lovely; it was shooting chips back out of the hole and drilling very fast but
also very straight. I was also getting more than double the tool life from it than the previous
U-drill.”
The drilling performance included running at double the feed rate with slightly higher
speeds while maintaining holes within 0.07 mm tolerance.
Lewington has also witnessed impressive results with TaeguTec products. Applying the
TaeguTec SFEEDTEC 4N TF90-650-22R-09 face mill with 4NHT 090408R-AL K10 inserts for
high-performance milling applications.
“This tool has enabled dramatic productivity improvements,” he says. “We’ve managed to
cut cycle times by 50% by running this tool at 0.2 mm per tooth, which is close to the rapid
feed rates of the machine. At the same time, it’s taking depths of cut up to 7 mm in some
cases.
“The versatility of the face mill extends across multiple operations. For facing, it achieves a
near-mirror finish with an 80% stepover, and for wall milling, we can maintain a 7 mm depth
of cut while preserving surface finishes and tolerances. For slotting and pocket milling, we
can use a more aggressive ramp angle and the high pressure through coolant ensures
excellent swarf evacuation.”
As a company continually seeking to improve productivity and quality, Billet has also
installed the TaeguTec Typhoon on one of its DMG Mori machines. Driven by high-pressure
coolant, the Typhoon high-speed spindle unit is compatible with most machine tools,
increasing spindle speeds to over 30,000 rpm for small diameter tools. By increasing spindle
speed, small diameter tools can operate at optimal performance parameters, improving
cycle times and productivity by at least 65% while improving surface finishes and tool life.
Beyond product performance, Casey emphasises TaeguTec’s exceptional service: “They’ve
been brilliant. The turnaround times are impressive. Tony is always on hand with technical
support, and he’s always keen to take a look at our upcoming jobs to ensure we always have
the right tools for the job.”
Casey particularly appreciates TaeguTec’s proactive approach to improvement: “Rather than
just being comfortable with what we’ve used for such a long time, TaeguTec are always
making potential improvement suggestions. They’re constantly benchmarking against their
own products to enhance our performance.”
Looking ahead, Billet Precision is planning strategic expansion with additional DMG Mori
equipment planned for an imminent order.
“TaeguTec are always our first port of call for any technical questions and support,”
concludes Casey. “They’re always happy to help out and always have a solution to any
problems or questions that we have. With the help of TaeguTec and DMG Mori, we can’t
wait to see what the future holds.”
More information www.taegutec.com


