Mitutoyo seals the deal at CDK

When Yeovil-based CDK Seals won an order for the production of metal components from a new aerospace customer, this manufacturer of seals for the food, pharmaceutical and petrochemical sectors, had to employ new production equipment and methods.
Historically, CDK has produced its seals from a variety of PTFE composites on specialist machines. However, the new £100,000+ order required a three-part assembly featuring steel, aluminium-bronze and PTFE parts. These components include both a concave and convex part, as well as a housing that makes for an assembled measurement of 80 mm diameter and 60 mm height. A major issue for CDK was that the 1500 assemblies, with a total of 4500 parts, had to be machined to a 0.03 mm tolerance. Unfortunately, the company’s micrometers could not measure many of the complex features, especially the curved surfaces. This situation was particularly pertinent for a 4 mm diameter cross-drilled hole that is positioned on one of the
concave surfaces.
After assessing the market options, CDK engineers visited Mitutoyo and it was agreed that the Crysta Plus M433 CMM could provide the solution.
“Mitutoyo installed the machine and did the programming for the three seal components, so we could be up and running instantly,” says managing director Dave Paget. “The training was straightforward and we have the CMM networked to a PC, so we can store any subsequent programs off-line. Mitutoyo also provided a series of 3, 2 and 1 mm diameter ruby probes.
These small probes enable us to get inside the 4 mm diameter drilled hole and check the concentricity as well as the angle of the hole that has a critical tolerance of ±0.1°.”
For further information
www.mitutoyo.co.uk

CMM installed at subcontractor

In addition to stringent final inspection routines performed by dedicated quality staff, production personnel at Luton-based subcontract manufacturer Pact Engineering take responsibility for their own in-process quality control and carry out regular CMM checks.
The mainstay of Pact’s inspection provision is an Axiom Too CNC CMM from Aberlink that was installed two years ago. Shop floor personnel are able to instantly recall the appropriate pre-written program and measure first-offs before beginning a production run. In-process checks on the Axiom Too are also performed when carrying out long production runs.
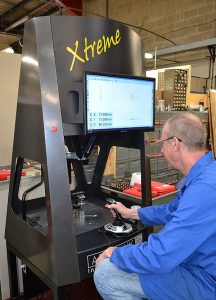
Despite the measuring speed of the existing Axiom Too, as a result of ever rising production levels, delays were beginning to occur. For instance, occasionally, when it was needed to verify the adherence to specification of a first-off component, the Aberlink machine would be engaged in a lengthy, CNC final inspection routine on a large batch of complex components. The delays incurred by machine operators while waiting for the CMM to complete its tasks, meant that production time was lost. However, the answer arrived in the shape of the recently launched AberlinkXtreme CMM.
The AberlinkXtreme is designed with a novel non-Cartesian structure and uses linear motors and mechanical bearings. According to the company, this configuration ensures that the machine maintains its accuracy at fast measurement rates and does not suffer from the accumulative inaccuracies that occur in conventional three-axis Cartesian arrangements.
“The use of our new Xtreme CMM has released our Axiom Too to concentrate on final inspection routines and put an end to bottlenecks in our inspection department,” states director Steve Banfield.
For further information
www.aberlink.com

Handheld laser scanner introduced

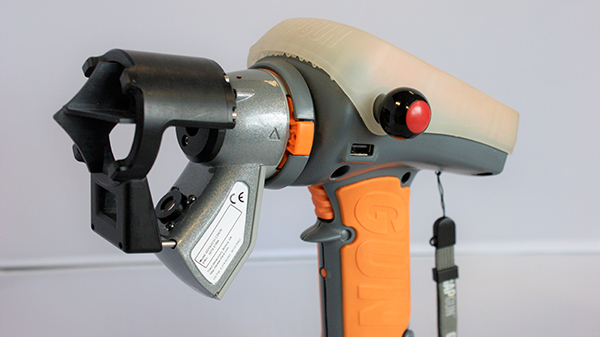
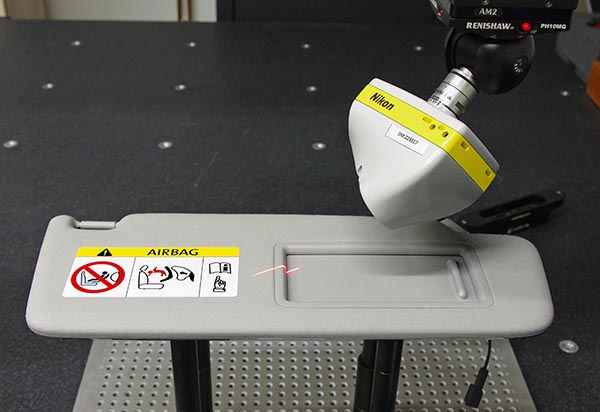
Incorporating blue laser technology, a fast frame rate, specially developed optics and the ability to measure challenging materials, ModelMaker H120 is the next generation of portable laser scanners from Nikon Metrology. The system offers a field-of-view width up to 120 mm and a point resolution down to 35 μm. A frame rate of over 450 Hz is available even when measuring difficult surfaces such as carbon fibre and gloss black, as well as reflective or multi-coloured parts.
With 2000 points per scan line and no reliance on point-to-point interpolation to artificially boost data density, it is possible to measure very small details on large surfaces even when cycle time is critical, says Nikon.
ModelMaker H120 uses advanced optics and a blue, low-speckle laser to generate high-accuracy, low-noise data, making it possible to identify small surface scratches and abrasions. In addition to rapid collection of surface data, sharp edges are represented with clarity thanks to a scanner accuracy of 7 μm and a combined system accuracy with Nikon Metrology’s MCAx articulated arms of up to 28 μm.
The fourth generation of the company’s Enhanced Sensor Performance (ESP4) adapts the laser source intensity, not just for every scan line, but for every point in each scan line, enabling parts with significant colour changes or reflectivity to be measured from any angle. This minimises the need for training, as a single-scanner setting is capable of measuring almost all parts encountered in industrial metrology applications, says Nikon.
For further information
www.nikonmetrology.com