Robot Tending Compatibility For Quality Tasks

Flexxbotics is offering robotic machine tending for quality inspection connectivity with the
complete range of 3D scanning and inspection products from LMI Technologies. Now,
companies can enable robot-driven manufacturing with Flexxbotics using LMI Technologies
to achieve closed-loop quality and Six Sigma consistency in unattended operations.
 
Flexxbotics’ FlexxCORE technology enables robots to connect and communicate with
equipment from LMI Technologies. With Flexxbotics, robots receive direct feedback based
on automated inspection results, enabling real-time adjustments to CNC machine programs
for autonomous process control. For inspection tasks, Flexxbotics orchestrates fleets of
production robots to achieve continuous operations, driving defect reductions while
improving throughput and increasing profit per part. 
 
Flexxbotics compatibility includes the full line of LMI Technologies’ Gocator sensors – such as
3D point profilers, 3D line profilers, 3D snapshot sensors and 3D line confocal sensors – as
well as Chroma+Scan multipoint scanners and FocalSpec 3D line confocal sensors. 
 
“We understand the important role that inspection technologies play in enabling smart
factory autonomy by providing the closed-loop feedback needed for autonomous process
control,” says Tyler Modelski, CTO and co-founder of Flexxbotics. “That’s why we’ve
developed a solution that is compatible with all types of inspection equipment, such as
probes, sensors, vision systems, lasers and gauges, CMMs and more.” 
 
Flexxbotics’ solution digitalises robotic production with autonomous process control for
next-generation smart factory environments. It runs both online and offline so production
continues with or without internet access. Flexxbotics works with existing business systems
like CADCAM, DNC, SCADA, IIoT, MES, ERP, PLM and others for comprehensive process
integration.
 
A full set of bi-directional communications, transforms and routing capabilities are available
in Flexxbotics for connected inspection tools, robots and machinery.
More information www.flexxbotics.com

Milestone Wenzel CMM Goes To ZF Group

Wenzel Metrology has delivered its 10,000 th CMM to the ZF Group. It marks another
important milestone for the company and underlines Wenzel’s close partnership with ZF, a
global specialist in driveline and chassis technology, as well as active and passive safety
solutions.

‍The LH 1210  is the first machine of its size with the ‘Premium Select’ accuracy of 1.2 µm
+L/450 µm. This specification makes it the most accurate CMM that Wenzel has ever
produced in this size.

Another highlight is the integrated new roughness sensor system, which can be used on
both the Wenzel LH series and the GT series (gear measuring machines). This technology
enables ZF to measure a wide variety of components flexibly and precisely, whether cubic or
rotationally symmetrical. The standard rotary table, integrated into the granite plate,
further expands the machine’s application possibilities and makes it a genuine multi-
coordinate measuring system.

Wenzel has developed the LH 1210 in such a way that it is ready for future sensors and
technologies. As a result, ZF can invest in the latest technologies in the long term without
having to replace any hardware.

A further decisive factor for ZF was compatibility of the measuring programs. The programs
of the GT series gear measuring machines can be easily used on the LH series and exchanged
between different locations worldwide. This gives ZF maximum flexibility and enables
optimal use of the machines in its global production networks.

‍The 10,000 th CMM was ceremoniously handed over by senior management, Dr Heike
Wenzel and Dr Heiko Wenzel-Schinzer, as well as the key account management team led
by Björn Urland and Thomas Pfeiffer in Wenzel’s final assembly department.
More information www.wenzel-group.com

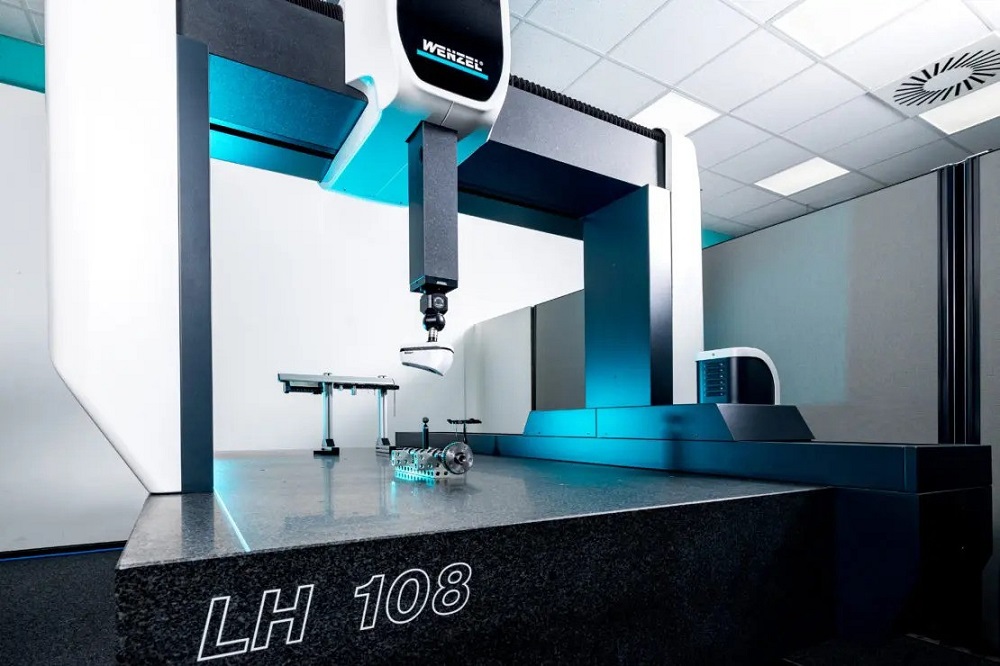
Wenzel expands LH series of small CMMs

The requirements for precision and efficiency are becoming increasingly specific. For this reason,Wenzel is expanding the standard sizes of its small CMMs in the LH series. With the introduction of the new sizes LH 67, 85, 105 and 107, the company now offers a wider range of machine variants that cover different measuring ranges. In turn, the expansion enables Wenzel to respond even more specifically to the individual needs of customers.

Wenzel has not only expanded the range of variants that make up its small LH machines, but also significantly increased the productivity and dynamics of these CMMs. From the smallest size, the LH 65, it is now possible to integrate the Revofive-axis measuring system from Renishaw. Revo offers a fast and accurate measuring process that improves measuring throughput and even includes the option of roughness measurement.

Notably, Wenzel attaches great importance to sustainability. The new LH machines feature a design that minimisespower and air consumption. With an environmentally friendly concept that focuses on durability and minimal wear and tear, Wenzel says the LH series actively contributes to lower CO2 footprint. This environmentally conscious approach ensures that the machines are not only efficient, but also sustainable.

With the expansion of the LH series, the companysays it is taking a significant step towards the future. With precise, economical and environmentally friendly solutions, Wenzel’s aim is to continue offering advanced machines and providing customers with the best solutions for their individual needs.

More information www.wenzel-group.com

Laser reliably measures 10 µm tools at Zecha

When it comes to carbide tools, there are always products that push the boundaries of what was previously considered technically possible. Some of these products are made by Zecha Hartmetall-Werkzeugfabrikation GmbH,like a two-flute end mill with a diameter of 10 µm or a PCD tool that has 42 cutting edges with a diameter of 6 mm. This leads to the question of how to measure such small tools, which are many times smaller than a human hair, and how to ensure that the machining process is reproducible.

“It’s especially important that measurement takes place in the machine, because this is the only way to record and compensate for all influencing factors,” says Marcus Becker, milling application engineer at Zecha.

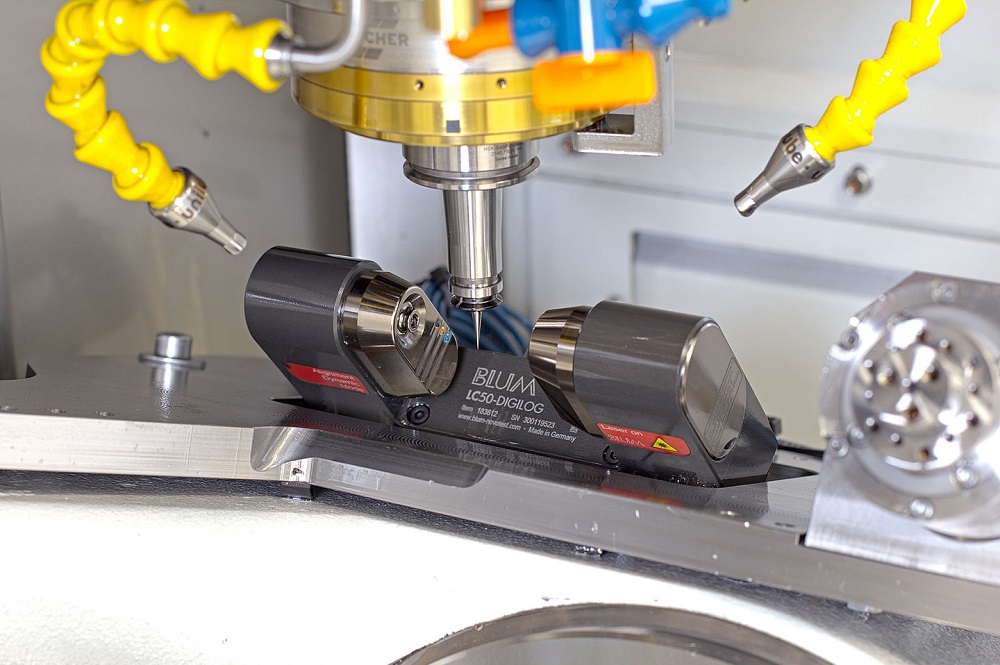
Since machine manufacturer Kern has been integrating laser measuring systems from Blum into its precision machines for many years and Zecha has its own high-end machine, it did not take long to decide on the LC50-DigiLog


In contrast to conventional laser systems that generate a single measured value when the laser beam is shaded to a certain degree, Blum says that the LC50-DigiLog laser measuring system determines the actual measured value based on thousands of individual values per second. In addition, thanks to the large number of measured values per cutting edge, the system detects contamination and cooling lubricant deposits on the tool and calculates them out of the result.

Unsurprisingly, in addition to tool measurement, tool breakage detection is also an important issue with micro-tools. This is where non-contact measurement at high machining speeds, made possible with the DigiLog system, offers great advantages.


Zecha also uses LC-Vision software from Blum-Novotest: measuring and visualisation software that generates, visualises and evaluates a variety of measurement applications on the control screen.

More information www.blum-novotest.com

Faster inspection in large-scale manufacturing

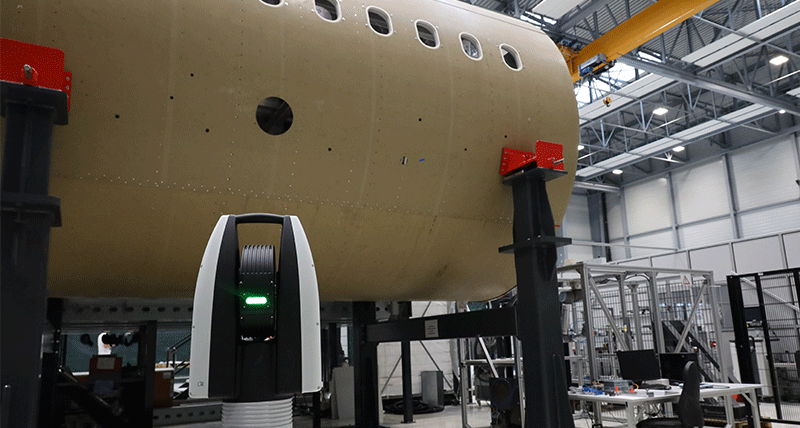
Hexagon’s Manufacturing Intelligence division has a new technology to reduce quality inspection delays in large-scale manufacturing operations. Combining laser tracking with laser radar functionality, it enables manufacturers to measure detailed features and meet tight assembly tolerances from tens of metres away. Built on established measurement and positioning technology, the new Leica Absolute Tracker ATS800 offers significant productivity improvements in large-scale part manufacturing and assembly operations by safely and rapidly measuring critical features.

The new system enables manufacturers to measure fine edges and features across large volumes productivity from a convenient stand-off distance. Whether inspecting large aerospace or automotive structures, ship sections, or wind turbine components, there is no need for operators or robots to be in close proximity to the part. This capability avoids unreliable measurements and safety issues,while also providing significant time savings. 

By combining direct scanning and reflector tracking capabilities, the system replaces two pieces of hardware with a single device. Using Hexagon’s patented PowerLock technology, the ATS800 automatically and immediately ‘locks on’ to a fixed reflector and tracks its movements in real time, providing an absolute position reference. The ability to measure target reflectors also greatly simplifies robotic automation processes, providing precise position referencing within a wider co-ordinate system when the tracker is mounted on a linear rail or an autonomous mobile robot (AMR). 

It is possible to measure an aircraft fuselage, for example, quickly and without bringing target reflectors to the part, reducing total inspection time from hours to minutes. Using multiple devices or an AMR, several fuselage sections or panels can undergo batch inspection overnight, further reducing inspection time and avoiding disruption during shifts. 

More information www.hexagon.com