Mills CNC, the exclusive distributor of Doosan machine tools in the UK and Ireland, has recently supplied leading precision subcontract specialist, SRD Engineering, with three new Doosan machining centres. The machines, two DNM 4500 three-axis vertical machining centres supplied with Nikken 4th-axis units, and a DVF 5000 simultaneous five-axis machining centre, were installed at the company’s 18,000 sq ft facility in June 2021.
SRD Engineering’s new machines are now busy producing a range of high-precision and often complex components for customers operating in the motorsport, automotive, electronics, medical, power generation and aerospace sectors. The parts are machined in small-to-medium batches from a diverse range of materials that include inconel, titanium, stainless, steels, aluminium and plastics.
Typical components machined by SRD Engineering are characterised by their tight tolerances (8-10 µm) and exacting surface requirements (Ra 0.8 µm or better). Part cycle times vary considerably, from a few minutes at one end of the spectrum, through to over nine hours at the other end.
The parts machined by SRD Engineering are also required, in many instances, in double-quick time, especially where the motorsport sector is concerned. This helps explain why the company operates 24/5, and why it is committed to investing in technologies that improve productivity and efficiency levels.
Says Mark Bonham who, along with brother Paul, is a director of the company: “We operate in demanding and competitive sectors where quality, lead-time fulfilment and cost competitiveness are the panacea. If you are weak in any of these areas, you’ll be found out quickly and won’t last long.”
SRD Engineering was established in 1989 by Steve Bonham (Mark and Paul’s father) and two business partners. Over the last 32 years the company has changed dramatically and grown exponentially. SRD has expanded its operations considerably and relocated twice. The company now employs 85 members of staff and has, just shy, of 40 CNC machine tools at its disposal.
A constant and recurring theme throughout the company’s history is its commitment to continuous improvement and the regular and strategic investments it has made in its people, plant and equipment, as well as its processes and systems.

“To ensure that you are meeting, and hopefully exceeding, customer expectations you need to monitor and benchmark your business performance and address any weaknesses or concerns before they can impact on your ability to meet quality, lead-time and cost-down requirements,” says Bonham. “We have systems in place to ensure that this is a priority and our latest continuous improvement programme, Project 24, is a company-wide initiative that focuses on restructuring, redeployment, training and investment. It has provided the catalyst and rationale for the recent Doosan machine tool investments.”
Project 24 helped identify a ‘weakness’ in SRD Engineering’s milling section – specifically with three older vertical machining centres which, owing to their age and through constant use, were becoming more unreliable, required consistent and costly maintenance intervention and, if left unchecked, would create production bottlenecks.
To avoid production pinch points, the company decided to replace the three older machines with more advanced machine tools and approached the market to identify suitable replacements.
Says Bonham: “We are always looking to increase our machining capabilities and not just our capacity. Multi-tasking and multi-axis machine tools help increase our productivity and operational efficiencies. Being able to machine components in one hit and reduce part cycle times enables us to better meet customer deadlines. Furthermore, reducing the number of job set ups and avoiding the need to transfer jobs from one machine to another ensures that part accuracy and repeatability are not compromised.
“We approached Mills CNC with our requirements,” he continues. “We had previously invested in Doosan DNM machining centres with 4th-axis units some years earlier and, owing to the machines’ reliability and performance, decided to replace two of our older milling machines with two new DNM 4500 machining centres.”
The two DNM 4500 machines supplied to SRD Engineering are equipped with the latest Fanuc 0iMP control, 12,000 rpm directly coupled spindles, integrated thermal compensation, LM roller guideways, 30-station quick-change ATCs and Filtermist extraction systems. To increase the productivity of the machines, both were supplied with Nikken CNC202 rotary tables.
SRD Engineering is no stranger to five-axis machining and has a dedicated five-axis milling section.

Explains Bonham: “In discussing our future milling requirements and production strategies with Mills CNC’s sales and application engineers, we decided that the third machine would be a high-performance, simultaneous five-axis machining centre capable of processing a range of parts.”
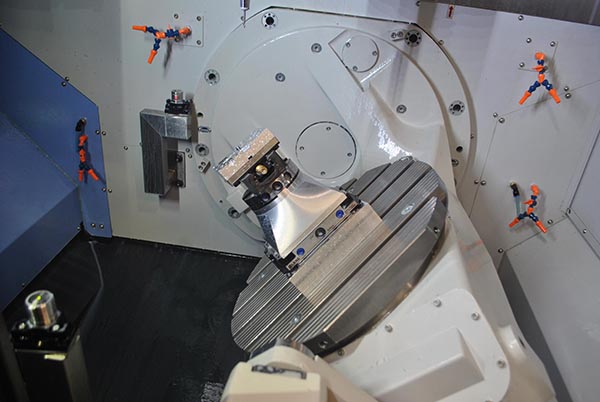
The machine identified was the Doosan DVF 5000 – a compact machining centre equipped with a 12,000 rpm direct-drive spindle, 60-station ATC, linear guides, an efficient swarf conveyor system, Filtermist extraction and the Fanuc 31iB5 control.
“We negotiated a great deal with Mills and part-exchanged our three older machines for the three new ones,” says Bonham.
Key strengths and market differentiators that help separate SRD Engineering from other precision subcontractors are its commitment and ability to go the extra mile for customers, as well as its focus on growth and improvement. In recent years the application of both have seen the company invest in sliding-head lathe technology, enabling it to machine high-precision, complex components in large volumes.
From a standing start, the company now has four sliding-head lathes at its disposal. Indeed, SRD has brought many machining processes in house. To ensure quality, cost competitiveness and lead time fulfilment, the company has lessened its reliance on outside subcontractors – preferring to bring several secondary services and specialisms in-house.
SRD has also made significant improvements to its inspection and measurement capabilities. The recently implemented Project 24 initiative identified the need to further upgrade its capabilities by investing in another CMM and making its inspection room fully air conditioned.
Notably, the company stocks heat-treated materials at its facility just in case a specific Formula One customer needs components immediately.
Concludes Bonham: “Although SRD Engineering is a very different company to the one that was established 32 years ago – not everything has changed. We still operate on the same quality, lead-time fulfilment and cost-down principles that we did when first established, and our commitment to continuous improvement, as evidenced by our recent investment in three new Doosan machining centres, remains a priority.”
For further information www.millscnc.co.uk


