GF Machining Solutions has supplied a precision subcontractor – Thomas Brown Engineering Ltd – with a new five-axis machining centre.

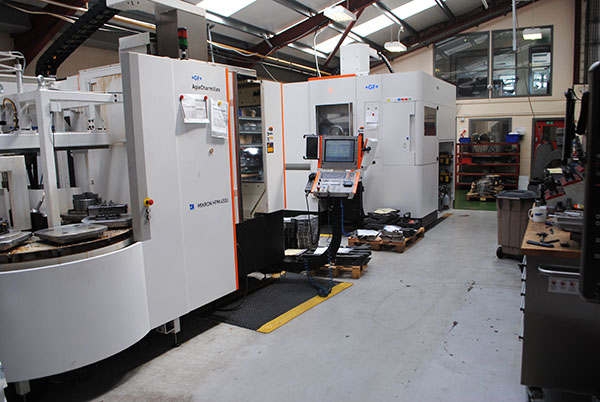
The Mikron MILL P 500U was installed at the company’s 20,000 sq ft facility in Huddersfield earlier this year and is being used to machine precision components for customers operating in the aerospace, medical, automotive, robotics, food processing, oil and gas, and steel manufacturing sectors.
Components machined by Thomas Brown Engineering on the MILL P 500U are diverse and varied. Typical materials processed include aluminium, steel, stainless steel and Inconel, while batch sizes are mainly in the low-to-medium range.
The parts machined on the Mikron are characterised by their accuracy and surface finishes, with a 20 µm geometric tolerance and a Ra 0.2 µm surface finish requirement being the rule rather than the exception.
Says Tom Brown, managing director: “The sectors where we operate are competitive and demanding. Quality is non-negotiable, and ever-stringent delivery times are increasingly prevalent. To meet customer demands and survive in these environments you need to be committed to continuous improvement and continually raise your game. By investing in the latest and most advanced machine-tool technologies, and by combining our manufacturing prowess with excellent customer service, we’ve found that we have been able to grow our business.”

Thomas Brown Engineering was established in 1983. Over the past 35 years the company has grown steadily from a one-man band to a business that now employs 20 members of staff. Other changes in the company have been even more noticeable – and dramatic.
Says Brown: “When the company was created, it operated out of a couple of old garage units. As a fledgling engineering subcontractor we were, at that time, relying on a couple of used manual machines to produce parts and make a living.”
In stark contrast to these early days, the company today has 14 CNC machine tools at its disposal, and by the end of the year is looking to increase its floor space by an extra 4,000 sq ft.
The company’s customer profile and client base has also changed significantly, as Brown explains: “We’re a tier-two supplier in the sectors where we operate. The investment we’ve made in plant, people, technologies, systems and processes has enabled us to consolidate our position in these industries with existing customers, and win contracts with new customers too.”
This result is exemplified by the company’s position in aerospace sector, where its AS9100 accreditation has been instrumental in achieving a number of new contract wins. Such an increase in demand for the company’s engineering services did, however, create some production issues, resulting ultimately in the decision to invest in the new Mikron MILL P 500U.
“We audited and reviewed our machining strengths and weaknesses, and identified where the ‘pinch’ points existed,” states Brown. “This exercise helped determine that we needed to increase our five-axis milling capacity and capabilities as a matter of some urgency.

“We had invested in a Mikron HPM 450U five-axis machining centre some years earlier and the machine had served us well,” he continues. “We particularly liked the machine’s built-in automation and the way in which its integrated automatic pallet changers helped us increase our productivity and efficiency, and reduce our operational costs.”
Thomas Brown Engineering drew up a list of technical and performance requirements for the new machine and benchmarked these against the five-axis machines in GF Machining Solutions’ portfolio. It became clear that the MILL P 500U was the preferred choice.
The Mikron MILL P 500U is described as a high-performance, simultaneous five-axis machining centre that offers powerful and dynamic material removal capabilities, thermal stability and high stiffness, to deliver precision and high surface finish on complex parts. A thermo-stable and symmetrical design is featured so that even when machining at a fast pace and over long production runs, accuracy and process reliability remain high and consistent.
GF Machining Solutions says that the machine delivers fast acceleration (1.7g) and is equipped with a high-torque, 36 kW Step-Tec motor spindle that is highly reliable. The machine’s productivity is enhanced by its (in-built) automation which comprises up to a 215-position ATC and up to a 12-pallet APC.
Thomas Brown Engineering also wanted the machine to be able to perform interpolation turning operations. Interpolation turning is a machining technique developed for advanced machining centres and B-axis multi-task machines. The strategy enables a turning operation to be performed by interpolating the X- and Y-axis in a circular direction, and rotating the machine spindle in time with the rotational contour. Circular movement can either increase or decrease in diameter to perform facing operations, or be combined with the Z axis to produce a bore or outer diameter.
Concludes Brown: “The MILL P 500U is a great machine. It is accurate, fast and flexible. We mainly use the machine for 3+2 positional machining operations as opposed to full simultaneous five-axis machining, and its performance to date, no matter what we’ve asked it to do, has been exceptional.”

For further information www.gfms.com


