Headline Filters in Aylesford, Kent has taken a big step towards streamlining the manufacture of its components by adopting twin-spindle turning and five-axis machining to reduce set-ups and take advantage of lights-out operations.

New process routes for around half of the factory’s production of bonded microfibre filter housings involve four new CNC machines installed between September 2018 and July 2019: three turning centres with Y axes from Biglia, Italy, and a German-built Spinner machining centre with trunnion-mounted rotary table. All of the machines were supplied by UK agent Whitehouse Machine Tools.
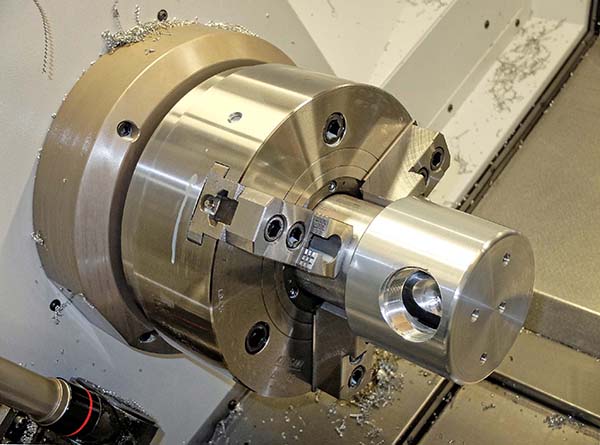
A backlog in multi-operation turning and milling of a particular filter part, a complex stainless steel head designated ‘112’, prompted the manufacturer to look for a more productive solution. The obvious choice was a lathe with powerful driven tooling and twin-opposed spindles to enable in-cycle machining of the reverse end of the component.
Space is limited on the shop floor in Aylesford and the machine initially considered was too large to be conveniently installed. Whitehouse demonstrated how the more compact Biglia B565-YS lathe, which was also half the price, could do the job – provided it was fitted with double, triple and quad tool holders in its 12-station turret so that the requisite number of tools could be deployed.
Programs were written and time studies carried out at Whitehouse on this part, as well as two other components, and the feasibility of all processes was confirmed. The first Biglia B565-YS was installed in September last year and ran for several months to clear the ‘112’ component production backlog.

Rob Hibberd, director of Headline Filters says: “As soon as we saw the lathe producing the stainless steel components in one hit, we knew it was the way forward and quickly ordered a second identical model, which arrived at the end of last year. The previous production method involved turning on two separate single-spindle lathes and three set-ups on a three-axis vertical machining centre, so five ops in all. Total cycle time was 17 minutes, including three minutes for repositioning the part on the VMC.
“The new cycle time of 16 minutes on the Biglia is not much different, as its driven tooling cannot compete with the milling power of a machining centre,” he continues. “However, the big advantage now is that there is no inter-machine handling or work-in-progress, and production is minimally attended, so the operator can look after several machines. Even more importantly, we can take advantage of unmanned ghost shifts for extra production output. We gain up to eight hours overnight when machining aluminium and brass parts, and a couple of hours when running stainless steel before the tips become blunt and the lathes shut down automatically.”
He adds that a further advantage of single-hit production is the ability to better hold tolerance, as no cumulative errors are introduced by repeated re-clamping. Run-out is improved and ±0.05 mm tolerance is easily held on O-ring seal faces. Surface finish is also enhanced due to the stability of the Biglia lathes and the ability to run modern tooling at the recommended feeds and speeds, so less subsequent polishing is needed. It is also notable that tool life is prolonged on these lathes due to their rigidity.
In another before-and-after example, an aluminium ‘360’ filter head previously needed turning on a lathe and prismatic metal cutting on a machining centre, taking 12 minutes (including handling between the two machines). The part is now produced in one hit in an 11-minute cycle on a B656-YS bar auto. Again, the main benefits are a reduction in work-in-progress, better accuracy and the ability to automate production.
Whitehouse facilitated unattended running by fitting to each lathe a Hydrafeed MSV80 bar magazine for feeding 1 m stock through the spindle and providing a Rota-Rack rotary parts accumulator to collect finished components delivered via a parts catcher and conveyor. The B565-YS lathes were supplied with a bigger spindle bore than usual, 75 mm rather than 65 mm, to enable the production of Headline Filters’ larger parts in high volumes.

Above this diameter batch sizes are lower, but recently the manufacturer’s US distributor started to request bigger products in higher quantities, which put pressure on the company’s single large-capacity turning machine. Positive experience with the first two Biglias again pointed Hibberd in the direction of Whitehouse, which in April 2019 supplied the largest capacity version of a twin-spindle Biglia 750-YS with Y axis and C axis.
The Biglia 750-YS is capable of turning components up to 552 mm diameter by 765 mm long, far larger than needed. More pertinently for Headline Filters, it is possible to use a bar puller in the turret or, alternatively, the counter spindle to feed stock up to 100 mm diameter through the bore of the main spindle into the working area to simulate the advantages of having a bar feeder. A 38 kW main motor, 17.5 kW driven tools in the 16-station turret, rotational speeds up to 10,000 rpm, plus the availability of high-pressure coolant, promote productive machining.
An early example of time advantage using this machine involved the production of a ‘380’ aluminium filter head in one operation in a cycle time of 15 minutes 50 seconds. Previously, using the other large lathe, which is of single-spindle design without driven tools, the part had to undergo two operations and then be transferred to a machining centre for milling and drilling. The three operations took 21 minutes 15 seconds, plus handling between machines.
As 15,000 of these parts are needed annually, the production cost saving is considerable. Work-in-progress is eliminated, avoiding the need to have batches of typically 400 part-finished components in storage. Moreover, as Hibberd points out, each part can be assembled into a filter for delivery and invoicing straight away, not days or weeks after machining operations have been completed.
A previous difficulty in the factory was that six lathes with limited or no live tooling were feeding components to a pair of overloaded, entry-level VMCs with 7000 rpm spindles for milling and drilling. That problem was alleviated by the arrival of the three Biglia lathes with their driven cutters, so the machining centres were able to cope. However, with an eye to the future, Headline Filters decided to invest in its first five-axis machining centre to boost prismatic metal-cutting capability.
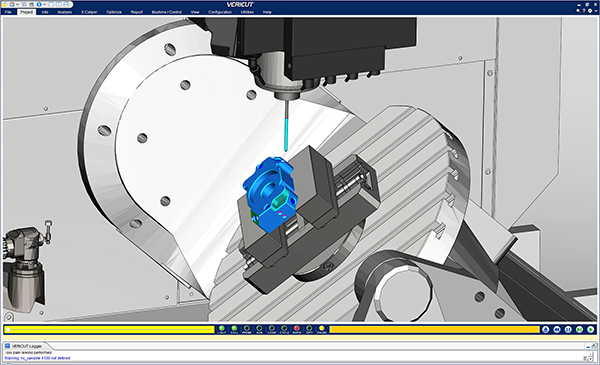
The Spinner U5-630 five-axis VMC supplied by Whitehouse in July this year with 12,000 rpm BT40 spindle, provides more productive machining as higher rotational speeds increase metal removal rates and enable the use of more capable, contemporary tooling. A large magazine for 32 cutters, high-pressure coolant and Blum probing for setting tools and workpiece datums, form part of the production package. The extra power and rigidity will help when producing filter parts from tough materials, not only stainless steel, but nickel and titanium alloys.

Jason Rose, engineering and workshop manager, says: “We use the Spinner mainly in 3+2 axis mode for automatic workpiece positioning to reduce the number of manual set-ups. Nevertheless, we have a certain amount of contour milling to do and, when I design new products in future, I’ll have greater flexibility to incorporate features that would be uneconomic or impossible to complete on a three-axis, or even a four-axis VMC.”
He also advises that the U5-630 is significantly faster at cutting metal than the other machining centres on site. In one example, a 12-minute cycle was reduced to seven, and in another, 45 minutes was reduced to 20. There is potential to improve on these times further as Headline Filters’ operators become more familiar with the new cutters they can now use, as well as the Siemens control system, which is the first on site.
For further information www.wmtcnc.com


