Subcontractor takes ‘Xtreme’ measures

Poole-based subcontractor Alpha Precision Engineering has recently installed two Aberlink Xtreme CNC CMMs.
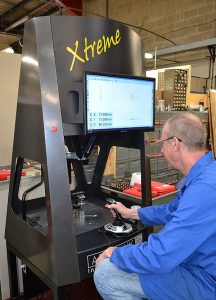
“Our first manual Aberlink CMM has proved to be easy to use, very accurate and ultra-reliable. Therefore, as the launch of Aberlink’s Xtreme CMMs coincided with a sharp upturn in our business, we placed an order for two of the new machines,” says quality manager Rob Allen. “As Aberlink’s Xtreme CMMs feature temperature compensation and are designed to operate both in inspection departments and on the shop floor, we have installed both of the new Xtreme CMMs in our production facility.
“Our new shop-floor Xtreme CMMs are now in regular use by our production personnel for in-process inspection checks and verifying first-off parts,” he continues. “Rather than lose time taking machined parts to our inspection department, fast and accurate CMM inspection results can now be achieved close to the point of manufacture. This quick feedback enables adjustments to be made when component sizes deviate from nominal conditions.
“Our quality staff also use our new Aberlink CMMs for final inspection routines and for other applications. The CNC nature of the new Xtreme CMMs enables them to be loaded with batches of machined components; the relevant program is then selected and, following the press of a button, a rapid, fully automated CNC measuring routine is started. In addition to storing the captured data related to individual measured features of each component in the batch, when required, we are able to generate detailed inspection reports for each part.”
For further information www.aberlink.com

Update for quality data software

A new release of HxGN Smart Quality online quality data and measurement resource management software, an enterprise IT solution designed to help manufacturers utilise aggregated quality data to gain actionable intelligence and insight for process optimisation, has been announced by Hexagon Manufacturing Intelligence.

Providing a single platform for managing product quality and measurement resources, HxGN Smart Quality homogenises data from disparate systems across multiple locations to offer a company-wide view of quality.
The latest release features OEE-like functionality for all machines connected to HxGN Smart Quality so that manufacturers can assess and compare OEE using a standard metric. Offering insight into both availability and performance, the software supports root-cause analysis for investigating anomalies on an individual piece of equipment in line with TPM principles.
Improvements to the software’s document and work-flow management tool set enable manufacturers to build robust processes for measurement and minimise the risk of common operational errors. The user interface has also been enhanced with an individually configurable dashboard, while user-friendly functionality such as the ability to display part-mounting instructions within Hexagon’s Inspect software, helps to simplify shop-floor operations.
HxGN Smart Quality’s statistical process control capabilities are boosted with the addition of Q-DAS monitoring, which enables near real-time visualisation of measurement and process data. The software’s connectivity credentials are enhanced by the ability to interface with Heidenhain CNC controllers, offering new potential for data exchange with production equipment.
For further information www.hexagonmi.com

Measurement software boosts quality control

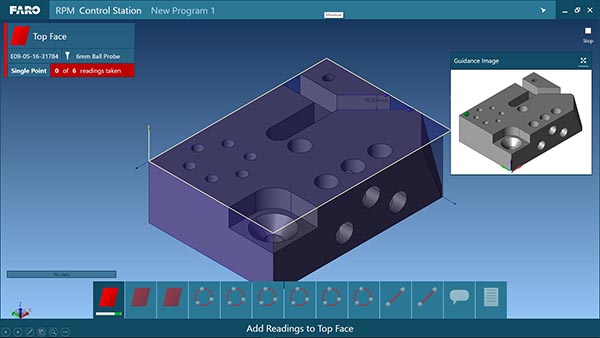
Faro Technologies has released its CAM2 2018 software platform for the company’s portable co-ordinate measuring machine products. Along with new reporting dashboards, the software offers improved quality control through Repeat Part Management (RPM) smart tool functionality.

RPM enables a specific inspection process to be created once and then repeated and executed by anyone on the factory floor. Accordingly, this ensures resource-efficient quality control of inspection routines without the need for highly skilled metrology professionals to drive and manage the process.
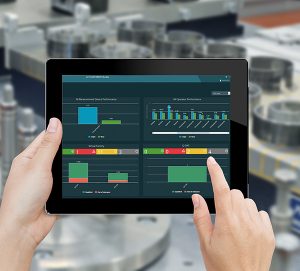
CAM2 2018 also features integrated web-based dashboard reporting that delivers real-time inspection results and insightful trend analysis in a user-friendly set of adaptable visual reports. As a result, RPM control
centre information can be shared across the organisation in real time, accelerating the ability to take immediate corrective action as required.
“As a full service, high accuracy, portable co-ordinate measuring solution provider, we can provide great value for our customers,” states Pete Edmonds, vice president of factory metrology. “Subsequently, we are focusing our platform development to ensure that our software enables customers to realise the full operational potential of their Faro hardware, ranging from small to large volume measurement. CAM2 2018 is a further evolution of our strategic direction to deliver the tight alignment of our hardware and software portfolios.”
For further information www.faro.com

No stone unturned in pursuit of excellence

As part of its quest for continued growth, excellence and product diversification, CMS Cepcor of Coalville has recently invested in the latest Creaform HandyScan3D from Measurement Solutions.

CMS Cepcor says it is Europe’s largest aftermarket manufacturer and supplier of stone crusher, screen and asphalt plant spare parts. The company provides its products and services globally to the mining, quarrying, demolition and recycling industries, exporting to over 100 countries.
To maintain its market status, operations director Chris Sydenham is constantly looking at new technologies and capabilities to drive efficiencies, customer satisfaction and product diversification.
This has been exemplified in recent years with around £7m invested in CNC, milling, turning, boring, slotting, grinding, drilling, welding, co-ordinate measuring and materials testing.
CMS Cepcor has made significant investments in three portable measuring and scanning arms during the last decade. However, the portability, and scanning capability in particular, resulted in the need to assess complementary technologies capable of increasing measurement efficiency
and usability.
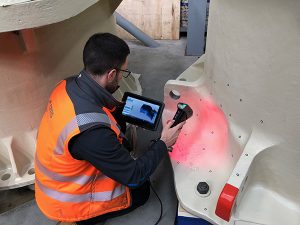
“The Measurement Solutions team were able to visit our facility and demonstrate a device which is truly portable,” says Sydenham. “Although we design and manufacture in the UK, having the ability to take the HandyScan3D overseas is a major advantage, as the whole system is transported in a carrying case no larger than aircraft hand luggage. This gives us a whole new capability of scanning on-site, with the ability to send data back to the UK and begin the reverse engineering or inspection processes before our engineer has even boarded the plane home.”
Due to the scale of the components, the large field of view and scanning speeds generated by the HandyScan3D’s 14 laser lines far surpassed any other system considered, says the company.
For further information www.measurement-solutions.co.uk

Injection mould OEM enters UK market

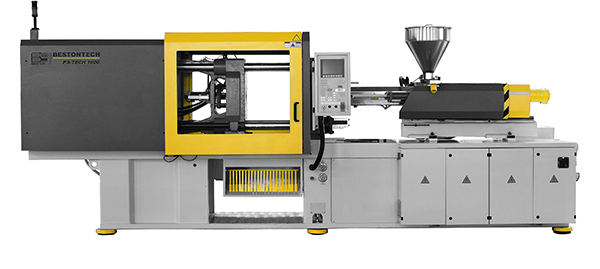
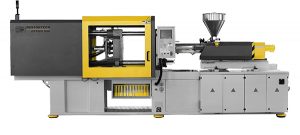
IMM Projects has introduced Beston injection moulding machines into the UK market for the first time.

There are 13 models in the European SYS series, with clamping forces ranging from 600 to 13,500 kN, minimum mould heights from 120 to 1,350 mm, and k1000 or 2000 KEBA interfaces. The clamping system’s ‘V’ design decreases distortion of the mould platen and increases mould life by up to 30%, says the company. In addition, Beston’s linear guide rail has a more effective nozzle seal when compared with a guide post design, meaning it is safe under high pressure.
For further information www.immprojectsuk.com/products