Robots boost profitability

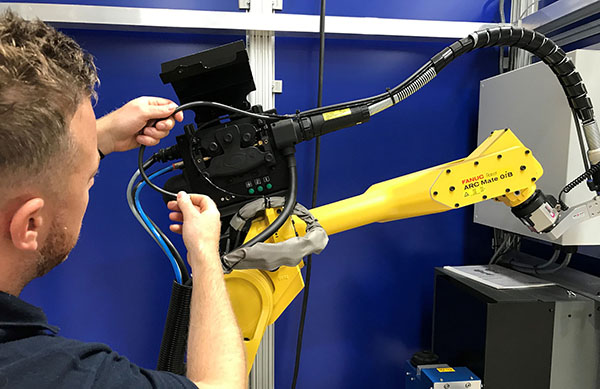
A specialist in multi-axis machining is leveraging the benefits of Universal Robots supplied by RARUK Automation to load and unload its machine tools.

A mix of seven UR5 and UR10 robots have helped Rousant Sherwood maximise the productivity of its workforce by automating repetitive tasks and bidding for contracts which would have otherwise been unprofitable. One of the UR10 robots is currently serving a Nakamura-Tome Super NTJX multi-tasking turn-mill centre. The robot loads square billets of aluminium into the machine, where they are turned into aerospace components as part of a 40-minute cycle. The machine and robot are running 24 hours a day, seven days a week.
“Just to be clear, we have not invested in robots to save on headcount, we’ve done it to win contracts,” says general manager Robin Salter. “We would never have been able to tender for jobs like this without automation. Using a robot makes us profitable on work where we wouldn’t normally be able to compete.”
For further information www.rarukautomation.co.uk

Energy-saving drive at Shield Group

A tier-one supplier of castings and machined components has tapped into specialist support to manage its energy costs.

Shield Group, which operates from six different manufacturing divisions across Coventry, Leicestershire, Northampton and Oldham, has just hit £80m for the first time in its 69-year history. However, faced with major increases in production, Shield needed to better manage energy consumption. The company turned to Control Energy Costs (CEC), which successfully reduced the amount of energy used by 15%. Furthermore, a recent exercise completed by CEC was to reduce Shield Group’s Green Tax liability, resulting in six-figure savings per annum.
For further information www.cec.uk.com

Dedicated metrology department at JCB Academy

Almost 10 years ago, JCB CEO Lord Anthony Bamford had a vision for educating the next generation of engineers.

This inspirational spark led to the internationally recognised yellow goods manufacturer establishing the JCB Academy in 2010. To ensure education is vocationally suitable for future generations of engineers, the JCB Academy is supported by metrology expert Mitutoyo.
At the centre of the metrology department at the JCB Academy is a Crysta-Plus M443 CMM that is connected to a 60” wall mounted monitor. The manual Crysta-Plus CMM with temperature compensation offers the facility everything from simple dimensional to complex form measurement on a small footprint 400 x 400 mm table. Utilising the latest MCOSMOS CMM software, learners can evaluate the dimensional precision of components and test pieces. By connecting the CMM to a large monitor, teaching staff can conduct practical demonstrations to learners in a classroom environment.
The vision of Lord Bamford is certainly starting to pay dividends for the future of UK manufacturing and, in particular, the future of JCB.
“As a company, JCB has thousands of employees and there is natural staff wastage of approximately 350 people every year through retirement and other factors,” says Graham Rowley, team leader for technical delivery. “The academy is now generating future recruits, while giving prospective employees a strong grounding in engineering.”
With regard to the service, support and expectations placed upon Mitutoyo, Rowley concludes: “We’ve never had an issue with Mitutoyo; the support is excellent. In terms of how quickly they respond to either an email or a call, there is always somebody on hand with the correct technical information. Furthermore, if we ever need on-site technical assistance, there is always someone available to come to our facility, usually with same-day call-out support.”
For further information www.mitutoyo.co.uk

Next generation of digital microscopes

Vision Engineering unveiled the next generation of its Evo Cam digital microscope at the MACH exhibition in Birmingham last month. Suited to close inspection and the recording of high-resolution images, the latest Evo Cam II benefits from the addition of user-customisable overlays, on-board measurement and Wi-Fi image transfer – all supported by a 30:1 optical zoom and a maximum magnification in excess of 3600x.

Evo Cam II replaces the original Evo Cam, which is already used for the inspection of automotive and aerospace components, medical devices, precision engineering, plastic mouldings and more. High-definition images can be captured and stored directly to a USB memory stick. When connected to a PC, images and video can be easily captured, stored and shared. A Wi-Fi dongle even allows direct sharing with PCs, laptops, tablet computers and smartphones.
Simple on-screen measurement can be performed with the aid of virtual callipers and scalable grids, while live images can also be compared to user customisable overlays, increasing efficiency of use.
A completely new graphical user interface and intuitive controls with 10 presets, allow for rapid swapping out of subjects under inspection, making Evo Cam II suitable for multiple users in high-speed production environments. A remote control option is available to maximise the ergonomic operation of the microscope when used over prolonged periods.
Evo Cam II features an LED ring light and sub-stage lighting for viewing translucent samples. High-contrast subjects, such as reflective metals used in automotive manufacturing, can be viewed in more detail using Evo Cam II’s Wide Dynamic Range (WDR) mode.
For further information www.visioneng.com

Aberlink provides shop-floor accuracy

Pinxton-based Nasmyth Bulwell, which specialises in the manufacture of precision parts, kits, airframe assemblies and sub-assemblies for the global aerospace and allied industries, has installed an Xtreme CNC CMM from Aberlink.

“Having evaluated several shop-floor CMMs against our list of requirements, a demonstration of Aberlink’s Xtreme CNC CMM, together with Aberlink’s market reputation, convinced me that the Xtreme was the ideal machine for our needs,” says quality manager Jonathan Walsh. “The accuracy, CNC nature and speed of our new Aberlink CMM means that it is able to perform comprehensive inspection routines on manufactured components within the cycle time of the machine tool it is located next to. Now, rather than our skilled machine operators taking a first-off part to our busy inspection department and experiencing delays waiting for a CMM to complete its current task, they are able to quickly confirm component dimensions before commencing full production.
“In the cell, as a machined part is now fully inspected before the next component is produced, the speed of feedback achieved through in-cycle measurement allows adjustments to be made quickly when a feature is drifting from its nominal size,” he adds. “Our new inspection method has increased efficiency and further reduced our already low scrap rates.
“In addition to taking the strain off our busy inspection department, the efficiencies we have realised through the use of our new shop-floor CMM mean that we plan to purchase further Aberlink Xtreme models in the future.”
For further information www.aberlink.com