Versatile software extends capabilities of CT

Researchers at the Henry Moseley X-ray Imaging Facility at the University of Manchester are using Nikon Metrology’s programmable Inspect-X software to develop bespoke computed tomography (CT) solutions that integrate third-party analysis software and control external hardware. The 4D (three dimensions plus time) CT laboratory experiments have the potential to open up new avenues in industrial environments.

Parmesh Gajjar is a research associate at the imaging facility who has been discovering the possibilities of the programmable IPC (inter-process communication) interface to Nikon’s X-ray control software and how it can be harnessed to perform temporal (time-related) CT for scientific, non-destructive observation and quantification of processes that change structure over time in 3D. He says: “Nikon Metrology’s programmable CT systems are a gold mine for researchers and manufacturers alike, as it gives users the flexibility to do whatever they choose.”

Andrew Ramsey, a consultant at Nikon Metrology with experience of developing special CT applications in industry adds: “In the aerospace industry for example, when studying accelerated fatigue crack propagation in fan blades, time-lapse CT can be used to replicate years of work in a fraction of the time.”

The fully programmable IPC software interface allows users to write their own code and implement individual functions in Inspect-X. These functions range from simple tasks such as turning the X-rays on and off, to high-level actions like initiating a CT scan with previously stored acquisition parameters, automatically reconstructing a CT volume using stored settings, and running an automatic analysis using stored macros while providing progress feedback throughout – all without further human intervention. The IPC program can create simplified user interfaces for previously cumbersome tasks and acquire data for the non-destructive examination of a 3D sample.
For further information www.nikon-metrology.com

Casting specialist opts for HandyScan 700

To meet the demands of approximately 300 new product introductions, including niche volume and motorsport supply annually, Grainger & Worrall recently purchased a Creaform HandyScan 700 from Measurement Solutions. Although already equipped with traditional gantry CMMs, CT systems and white light scanners, the increasing complexity and persistence to push the limits of possibility has driven a need for both greater capacity and capability. The requirement to spend time preparing the surfaces of castings with powder spray, which has always been difficult with projected light scanners, steered the company towards purchasing the Creaform HandyScan 700.

Project engineer David Lang, who was integral to the decision-making process, says: “The HandyScan ticks many boxes. Not requiring powder spray is an obvious benefit in terms of time savings, both before and after scanning. We were spending several thousand pounds annually on spray, which is an inefficient and unnecessary cost. In addition, associated costs were being incurred by having to clean the castings after scanning.”

The HandyScan 700 utilises 14 red laser lines, which in combination offer a large field of view and the capability to capture data quickly.

“As we assessed the product further, additional benefits came to the fore,” says Lang. “The ability to scan with a handheld portable solution was significant, while the fact that the HandyScan and all accessories fit into a small carry case means it is quick and simple to take to the shop floor and start inspecting.”
For further information https://measurement-solutions.co.uk/

Winds of change at Ate Aerotech

The latest metrology innovations are proving popular at Sussex-based Ate Aerotech, which specialises in aerodynamic test equipment, typically for wind tunnels used in the motorsport and aviation industries.

Before a wind tunnel test is undertaken, it is vital to calibrate the positional accuracy of the system’s various movable elements, which enables the company’s control algorithms to achieve the required intricate and precise profiles. Faced with the need to perform 3D metrology procedures in such a large-scale environment, Ate Aerotech recently searched for a precise, non-contact co-ordinate measuring system that could provide high levels of calibration accuracy, along with ease and speed of use. Having considered several options, Ate purchased a VantageS laser tracker from Faro, which was to be incorporated into one of its systems for a Chinese client.

The laser tracker soon proved its ability to provide the required challenging levels of accuracy over long distances. Ate Aerotech staff perform wind tunnel calibration tasks by plotting the position of each of the system’s moving parts at their start positions. Then, when each element is traversed throughout a predetermined grid pattern, a series of further readings is taken. The precision of the captured data allows micro adjustments to be made so that the maximum accuracy potential of each Ate Aerotech system can be realised.

Many other uses have been found for the laser tracker, so much so that the company has since invested in a further unit for its own use.
For further information www.faro.com

Walter reports strong UK Helicheck sales

Walter Ewag UK reports another successful year of order intake during 2018, with particular mention for sales of the company’sHelicheck tool measuring machines.According to sales director Neil Whittingham, “while last year’s order book was especially focused on tool grinding and erosion, this year we’ve also seen a shift towards investment in tool measurement from across the Helicheck range, including the top-of-the-range Helicheck 3D”.

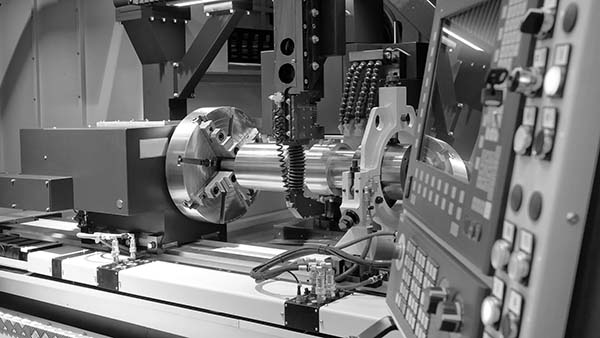
With X-, Y- and Z-axis capacities of 270 x 455 x 325 mm, plus an A axis of 360°, the Helicheck 3D utilises a novel method of laser digitising so that items canbe scanned quickly and easily. This capability creates3D model data that can be saved, processed, analysed and measured.

The machine’s 3D Tool Analyser software – specifically developed for the application – can lay horizontal, vertical and freely selectable cutting planes at any position on the 3D model. These planes are automatically analysed and the resulting parameters made available for use.The capability to measure all important tool features is said to be quick and simple with Helicheck 3D, and since measurements are carried out on virtual models, the process can be performed offline.

A software 3D ‘matcher’ enables users to create a colour-coded comparison of two 3D models within the machine’s graphical user interface. After the ‘match’ of both models, the operator instantly receives an evaluation of product quality and any deviations from desired values.

Whittingham adds: “Of course, not all machines ordered in a certain year are delivered during that year, which means we have a healthy outlook as we enter 2019.”
For further information www.walter-machines.com

Gewefa at Hurco open house

Gewefa UK will be exhibiting at the forthcoming Hurco open house and this year will be highlighting – among other products – its expertise as a supplier of face and taper tool-holding products. The Hurco open house takes place on 4-5 December at the company’s UK headquarters in High Wycombe. With its long-standing relationship with Hurco in the UK, Gewefa is the primary supplier of tooling packages supplied on new Hurco machines. Gewefa supports users of these machines with a range of tool holders, covering BT and DIN formats in SK30, 40 and 50 tapers, to offer capability for heavy-duty and very high-speed machining applications.
For further information www.gewefa.co.uk