PORTABLE CMM ARM WITH 2 M REACH HALVES INSPECTION TIME FOR LARGE COMPONENTS

Founded in 2011, toolmaking and subcontract machining company GT Tooling spent one year using conventional manual metrology equipment to measure the components it was milling and turning before investing in a 3D articulating arm, a six-axis model with a reach of 1.2 m. Three years later when the company moved from Petersfield to a bigger factory unit in Fareham, the company invested in a machining centre with 1651 x 762 x 762 mm travels, which meant that larger prismatic parts required inspection in two operations.

Although satisfactory, the procedure was time-consuming and risked the introduction of errors due to the necessity for arm relocation. So in May 2022, a Freedom Classis Scan portable arm with a reach of 2 marrived from LK Metrology. GT Tooling gained its introduction to this UK CMM from nearby Mech Metrology & Power Tools, which calibrates the toolmaker’s inspection equipment and supplies it with conventional metrology tools such as verniers and micrometers.

Greg Simmonds, joint owner and director of GT Tooling, says: “We considered manuallyoperated and CNC CMMs. However, the repeatability of measurement on the former was not good enough while the latter did not offer sufficient flexibility of use. Neither had the reporting capability that was up to our standards or those of our customers. We also felt that programmable CMMs were better suited to series production, whereas we machine mainly one-offs and small batches.”

He continues: “We therefore decided to stay with portable arm technology, but instead of returning to the incumbent supplier we chose LK. We were keen to take advantage of their renowned aftersales service and we also like the PolyWorks Inspector reporting software supplied as standard with LK Freedom arms, which is particularly easy to use. Simply by pulling out the required dimensions and pressing a button, it is possible to manipulate reports freely into different, easily-digestible formats to suit each customer’s preference.”

The precision engineering firm has held ISO9001 quality management certification since the beginning and takes inspection and measurement very seriously, not least because it is heavily involved in supplying Formula One teams during the off-season. During that period, motorsport accounts for a large proportion of factory throughput, mainly the manufacture of patterns, jigs, fixtures and aluminium soft tools for producing composite race car parts. Other industries served include aerospace, automotive, food and beverage, while the company produces rubber and injection moulds from tool steel for a multitude of sectors. Further materials processed at GT Tooling include stainless steel, exotic alloys, copper and its alloys, carbon fibre, and engineering plastics.

Ryan Leaves, who doubles as a sales engineer and an inspector at GT Tooling, says: “Greg and I witnessed a one-hour presentation on the Freedom arm by LK engineers in Castle Donington. It took place online during the pandemic. The demonstration, which included use of the PolyWorks software, took place inspecting one of our parts. It showed how easy the equipment is to use and left me feeling relaxed that, even though I don’t have a formal metrology background, I’d be able to implement the new inspection system quickly.”

A CMM is inherently able to measure tolerances about 10 times smaller than an articulated arm, as positional feedback is from linear scales rather than absolute angle encoders within rotary joints. Nevertheless, the Freedom arm provides accurate results when GT Tooling is measuring dimensions to general drawing tolerances of ±0.1 mm. If there is a need to check tighter features, Leaves uses conventional metrology involving bore and pin gauges, for example.

He confirms that the entire quality control process using the arm, comprising alignment, inspection and reporting, is now faster and more flexible than previously due to the enhanced usability of the LK equipment. Speed is important, as some urgent jobs for Formula One require a 24-hour turnaround. An internal report takes typically 15 to 20 minutes to prepare, while about one hour is required for a full FAIR (first article inspection report). The reason these previously took longer was that the reporting element of the process to GT Tooling’s specification was more time-consuming. Where really significant savings accrue is when inspecting large parts that previously required two arm set-ups. In these cases inspection time is halved, as Leaves was essentially doing the job twice.

The main benefit of the new quality control procedure is that the resulting documentation is now exactly what the customer wants to see, without the inclusion of unnecessary content and consequent need for interpretation. GD&T reporting in particular, previously a laborious exercise, is notably more user-friendly with PolyWorks. GT Tooling uses the arm almost exclusively on a dedicated inspection table for checking components, but occasionally it is mounted on a machining centre table to verify the accuracy of a part before it is taken out of its fixture or prior to further metalcutting.

During pre-purchase discussions, it became clear that laser scanning as an adjunct to touch-probing of discrete points would be of considerable benefit to GT Tooling. It would allow the collection of much more comprehensive data on freeform surfaces in a fraction of the time and hence provide more comprehensive reporting and avoid any risk of missing machining errors. It was for this reason that LK supplied a seven-axis Freedom arm rather than a six-axis model, together with suitably configured software, as the extra degree of freedom is necessary to enable laser scanning when the additional investment can be justified.

A further benefit of laser scanning will be inspection of delicate and deformable components, including rubber parts such as car door seals, without fear of damaging or deforming them in the process. Yet another advantage will be the ability to reverse engineer legacy components, such as for vintage cars, for which no data or drawings exist. It will be possible not only to use this capability on parts machined in-house, with the opportunity to win new customers as a result, but also to sell an inspection service to other manufacturers on a subcontract basis if there is spare capacity.

Simmonds concludes: “Until now, we’ve produced inspection reports on about 40% of our machined components, as not every end user requires one. Now that the process is so much quicker and easier with the LK arm, we’re looking to more than double the number, as it reflects well on the service we provide, gives customers confidence and may result in extra business.

“I’d like to place on record that the PolyWorks software has proven to be even better than we were expecting and the company’s telephone advice is excellent, as is LK’s. This is key for us, as we often have to provide a quick service, especially to Formula One, and we cannot afford to have our inspection function down for long should we have a problem.”
For further information www.millscnc.co.uk

OPG invests in brand new surface grinder

Gateshead-based Omega Plastics Group (OPG) has recently been successful in securing orders of over £2m for a wide range of multi-impression fully hardened production tools. This results in the manufacture of hundreds of core and cavity inserts, together with side cores and other ancillaries for customers.

OPG’s recent business-winning success was instrumental in its investment decision to extend the company’s surface grinding capability, thusimproving efficiencies and catering for multiple insert set-ups and larger X, Y and Z-axis grinding capacities. The machine is also equipped with dust extraction, an 800 x 400 mm magnetic table and a coolant filtration system.

Following a frustrating six-week period of window shopping and searching for a viable solution,the agility of the team from RK International Machine Tools resulted in the delivery of asurface grinder within three weeks from placement of order.

The new PERFECT PFG-D4080AH surface grinder was supplied and delivered to OPG on a short lead time and included the installation of a digital readout prior to shipping.This acquisition will allow the company to reduce its reliance on the laborious task of sub-contracting this type of work. Also through the ability of NC programming and auto down-feed will expand the multi-tasking approach of the company’s skilled workforce, and allow the machine to run unattended.

A survey based on the workflow of current production demands estimated that the time saved by investing in the new surface grinding machine will result in efficiency gains of 3%, resulting in saving over 180 hours compared with the company’s smaller manual machines.
For further information www.rk-int.com

More seeing economics of planned maintenance

Manufacturers of every size are coming to realise the peace of mind that comes with having a planned preventative machine maintenance scheme, says machine tool supplier Starrag UK as it reflects on a recent flurry of new service deals that complement a host of similar contracts which have been in place for some years with a number of existing users.

In addition to an annual machine service and maintenance plan, Starrag’s ServicePlus programme covers every eventuality, assuring service response times, inspection and repair, as well as an uptime guarantee in some cases.Starrag UK has a team of 20 customer-facing service specialists covering the UK and Ireland, including 16 very experienced, highly-trained and skilled ‘mobile’ service engineers who each have an average of 17 to 22 years’ experience of Starrag machine technologies.
For further information www.starrag.com

Twin-spindle blast machine etches tubular parts

Guyson International, a UK manufacturer of industrial finishing equipment, has recently manufactured and installed into a UK manufacturing company an automated Multiblast RSB twin-spindle blast system for the external blast etching of various tubular components. The new system incorporates two rotating blast stations with matching top clamps to hold the product securely, while two vertically traversing blast guns produce a uniform blast etch finish over the length of the parts.

Twin spindles in combination with the top clamp design provide optimal manual process capacity with an operator able to load and unload two components simultaneously. Once the safety-interlocked front door is opened, the operator simply centres the components between two pairs of conical spring-loaded clamps for processing.

A roof-mounted servo drive vertically raises and lowers the twin Guyson Model 900 blast guns, with blasting taking place on the upward vertical traverse, while a compressed air-wash to remove any residual surface dust or blast media activates on the downward stroke. The servo drive facilitates the programming of different speeds for the blast and air-wash phases of the program, delivering greater productivity and shorter cycle times.

The blast system is fitted with a large front opening door allowing easy component loading, while a side door provides further access for maintenance and adjustment purposes. Interior lighting permits a clear view of the blast etching operation.

After blasting, a Guyson CY600/12 cyclone reclamatorextracts the used blast media. This operation separates the reusable blast media from the dust, blast debris and undersized media, reducing the possibility of contamination in the blast media which could reduce the consistency of the surface finish. A Guyson model C800 twin cartridge dust collector completes the system.
For further information www.guyson.co.uk

Tube bending specialist celebrates 50 years

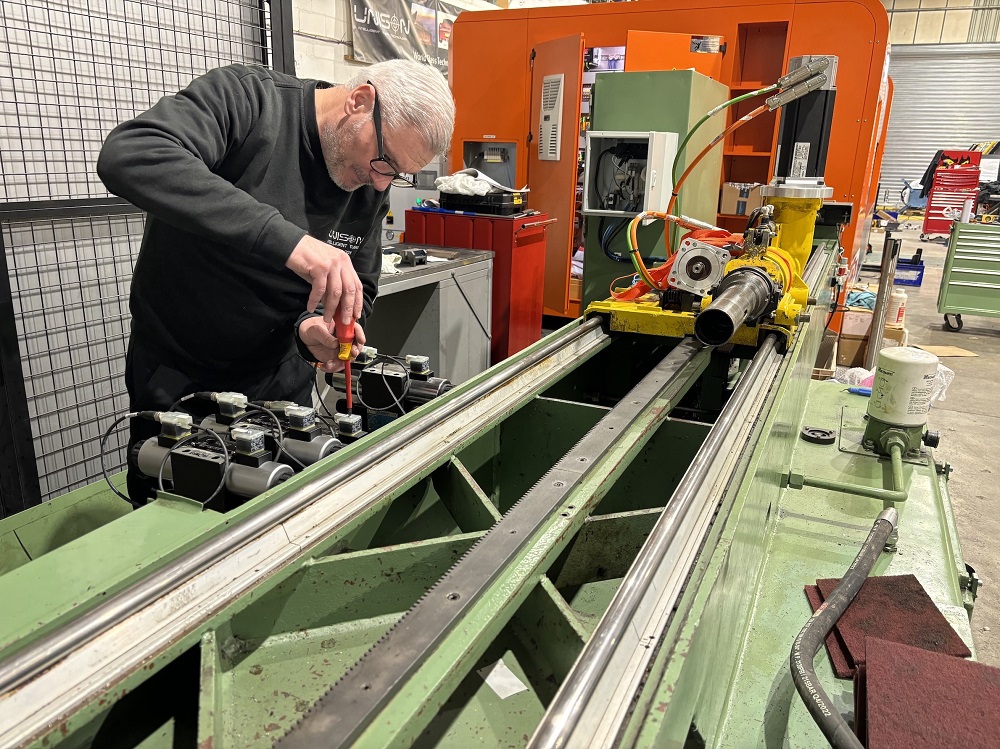
Unison Ltd, the UK-based inventor of all-electric tube manipulation, celebratesits 50th anniversary on 3 April 2023. To mark reaching a half century, the business is planning a special birthday party at its Scarborough headquarters on 24 May, when several of its latest tube bending technologies will be on display, alongside fibre laser cutters from its sister company, Nukon Lasers UK.Customers, colleagues, friends and neighbours of Unison will all receive an invite to the event, as will members of Made in Yorkshire.

“All in all, it’s been an incredible journey,” says managing director Alan Pickering. “One made possible by having fantastic people on our team, and amazing customers around the world who, every day, put their trust in our uncompromising technologies. Moreover, having invented all-electric tube bending, we intend to stay at the top of our game. Here’s to the next 50 years!”