Rotary table raises efficiency of portable arms

The speed with which someone can inspect a component using a portable, multi-axis measuring arm is increased by up to 40% if, instead of the part being static, it is placed on a new Freedomindex table from LK Metrology. The CMM manufacturer says that not only is inspection more efficient, but in some cases it is possible to use a smaller, less expensive arm to access all areas of a component. In other words, the effective measuring volume of any arm is increased.

Rotation may even avoid the need for arm relocation to enable sufficient access to the back of the part, which lengthens the measuring cycle and can introduce inaccuracy. Additionally, there is no operator fatigue from repeatedly having to stretch around the component, which can weigh up to 100 kg.

Requiring no cables, the portable, manually operated, metrology-grade index table is compatible with any make of portable measuring arm, not just LK’s six- and seven-axis Freedom arm range, which comprises 34 models. The 300 mm (optionally 500 mm) diameter table is quick to set up on a work surface, after which the operator secures the part onto the surface with the aid of pre-drilled, threaded fixing holes or integral clamping magnets.

Similarly rapid is initial calibration of the start position by telling the co-ordinate system in InnovMetric’s PolyWorks Inspector software the location of the table. The speed of this procedure is down to clever positioning of randomly placed, alphanumerically labelled, fiducial dimples machined into the top of the table and around its periphery. By probing three or more of them using the arm, the software recognises the irregular pattern and automatically knows the orientation.
For further information www.lkmetrology.com

Quality control takes-off at Hill Helicopters

The recent installation of an AccretechSurfcom NEX240 DX-13 surface and contour measuring machine at the Staffordshire facility of Hill Helicopters illustrates the advantages that aerospace manufacturers gain when they are able to achieve rapid, high-precision inspection results.

Mark Webb, lead production engineer at Hill Helicopters, says: “Our literature describes our new HX50 helicopter as delivering a whole new experience in safety, performance, adventure, comfort and elegance. It isn’t a coincident that ‘safety’ comes first on this list of attributes. To ensure the highest safety standards we oversee a rigorous company-wide quality regime. In addition to employing skilled quality personnel, we invest in the best available inspection equipment.

“After searching for a high-precision, rapid-acting surface and contour measuring instrument, we concluded that the Accretech machine best met our demanding accuracy and efficiency standards,” continues Webb.“During the development and testing of our components,the new Accretech machine will be used by our skilled machinists and our production and quality engineers. Then, when we move into full production, we plan to purchase further Surfcom NEX machines for use on our shopfloor. Given the Surfcom NEX’s ability to provide high-precision surface and contour measuring results within production environments, it will be ideal for inspecting components throughout our production runs and for generating and archiving FAIRs [first article inspection reports].”

As each HX50helicopter has 38 different high-precision bearings, the Surfcom NEX machines will inspect the critical surface and contour specifications.

“The impressive operational speed and ease-of-use of our first Surfcom NEX and that of our planned additional models means that we’ll be able to keep pace with our high-precision surface and contour inspection needs as our production volumes continue to grow,” says Webb.
For further information www.accretech.eu

New director at EngineeringUK

EngineeringUK says Maddie Dinwoodie will join as director of engagement programmes this summer. Dinwoodie joins the organisation from UK Youth, where she is currently chief programme officer. With a background in the not-for-profit sector, she has 20 years’ experience in developing programmes for young people, growing partnerships and improving impact. Says Dinwoodie: “It will be a privilege to work with the team and partners to create the systemic shift that we need to see: inspiring more young people from all backgrounds into engineering and technology, and tackling employment inequalities.”
For further information www.engineeringuk.com

Visual inspection gets AI-powered boost

A UK digital transformation specialist has added an important feature to its augmented reality solution, Vuforia, which will support and simplify visual inspection on shop floors across the country.PTC’s Step Check will provide employees with a step-by-step guide through inspection tasks using context-sensitive work instructions. These instructions superimpose on the physical product during inspection, while artificial intelligence (AI) helps to detect improper assembly, missing or misaligned parts, and other errors.

Thanks to colour-coded graphics displayed in real time on the part or product in question, operatives can see at a glance whether it has passed the inspection step. In addition, Step Check automatically documents inspection results and creates dashboards to analyse the inspections performed.

“Step Check uses advanced computer vision to recognise parts or products requiring inspection using their 3D CAD models; it then utilises an AI model based on examples of passed and failed inspections,” explains JJ Lechleiter, general manager of Vuforia at PTC.“The AI models learn from the decisions made by the employees and, as a result, continuously improve the results. Vuforia’s computer vision capabilities also recognise things not included in 3D CAD models, such as stickers or labels.”

Step Check is part of PTC’s Vuforia Expert Capture SaaS augmented reality (AR) solution, a product for the quick and easy creation of step-by-step AR work instructions. The new feature focuses on one of the most important phases of the manufacturing process: visual inspection in quality control. Traditionally, these inspections are performed by the naked eye and paper-based documentation, putting pressure on employees to make decisions quickly and increasing the risk of errors and rework.
For further informationwww.ptc.com

NAKAMURA CUTS SECONDARY OPERATIONS FOR OAKLEY

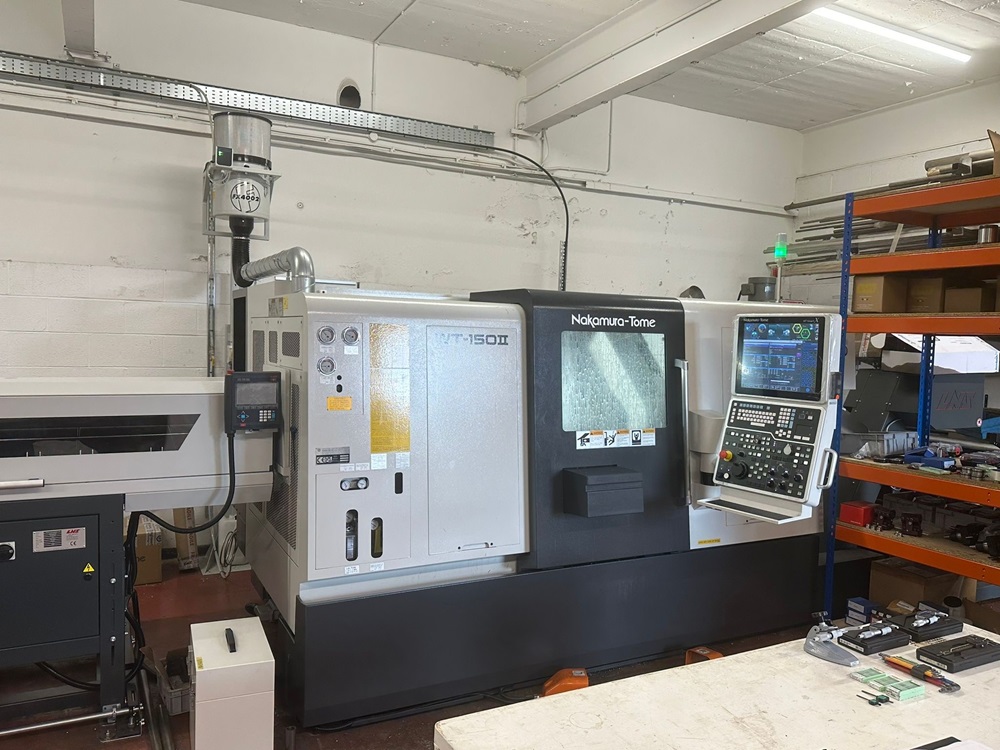
Despite only opening its doors for business in 2002, Oakley CNC Machining has undergone a major transitional shift in its machine tool technology in recent years to support its relentless growth trajectory. Initially starting with Herbert capstan lathes and a selection of two-axis CNC turning centres, the company has rapidly evolved its investment strategy, with the latest acquisition being a Nakamura-Tome WT150IIF twin-spindle twin-turret turning centre from the Engineering Technology Group (ETG).

Already progressing through a transition period, it was the company acquisition by Ian Oakley in 2015 that led to an acceleration in capital equipment investment. Unfortunately, the performance, capabilities and service support from some machine tool vendors fell short. With an order book continually filling and capacity at a premium for the Burton-upon-Trent subcontractor, the company searched the market for a twin-spindle turning centre – and it was the Nakamura-Tome WT150IIF that caught its attention.

Oakley CNC Machining’smanaging director Ian Oakley says: “We’ve taken full advantage of the 130% super-deduction tax allowance and invested in several high-end CNC turning and milling centres. However, not all acquisitions have performed as we would have liked. As we have several new projects that require production volumes of 10,000+, we needed a high-performance turning centre to absorb the volume.The Nakamura was the perfect choice.”

Oakley CNC Machining searched for a twin-spindle, twin-turret turning centre with an intuitive CNC interface that could offer both conversational and G-code programming.

“We wanted a user-friendly machine capable of machining the range of parts we produce, but we got so much more,” reveals Oakley.“One factor that drew us to the Nakamura is the oscillating servo [oscillation cutting] that prevents long strings of swarf and enables us to extend our unmanned running. This was particularly important as we have a family of nylon parts required in production runs up to 10,000-off. Required for the rail industry, the project involves a family of 40mm diameter parts up to 100mm long that we can set up on the Nakamura and leave to run for days without manual intervention. In fact, it was the swarf-breaking technology and the ability to run long unmanned periods that won this contract for our business.”

Before the arrival of this project, the initial prompt to invest in the robust turning centre was in fact a brass electronic component for the construction and earthmoving equipment sector. The company regularly machines the brass electronic part in batches of up to 15,000.

Discussing this component and why the Nakamura WT150IIF was needed, Oakleysays: “This part was being machined on an existing twin-spindle turning centre, lights out, but we were having issues keeping the component in pristine condition with no marks. The existing machine has a traditional parts catcher with swarf deposited in the parts catcher area from machining. The parts, when ejected, land on top of the swarf, which is far from ideal. In contrast, the Nakamura has a robotic arm that unloads the parts very gently and ‘places’ them into a separate unloading conveyor belt. This capability in itself is a big bonus, but coupled with the benefit of having an extra turret, we’ve reduced cycle times from 3.5 minutes to 1.5 minutes. Considering the batch sizes, we’re now saving just over 500 hours per batch.”

He continues: ‘’We previously machined another aluminium part for the food processing industry on our existing twin-spindle machine that is just over 200mm long. This part needed four different operations due to the sub-spindle bar capacity being very limited, incurring significant set-up time and taking a lot of capacity from our machine shop.The overall cycle time was 6.5 minutes. We’re now able to produce these on the Nakamura with a cycle time of 3.5 minutes in one-hit.’’

As a long-running project that has been ongoing for more than three years, the Staffordshire manufacturer was struggling to keep up with demand prior to the arrival of the WT150IIF. The major saving on this project for the ISO9001-accredited company is not just the cycle time but the reduction in set-ups, the ability to free capacity from other machines and the reduction in manual intervention.

“It was a labour- and machine-intensive process,” states Oakley.“Now, we can set the job on the WT150IIF and it will run unmanned 24 hours a day for up to two weeks with the swarf-breaking technology. All we have to do is feed the bar into the machine and collect the finished parts from the other end. The stability of the machine also means that we don’t even have to change the tools in a two-week long production run.”

As the company gains familiarity with the machine following its arrival at the end of 2022, it is moving more parts to the Nakamura.

“The brass and nylon parts are long series runs and we’re benefitting from the combination of the swarf-breaking technology and the one-hit capabilities of the WT150IIF,” says Oakley.“We are continually moving more jobs to the Nakamura and will likely need another machine in the near future.”

Discussing the service from ETG, Oakley concludes: “We have machine tools here from a range of vendors and the service, and the quality of the machines has been indifferent. It’s only been a matter of months since we installed the Nakamura, but we’re delighted with the machine and the service from ETG has been exceptional. If we have ever had any issues, the service team have jumped on the issues immediately. We are currently planning to double the size of our facility to nearly 700sqm, a move that will help facilitate our growth. When we have our new building, we’ll definitely be looking to purchase more Nakamura machines from ETG.”
For further information www.engtechgroup.com