Profiling and press brake capacity upgraded

Nestling in the Dorset countryside on the edge of Bridport, sheet metal subcontractor Ackerman Engineering’s freehold 1500 sq m factory was purpose-built in 2006 by current managing director, Graham Ackerman, great-grandson of the company’s founder, William, who started the enterprise in 1885. Indeed, 2006 was a seminal year that saw the purchase of a Bystronic BySpeed 4.4 kW CO2 laser-cutting machine, another press brake from the same supplier and a generation facility for nitrogen.

Nitrogen is the assist gas of choice when laser cutting as it produces a non-oxidised edge for painting without the need for fettling. In addition, nitrogen allows cutting speeds up to three times faster in thin to mid-range gauges.
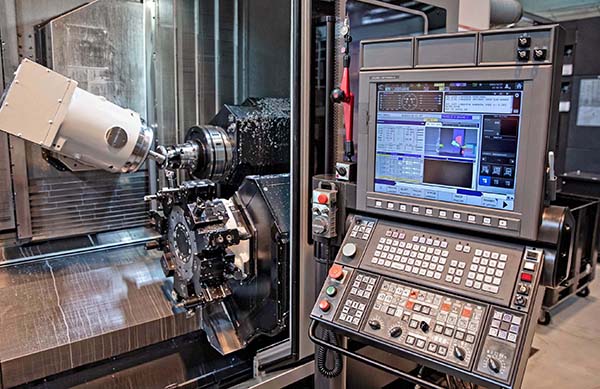
CO2 laser technology, which had been used by the company since 2001, was phased out in August 2018 when the 4.4 kW machine was part-exchanged for a ByStar Fiber 8 kW fibre laser-cutting centre, which joined a 3 kW BySprint Fiber installed four years earlier. Both are of 3 m x 1.5 m sheet capacity. At the same time, an Xpert 150-tonne, 3.1 m press brake was added to the six Bystronic models already on-site, one of which dates back to 2001 and is badged Edwards Pearson, which the Swiss manufacturer acquired in 2002.
The advantage of profiling and bending components on the same make of equipment is that Bystronic’s offline Bysoft 7 software modules, ‘Laser’ and ‘Bend’, work together to produce precise 3D sheet-metal parts. Graham Ackerman says that drawing tolerances are almost incidental, as they are routinely held due to the accuracy of machining. Inspection is scarcely needed, as quality is virtually guaranteed once a job is in production. Any mistakes are almost always down to human error, so most of inspection effort is at the CADCAM stage.
A customer’s drawing or model, which usually arrives in DXF, DWG, IGES or STEP format, is interrogated in the subcontractor’s CAD department to ensure the component’s manufacturability. The file is then exported as a flat blank to the Bysoft CAM environment, where the programs for fibre-laser profiling and bending are generated automatically.
Ackerman says: “Fibre-laser cutting is massively faster than CO2. When we installed the 3 kW BySprint Fiber alongside the 4.4 kW BySpeed CO2, the former was so productive that we could have sold the other machine and still hit production targets. The only reason we didn’t was to retain back-up capacity for servicing or unusual peaks in order to guarantee customer deliveries.”
He adds that the Bridport factory mainly processes aluminium, stainless steel and mild steel sheet from 0.7 to 8 mm thick, with a lot of material in the 1.2 to 2 mm range for the manufacture of electrical cabinets. When cutting these gauges, the 3 kW fibre machine is typically two to three times faster than CO2. However, when the 8 kW fibre laser was installed, a further increase in throughput was seen, as processing times are less than half those using the 3 kW fibre source.
Additionally, CO2 machines require a 15-minute warm-up in the morning and a similar time to close down at the end of the day, whereas these unproductive periods are avoided with fibre-laser cutting. Another benefit of the technology is its low running costs. No laser resonator gas is needed, while an even greater saving derives from reduced electricity use.

Ackerman notes that the firm’s larger fibre source draws less than half the power of the previous CO2 machine, yet delivers nearly twice the power to the point of cutting. The wasted energy previously had to go somewhere, which was into the factory in the form of heat, so the fibre-only working environment was more pleasant during the summer months.
Appraising his company’s use of fibre-laser cutting, Ackerman made a couple of interesting observations. One was that the 8 kW machine is so fast that the expected increase in nitrogen usage did not materialise due to the short cycle times, so it has not been necessary to increase the size of the gas generation plant.
Another comment was that on some delicate parts, which are frequent bearing in mind that the subcontractor operates at the high quality end of the market, the 8 kW laser beam can be
too strong for cutting 0.8 or 1.2 mm material, a problem that is easily overcome by turning down the power of the source.
To maximise productivity, however, the lower power fibre machine is designated to cut thinner gauges, while the 8 kW laser cutting centre is kept on full power for processing thicker materials.
As to his company’s move away from other makes of laser-profiling machines to standardise on Bystronic equipment, Ackerman says: “Our business recognised more than a decade ago these Swiss-built machines are among the best in the world and highly productive, both in terms of processing speed and maximising uptime. We especially like the speed of changeover to the next job, which is important to us as we produce small batches of high added-value work, typically within the range 5- to 50-off.”
It is due to these relatively low batch sizes that Ackerman Engineering has restricted its automation equipment to simple ByLoaders for feeding the fibre-laser machines with material. The step up to a ByTrans automated sheet loading/unloading arrangement would have not lent itself to such small runs. In any case, it would have necessitated tagging components within the sheet, then shaking them out and de-pipping them, which is not conducive to the premium-quality work for which the subcontractor is known.
Modern press braking technology has been a similar boon to the firm’s business. Ackerman is particularly impressed with the latest Bystronic Xpert 150, for which he has bought a comprehensive suite of the manufacturer’s RF-A segmented tooling. He says it is twice as fast to set up compared with older style tooling, as the punch and die segments are automatically centred when loaded from the front and hydraulically clamped.

Moreover, the system is fully compatible with the Bystronic bending database in the machine control, and it is practically impossible to insert an incorrect tool due to laser beam recognition of its profile. Part quality is improved, especially when bending long components, as there are no witness marks where the tool segments meet, and there is no need to resort to shimming.
When Ackerman joined the family firm in 1979 at the age of 17, the only other employees were his father, David, together with three or four other staff. From the early 1970s using a treadle guillotine, self-made power press tools and an Edwards box and pan folder, David started producing light sheet-metal fabrications. The company had nearly reached its century but had not realised much in the way of progress. Ackerman Engineering had, however, reinvented itself a number of times, from its beginnings in watch and clock manufacture, to automation of Bridport’s netting looms in the 1950s and 1960s.
Ackerman concludes:
“Once sheet metalworking became our activity of choice, the foundations of sustained growth ensued. Today we have 34 staff working in Bridport, including a fifth generation Ackerman, my son Edward.
“By the time he takes over the business, with our policy of constant reinvestment, we will have grown further and there is plenty of room for expansion on our current site. The purchase of highly productive production plant like the Bystronic machines will be key to our continued success.”
For further information www.bystronic.co.uk

Finish-machining times cut from 32 to 14 hours

A mould maker serving the automotive industry says WorkNC CAM software gives it a distinct advantage, setting the company apart from its competitors with superior lead-times, quality and expertise. And, as a Beta tester for WorkNC, the company found that a new item of functionality, introduced in the latest release – 2019 R1 – slashed its finish-machining
times by more than half on certain parts.

Operating from three sites in France and one each in Turkey and Slovakia, Julien SA manufactures moulds for interior linings, boot compartment trim and roof linings, along with parts for sound-proofing, foamed components, and aluminium and textile thermal barriers. The company mainly produces single-order parts, or two-to-three small series moulds for foam components.
Based at the 10,000 sq m head office in Le Creusot, France, programming manager Sergio Couto is responsible for preparing production and implementing the product manufacturing process. His department takes the lead on a range of aspects such as technical issues, monitoring and quality control for tooling production.
Although Julien SA makes a small number of moulds for the aerospace industry, most of its customers are major automotive groups that need tight turnaround times. Using WorkNC’s CAD and CAM capabilities, Couto says practically nothing is impossible from a technical point of view.
The software is installed on seven computers on the company’s network, and drives three five-axis machine tools (Breton, Durango and Rambaudi), and four 3+2 machines (Goglio, FPT, Anayak and Soraluce). Explaining how WorkNC is an integral and vital part of its production operation, Couto says the process begins after the programming team receives an assessment from the engineering office with the purchase order: “Firstly, we analyse the CATIA file of the part to be produced, allowing us to isolate items which need to be precise, and to determine what’s feasible.
“With the aid of WorkNC’s CATIA interface we can re-establish the CATIA construction tree, which is crucial, as that data is of paramount importance to our business,” he adds. “WorkNC is one of the rare applications which allows this.”

The company then turns its attention to the number of parts that must be produced, and sets about creating the models in WORKNC, adding offset allowances and any other details required for accurate machining.
“The next step is to prepare the production phase and run tool-path calculations,” says Couto. “We establish machining schedules and adapt WorkNC tool paths to the specific machine being used.”
However, he adds that occasionally the company does not know which machines will be available, meaning generic tool paths must be generated. “This highlights the importance of ‘Machining Contexts’ in WorkNC, because we often have to switch to another machine at the last minute,” says Couto.
The final phase is in the workshop, where WorkNC’s simulation function validates the process before the machines start cutting metal. Here, he says WorkNC’s programming allows the company to undertake lights-out machining: “It means the workshop operates 24/7. From midday on Friday and over the weekend, it is fully autonomous, with automatic tool changing and head rotation. We couldn’t do that without WorkNC.”
As a beta tester for the software, Julien SA trialled a new finishing strategy which allows users to break free from previous constraints caused by tool shapes, and it has slashed machining times by more than half. As a result of the trials, WorkNC 2019 R1 adds the Z-level pattern to the ‘Advanced Toolform’ technology, allowing for tool shapes like barrel, oval and parabolic to be calculated over the part surfaces, including negative allowances.
Couto says the results of using the Advanced Toolform strategy with circular-segment cutters, compared with traditional methods, are indisputable, having reduced the company’s finish-machining times from 32 hours to 14.
WorkNC, part of the Production Software business of Hexagon Manufacturing Intelligence, is fully integrated into every machining phase – analysis, comparison, simulation, machining and verification.

Summing up the benefits of using WorkNC, Couto says tool-path calculation times are no longer an issue: “We manufacture some large parts – 2 x 1.5 m – and it’s very rare that calculation times are longer than eight hours for all roughing, finishing, rest material, corner re-machining, and mechanical operations such as drilling and pocket machining. And it’s a user-friendly application that’s so easy to learn, even for employees who’ve never done any programming before.”
The company has also invested in a mobile measuring arm from Hexagon, to make precise measurements at different stages of the manufacturing operation. Julien SA uses the measuring arm to make immediate decisions to either modify or continue the process when a doubt arises, which Couto says guarantees security, saving time. “This all helps with the precision we need to actually manufacture the part, ensuring it’s of high quality, and that it can be cleanly and accurately trimmed, which is particularly important for its final appearance as many of the parts coming out of our moulds are visible to the end user in the vehicles.”
Concluding, he explains why the company first invested in WorkNC in 1994, and how it has developed since then: “In the 90s, mould makers started receiving files from India and China in which radii and planar surfaces didn’t conform to the original part, and it was no longer possible to program with CATIA. Even back then, WorkNC could rapidly generate a tool path, irrespective of a part’s complexity or imperfect surfaces.
“WorkNC has developed in line with the requirements of milling operators, who had previously programmed tool paths directly at the machine tool. We have total confidence in working with it on a daily basis, and it helps us to take issues such as holidays, sickness absences and machine downtime in our stride. It means we can set ourselves apart as a mould maker, ahead of our competitors.”
For further information www.worknc.com

Precise gripping proven a million times

High quantities, extreme quality requirements and keen competition are shaping the production of injection-moulded parts for the automotive industry. To ensure success when performing this delicate balancing act, Gevelsberg, Germany-based Denk Kunststofftechnik relies on Schunk grippers in its self-designed handling systems.

“Around 60% full automation, and the trend is rising rapidly; we are no typical plastic injection moulders,” states Konstantin Spenst, head of automation technology at Denk. “Automation is the only way to output between 500,000 and well over 2 million parts per year, and check them 100%.
“Precision and verifiability are decisive factors for us,” he adds. “The newer the system, the more steps are monitored. Recently we wrote a chain of 800 steps, but only 30 of them were paths. Everything else was just commands of pneumatic components or queries with alarms.”
Around 60% of the range was operator messages such as “end position not reached”, “part lost” or “part not correctly mounted”. What is decisive nowadays is that the user receives as much information as possible, because in the case of a malfunction, the reason must immediately be identified. This factor is particularly thanks to the precise monitoring of grippers, as only in this way can damage to the tools be avoided, along with system downtime.
At Denk, all parts are first monitored to see that they are correctly mounted. Presence monitoring is then deployed immediately before mounting the tool; ultimately checking immediately after removal and finally during storage. This methodology is the only way to prevent parts from being lost in the handling process, causing an expensive tool collision.
The gripping systems that are increasingly being conceived, designed and built independently by Denk since the beginning of 2010 are of double significance. Each system must ensure reliable handling, while at the same time facilitating reliable monitoring of the relevant process steps. Historically, the latter had proved to be a challenge, because not all gripping system components available on the market permanently achieve the required level of precision and process reliability, not even the high-end ones.
“With our gripping systems, precise monitoring is very important, as with 1 mm play in the gripper jaws and a closing stroke of 3 mm, reliable monitoring is not possible,” says Spenst. “It repeatedly transpired with grippers from various manufacturers that sensors delivered unreliable results because the play in the jaw guidance was so large. Over the course of time, we have realised that Schunk grippers can be queried very reliably, as they work very precisely.”
The Schunk MPG-Plus grippers for small components are particularly advantageous in this respect.
“For parallel grippers, not only an end point can be queried, but also a centre point, which can be set very easily,” says Spenst. “If a component gets lost, the end switch is set to zero and reports the loss. When handling metal parts, an inductive sensor usually monitors whether, and at what distance to the sensor, a metal inlay is gripped.”
Besides inductive monitoring, the Schunk MPG-Plus miniature gripper can be monitored by integrated and programmable magnetic switches, by means of which a high degree of flexibility can be attained. Compared with similar modules on the market requiring the same input, the gripper produces a significantly higher output – says Schunk – paving the way for ever smaller and more efficient systems.
The high-performance, individually adapted junction roller guide ensures high load bearing capacity of the entire guidance system, minimal wear and a long life span. Components made of special, high-performance aluminium are used internally. In order for engineers to be as flexible as possible in process and system designing, the module can be screwed through and tightened both on the side, as well as the bottom.
“The grippers must be as light and as small as possible,” stresses Spenst. “If I have a heavy gripper, I have to move slower. This costs cycle time and cycle time is real money.”
On average, the loss of one second of cycle time costs between €2000 and €4000 each year. To keep warehousing as low as possible, Denk uses the miniature gripper primarily in sizes 40 and 64, in order to dock gripping systems on to the tools in a stable manner when loading. For large strokes, the Schunk KGG 80 two-finger parallel gripper is used. This gripper even allows handling of T-nuts with adhered chips. For larger, round components, Denk uses the Schunk PZN-plus centric gripper, which due to patented multi-tooth guidance and manually ground base jaw guidance, combines a high level of precision with low wear.

For Spenst, the standardisation of the gripping system components is elementary: “We want to keep inventory as low as possible to ensure the universality of our systems, and to react flexibly in the event of damage. When we design grippers with Schunk, we know that we will be able to handle 2 million parts a year for seven years, without losing any precision or having to fit new grippers.”
For normal use without overloading the grippers, these cycle rates can definitely be achieved and sometimes even exceeded. The temperatures in the injection moulding machines are generally non-problematic for Schunk grippers. Only in critical applications do the designers at Denk contact the manufacturer and ask about maximum permissible values.
Despite the high level of gripping systems expertise, it is not possible for Denk to manufacture the module components in-house.
“We could certainly build parallel grippers, but they would cost 20 times as much and would still not achieve the level of quality provided by the Schunk modules,” says Spenst.
After the relaunch of the PGN-Plus-P parallel gripper, Schunk has now transferred the features of its flagship product to the three-finger gripper series. The Schunk PZN-Plus-P centric gripper is now equipped with a permanent lubrication unit in the multi-tooth guidance system which, under normal, clean working conditions, ensures lifelong maintenance-free operation.
With short strokes in particular, the continuous lubrication pockets are said to produce a fast and even distribution of lubricant along the entire multi-tooth guidance contour. By enlarging the supporting dimensions between the six load-bearing shoulders of the patented multi-tooth guidance system, higher moments can be accommodated and thus longer fingers can be used. In order to ensure fit accuracy, each individual base jaw is carefully ground (manually) and fitted to the individual housing. Moreover, the large piston drive area helps to maximise gripping force.
For further information www.schunk.com

Radan trials improve efficiency at Lasershape

A sheet-metal subcontractor has recently switched over to Radan software to drive its fleet of four laser cutters and two waterjet machines following an intensive three months of development, trials and training. Jason George, IT and facilities manager at Nottinghamshire-based Lasershape, says that ROI in Radan looks likely to be achieved within two and half months.

Manufacturing components primarily for the general engineering, aerospace, rail and automotive industries, Lasershape’s core products are laser cut, folded and powder coated, with some assembly where required, and include parts for a wide range of interesting applications.
George has been implementing a series of measures over the past two years aimed at driving down costs, and felt the company’s CADCAM package was falling behind in terms of efficiency: “The system was very manual, and although we had a project with our supplier who was trying to automate it, we simply couldn’t rely on the results being produced, and had to have an operative watching over it, which defeated the object.”
Lasershape opted to replace the system with Radan, and found in numerous trials that it led to considerable savings.
“We use around £400,000 worth of material a month, and with the previous CADCAM package our scrap rate was around 20-30%,” says George. “We compared a trial we ran through Radan with what our production team had actually sent to the shop floor after making manual changes to improve the nest from the previous system, and it still reduced wastage by approximately 15%.”
The company also logs the reason for every scrapped part, and George says poor sequencing was the biggest single cause under the old system, which was not producing the high standard required by the company.
“With the large number of parts we produce, it’s impossible to go through each nest and manually select the cutting sequence; we have to rely on automation,” says George. “We ran the same job through Radan – and I even tried to trick it – but it was much better at getting out of areas without crashing the head.
“Radan’s not just about accelerating processes, it’s about accuracy, both in terms of the cutting sequence, and the finished component,” he adds.
Another Radan test involved a production job of 400+ runs involving 3 mm aluminium parts.

“This particular job had ‘head collision’ written all over it, but Radan cut each sheet 52 minutes quicker than the old system, and with no collisions,” explains George. “When I looked at the code I saw this was because Radan was able to cut at full speed, while the other software applied slower cutting conditions for small features. This would save us considerable time.”
And an optimised Radan nest in one of the early trials saved over five hours compared with the company’s previous nests, which George says represents shaving a full minute off each part. Having built a number of apps around Radan to meet Lasershape’s own specific requirements, the company benefits from two-way communication between CADCAM and its Epicor production control software.
“We’ve customised the main menus inside Radan and linked them to our own Lasershape menus,” says George. “This is helpful right from when we receive an initial inquiry, in that we can see at a glance how many sheets we’ll need for the job.
“And significant benefits
stem from our new ‘Workflow’ system,” he continues. “It controls stock, live updates of programs and remnant creation inside Radan. All this gives us an up-to-the-minute overview of what’s happening on the shop floor.”
He explains that Workflow means the tasks of marking programs as complete, and releasing remnants in Radan, can be performed by Android PDAs on the shop floor. George has also created a part editor app to mass edit components.
“It automates Radan’s functionality to work on multiple parts at the same time, and means we can mass import DXF files and edit the data quickly,” he says. “This is particularly important as we work on around 20,000 live items every month, and have nearly 200,000 repeat parts in the system.”
The company’s first task when an inquiry comes in, is to add a quote in Epicor.

“We’ve got a button in Epicor that says ‘Prepare Radan.’ This generates a quotation folder for us, a standard project template ready for the nester to nest in, and sub directories for the parts. Then we’re ready to start drawing the part in Radan 2D. The parts are imported and saved in the quote directory, which means quoted parts don’t touch our master part library. With the previous CADCAM system we had a bulging part library containing parts for jobs we didn’t win, and never cut. So this is a huge improvement.”
After that, Lasershape uses the part editor app to set customers, materials and machining operations, including any required countersinking and folding. This task is followed by another customised operation, running what the company’s calls ‘The Migrator’, which scans the entire project, calculates how long each part is going to take, and the exact percentage of a sheet it will use.
“Migrator then populates all relevant fields within Epicor,” says George. “When we win the job, it’s converted to an order, and Epicor tells Radan which customer the parts are for, creating directories for the project.”
The nesting team use Workflow to specify the parts for nesting, and send them to Radan.
“It’s so simple to pull in the raw material sheets, nest them, post them, and send them out for cutting on our Trumpf and Bystronic lasers, or Flow and Techni waterjets,” says George.
He says it’s vital that Radan drives both cutting technologies, and can work with a variety of CNC machine tool brands.
“With Radan we just have the one part library, which services all our machines; we couldn’t have multiple part libraries for the same components.”
Concluding, George says the Radan trials and tests gave consistent results and reduced the task of producing nests to what he calls “a simple admin role” as the system automatically creates efficient, cost-saving component nests.
“As everything we do now is about efficiency and data capture, Radan has become a key, integral part of the business.”
For further information www.radan.com

Putting the brakes on inefficiency

Established in 1983 by engineer and sports car racer John Moore, Alcon Components initially made brakes for Audi Sport’s Group B Quattro rally cars.

Today, the Tamworth-based company provides braking solutions such as discs, callipers, cylinders, valves, balance bars, pedal boxes, clutches and much more for the top echelons of motorsport and specialist markets. It is this reputation in motorsport that has led the company to Open Mind and its HyperMill CAM software.
Alcon Components designs, manufactures and supplies braking solutions to some of the world’s most prestigious brands, including Audi, Bentley, Brabus and Jaguar Land Rover. The company has products that can be found in anything as diverse as the extreme 900 bhp/tonne Ariel Atom 500 and the 225 mph Noble M600, through to military vehicles, armoured SUVs and anything in-between. To cope with the capacity demands of up to 500 discs a week, Alcon has recently invested in three new Doosan vertical turning lathes (VTLs) for its disc machining line, which is yielding a 30 to 40% cycle time improvement. The Doosan VTLs follow a considerable investment in machining centres that include a Doosan Mynx 6500/50, a DMG Mori NHX 4000 and a Hermle C32U.
When it comes to machining brake callipers, a solid aluminium billet will go through a complete range of five-axis machining cycles with four individual operations. Commenting upon this process, production engineering manager Brian Cutler says: “The first operation will be a lot of roughing on a VMC, which is programmed with HyperMill. We’ll then hold the callipers on their side and machine all the internal features on a five-axis machine. We flip it over again to finish the top faces and it will be turned once more for the final operation, which is the machining of the precision piston bores.”

Whereas many callipers may be small volumes or bespoke specialist products, the company is also manufacturing over 100 callipers per week for a high-end sports car.
Referring particularly to the company’s investment in Open Mind’s HyperMill CAM system, Alcon’s Adam Saweczko says: “The reason we moved from another CAM system to HyperMill was the stability of the software. Since opting for HyperMill, there has been a huge improvement in performance and calculation times. It calculates the paths with greater speed and is far more reliable than the software we used before. Our previous CAM software was problematic, sometimes crashing up to six times a day.
“This crashing was due to the complexity and data requirements of the parts, and the respective programs that we generate here at Alcon,” he continues. “The HyperMill system is very flexible, it allows us to copy proven methods from one program to another, which saves significant time. We can work with a number of windows open at the same time and this also reduces our programming times.”
Referring to the HyperMill tool library, Saweczko adds: “We can store more detail than ever before. We can now store all the cutting data, tooling suppliers and even the product codes. It has become the one-stop solution for our tool management data.”
Commenting upon the five-axis credentials of HyperMill, he says: “The five-axis routines are very easy to use. You no longer have to go into hundreds of different settings to get the job done. The parts we are making are quite complex, but our new CAM software has given us the ability to take existing programs and copy them over to HyperMill. So, existing and proven cycles can be applied to the existing part.”

Alcon manufactures its automotive brakes in sets, with left and right hand parts. Commenting on this requirement, Saweczko states: “Typically, HyperMill can save 50% on programming times as it can be done instantly. This also saves time where we have parts that are symmetrical to other components we machine. We actually save a lot of time by programming one half of a part and performing a mirroring routine, so the next component is produced automatically. The cutting conditions are respected also, meaning that if the one half is climb-cutting, then the mirrored half would also climb cut.”
Confidently backing this statement, Cutler adds: “In terms of improvements with HyperMill, we’ve made some pretty big savings in programming times. I would say that a complex five-axis calliper previously took upwards of four weeks to program with our previous CAM system; this is now less than 2 weeks with HyperMill. Producing brake callipers, we typically do a left and right-hand calliper and the first side takes 3-4 weeks to program. Mirroring the first calliper would then take up to another week. The mirroring function in HyperMill is really impressive and enables us to produce the opposite mirrored part in less than half a day.”
The feature recognition package has also been a major benefit for this progressive brake manufacturer, as Saweczko states: “For example, we have an M4 tapped hole and, to conduct that operation, we will need a tapping cycle, a drill and maybe even a countersink operation. HyperMill’s feature recognition will automatically recognise the task in hand and apply the correct tools and machining procedure.”

Alluding to the benefits of purchasing HyperMill, Saweczko concludes: “We are very pleased that we have moved over to HyperMill from another CAM suite. It has not only improved our product quality and surface finishes, it has also improved the working environment because staff are not as frustrated as before. This is because the software is more reliable and easier to work with.”
For further information www.openmind-tech.com