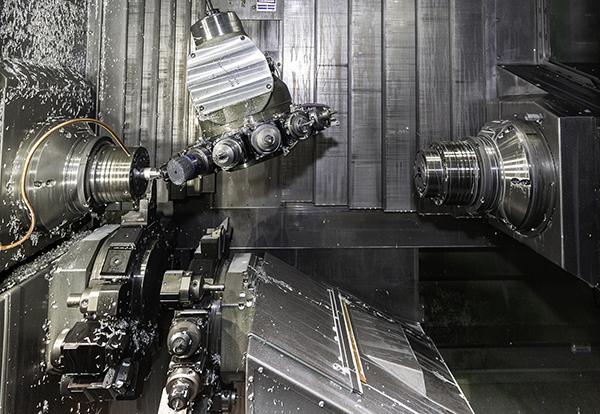
GrindingHub – new trade fair sets date

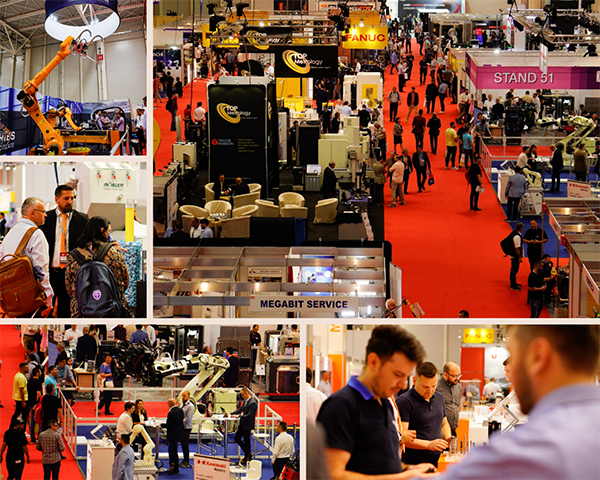
GrindingHub, the first edition of a new trade fair, will take place on 17-20 May 2022 in Stuttgart, running every two years thereafter. The main areas of the show will be technology/processes, productivity, automation and digitalisation in grinding technology. Among those set to attend are Agathon, Anca, Blaser Swisslube, Buderus Schleiftechnik, Danobat-Overbeck, DVS Group, DVS Tooling, Emag, Geibel&Hotz, Haas Schleifmaschinen, Hembrug, Isoma, Kapp-Niles, Liebherr Verzahntechnik, Naxos-Diskus, Präwema, Reishauer, Rollomatic, Saacke, Supfina, Tschudin, United Grinding and Vollmer.

For further information
www.messe-stuttgart.de/grindinghub

The new home of 3D scanning

GOM will be running the UK launch of the #HandsOnMetrology network via a webinar on 31 March. The event is in partnership with Central Scanning, a local #HandsOnMetrology partner that will be introducing the latest hand-held 3D scanning systems from GOM and Zeiss.

#HandsOnMetrology is a new global 3D scanning network and provides a digital go-to for everything the industry wants to know about 3D scanning. GOM, a Zeiss company, operates the platform.

From step-by-step set-up instructions to more advanced tutorials and expert hacks: the platform is made for learning and getting inspired. According to GOM, #HandsOnMetrology gives users all the information they need to deliver 3D scanning excellence. The platform supports the community of designers, technicians, engineers, scientists and specialists with valuable knowledge to increase product quality, optimise processes and expand possibilities.

Kevin Hawley, director at GOM UK, says: “We know there are many applications to cover with 3D scanning, from large parts like welded frames and huge castings for power generation, to highly complex and detailed parts. Sometimes, extremely portable systems are necessary for remote locations or confined spaces. All of these tasks need the right solution and #HandsOnMetrology is there to help you with this.”

He continues: “During the webinar we will cover the features and benefits of this new platform, see some of the makers’ stories to learn how #HandsOnMetrology has helped their processes, and meet products in the portfolio. A Q&A will end the webinar.”

For webinar registration
https://is.gd/efoxet

Faro answers ‘Call to Arms’

When faced with the need to find high-precision, flexible measuring devices that could satisfy the challenging inspection needs of two company divisions, Stuart Hill, development engineer at AM Hydraulics, communicated each division’s diverse requirements to Faro UK and requested demonstrations of suitable portable CMMs.

In the course of the subsequent in-house demonstrations, the speed, precision and capacity of Faro’s Quantum-M 3D ScanArm proved it to be the ideal portable inspection solution for AM Hydraulics’ large components. Likewise, when measuring the relatively smaller workpieces for the company’s AM Tooling division, the recently launched Faro Gage measuring arm confirmed its accuracy specification, in addition to its quick set-up and ease of use abilities. The outcome of these successful demonstrations was an order for both Faro products.

Trading since 1978, AM Hydraulics has continuingly expanded and is now a major force in the UK hydraulics manufacturing sector. Areas served by this progressive, family owned business include aerospace, nuclear power, earthmoving, oil and gas, and wind power.

Based in a recently opened, purpose-built manufacturing facility in Birmingham, AM Hydraulics offers an all-embracing, ‘one-stop’ service. The company’s end-to-end production capabilities include milling, finish grinding and hard chrome plating. In addition to meeting challenging delivery deadlines, AM Hydraulics’ level of autonomy enables adherence to rigorous quality control standards.

As an ISO9001-accredited business and an approved supplier to many blue-chip companies, the quality of AM Hydraulics’ output is of paramount importance. In addition to undertaking final inspection routines, dedicated quality inspectors make detailed in-process checks at every stage of production. Given the size (up to 3000 mm diameter) and weight (up to 20 tonne) of the company’s workpieces, administering an efficient in-process quality regime presents a range of challenges.

Now in use at AM Hydraulics, the Faro Quantum-M ScanArm is designed to deliver outstanding levels of inspection precision in less than pristine environments, such as on the shop floor. The robust Faro product carries certification to ISO 10360-12:2016, a rigorous international measurement quality standard, and tests to IEC 60068-2 standards for shock, vibration and temperature stress relief.

In addition to performing efficient tactile inspection tasks, the Quantum-M ScanArm is able to undertake precise, non-contact scanning routines thanks to the use of its Faro Blu Laser Line Probe HD. Faro’s next generation of blue line laser technology enables five times faster scanning than previous models, even when used on complex surfaces comprised of dark or reflective materials.

When compared with its predecessor, the Quantum-M ScanArm is 20% lighter in the hand and, as it requires no warm-up time, is always ready to use. These qualities ensure improved levels of productivity by enabling operators to work longer and more comfortably.

The use of industrial-grade wireless connectivity and dual, hot-swappable batteries supports the Quantum-M ScanArm’s data-transfer capabilities and its continuous operation in remote areas of the factory floor without the need for external power.

Explaining AM Hydraulics’ improved inspection efficiencies, Hill says: “Given the size of our workpieces we chose a Quantum-M ScanArm with a 2.5 m capacity, and it has proven ideal. In addition, as it’s easily transportable and quick and simple to set-up, it helps that our operators can carry the Quantum-M ScanArm to all of our production areas and quickly put it to work carrying out detailed inspection work using its touch probe or non-contact laser probe. Although our staff are experienced in using precision equipment, given the nature of the production areas, it helps that the Quantum-M ScanArm is so tough.

“In addition to delivering the levels of speed, accuracy and capacity we sought for our large parts, the Quantum-M has significantly reduced our inspection data capture times,” continues Hill. “Staff are now able to instantly download collected data, store it directly to a computer and compare it against nominal CAD data.”

Equally challenging, although different in scale, are the inspection requirements of the business’ AM Tooling division. AM Tooling specialises in the manufacture, assembly and repair of press tools, as well as providing a jig and fixture design and manufacturing service.

“Along with accelerating AM Tooling’s inspection work and data flow, the Faro Gage has enabled us to increase our precision capabilities,” explains Hill. “Also, as it’s so flexible, the Gage has helped to lessen our reliance on hand tools, such as calipers and height gauges, and reduce the use of numerous measuring instruments spread around the shop floor. Our Faro Gage is now making a major contribution towards upholding AM Tooling’s demanding quality standards.”

As the most accurate and affordable FaroArm ever produced, the recently launched Faro Gage is suited to performing inspection tasks on small to medium size components. The intuitive and versatile portable CMM boasts a 1.5 m working volume and a volumetric accuracy of 0.022 mm. Thanks to the Gage’s performance for hard probing applications, it is able to eliminate inspection bottlenecks and greatly reduce reliance on fixed CMMs.

Says Hill: “The success of both AM Hydraulics and AM Tooling is due largely to the quality of each division’s output and their efficiency levels, which allow competitive quotes to be tendered and business to be won. To make sure that we maintain these advantages, we regularly invest in state-of-the-art production and inspection technologies.

“Our two co-located divisions share the same passionate quality culture, although given the difference in their manufactured products, each has very specific inspection requirements,” he adds. “Therefore, when a decision was taken to make a major investment in portable inspection equipment, as an enthusiastic user of previous generations of Faro products, I related each division’s inspection requirements to Faro UK.

“On witnessing detailed, in-house demonstrations of a Faro Quantum-M ScanArm and a Faro Gage, I was very impressed by the latest developments and convinced that each suggested solution ticked each division’s precision and efficiency boxes. Our two new portable inspection technologies provide us with a major advantage over the use of a fixed CMM as, along with final inspection, we are able to use them to perform in-process checks on workpieces that remain located in machine tools.”

For further information
www.faro.com

RDS Precision selects Accretech

Given the intense competition between engineering subcontractors, it is often the businesses with unique selling points that stand out from the crowd. One such company is Washington, Tyne and Wear based RDS Precision Engineering. In addition to establishing a reputation for delivering on time and on budget, the busy company’s main differentiator is its highly developed quality ethos. To help ensure the premium quality of production output, regular investments are made in high-precision inspection equipment.

The latest addition to RDS Precision’s quality control department is an Accretech SurfCom NEX 041 CNC measuring station that provides the company with contour and surface roughness measurement capabilities.

Director Rob Bone says: “We use a selection of standard inspection equipment, such as CMMs and vision measuring systems. Also, given the demanding specifications and challenging dimensional tolerances of our components, we use specialised metrology equipment, like our recently purchased advanced Accretech CNC contour and roughness measuring system.”

The SurfCom NEX 041 is suitable for the measurement of contour geometries on parts that include ball screws and large bearings.

“We were previously using a shadowgraph to measure a family of parts with demanding angular contour specifications, and struggled to achieve the required levels of precision,” says Bone. “Now, however, we’re able to load each of these parts on to the SurfCom NEX 041, recall the relevant program and instigate a precise, fully automatic CNC measuring routine. Not only has the Accretech machine improved our precision standards related to these challenging components, it has also slashed the time taken to inspect them.”

For further information
www.accretech.eu

Scheme supports STEM graduates

The National Manufacturing Institute Scotland (NMIS) will be offering 30 recent STEM graduates from across Scotland the chance to work with its engineers and researchers as part of a new scheme aimed at helping those who are struggling to find work due to the economic impact of the pandemic. This new scheme will provide on-the-job training and the opportunity to build in-demand skills. To bolster the programme, NMIS is also collaborating with SME manufacturing businesses across Scotland, giving some of the graduates the opportunity to work and learn with potential employers.

For further information visit www.nmis.scot