Comau secures GM supplier accolade

Industrial automation specialist Comau is among the winners in General Motors’ 29th annual Supplier of the Year awards. GM recognised 122 of its best suppliers from 16 countries for performance in the 2020 calendar year. The annual awards highlight global suppliers that distinguish themselves by exceeding GM’s requirements, in turn providing GM customers with innovative technologies and among the highest quality in the automotive industry. This is the third year running that Comau has received a Supplier of the Year award, in addition to having received a GM Innovation award at the 2016 event.

For further information www.comau.com

Horstman invests in precision metrology

Part of the Renk group, Horstman is a manufacturer and global supplier of suspension systems for heavily armoured and tracked vehicles. The company also produces safety-critical engineering components allied to its core products for the subsea and aerospace industries. A transatlantic investment has seen the company advance its quality control procedures significantly by installing identical new co-ordinate measuring machines (CMMs) at its factories in Bath, UK and Sterling Heights, US. Made in Britain by LK Metrology, the new CMMs feature compact and versatile tactile scanning probe technology to capture data on the size and shape of components more accurately and much faster than was possible previously using touch-trigger probing alone.

The factory at the company’s headquarters in Bath, which dates back to the 1920s when the original suspension bogie for military vehicles was developed, was an early adopter of CMMs in the 1960s. Horstman has had a succession of different CMM models over the years, most recently three machines of small, medium and large capacity from another supplier. The new LK Altera M 25.15.12 bridge CMM, which has a large inspection volume of nominally 2.5 x 1.5 x 1.2 m and is equipped with traditional touch-trigger probing and a tactile scanning probe, replaced the smallest of the three earlier machines.

Trevor Prynne, business development director at Horstman, says: “The contact scanning capability of the new LK CMMs acquires many hundreds of surface points every second, enabling interrogation of form as well as size and position, including of bores 400 mm deep.
“This latest investment in technology is in line with our desire to remain at the forefront of high-precision, high-integrity engineering, allowing us to continue offering customers the guaranteed service in design and production that ensures soldiers have the best combination of armour, firepower and mobility.

“At Horstman, we are proud to supply products that exceed customer expectations,” he continues. “To do this we ensure quality is not just a word that is spoken about during component inspection, but something that permeates throughout the whole group. All three of our locations, including Ontario in Canada, have a minimum of ISO9001 accreditation, with the UK site also having AS9100 Rev D.”
Stephen Ellis, quality manager at the Bath factory adds: “As we’re involved in the supply of safety-critical defence products, we decided that we needed a second large-capacity measuring machine which could inspect every size of component that we manufacture to provide redundancy in our capabilities if one of the CMMs should break down or require servicing. LK offered us the best package in terms of technology and accuracy of measurement at a mid-range price.”

He adds: “We manufacture some components for our US factory and they produce others for us, so it was expedient to duplicate the metrology facility at our Sterling Heights plant. Crucially, LK is able to comprehensively support that installation as well, as it has a subsidiary in New Hudson, Michigan, just 40 miles away.”

Ellis goes on to say that LK provided a good training and support package in both locations, so the respective inspection teams either side of the Atlantic are able to prepare and share CMM programs seamlessly. LK also supplied the two factories with the latest version of its CAMIO 2021 software for programming and reporting. It is possible to retrofit the software to other CMMs on both sites in the future, thus enabling interoperability between the different makes of CMM. CAMIO features a convenient graphical user interface, single and multi-part loading instructions, program queuing, and advanced error recovery for automated inspection.

The Horstman group is introducing new designs with increasing regularity and to ever tighter tolerances for hydro-pneumatic suspensions, electronic and electro-hydraulic active vehicle ride management systems, military thermal management systems, and aerospace and subsea products. For this reason, the metrology departments were often under pressure and wanted to move quality control technology forward regarding speed of data acquisition and the accuracy of data collected, in particular for form measurement.
Component sizes are up to 1.15 m in length by 0.75 m in diameter. Materials include steel, titanium and aluminium. In addition to measuring dimensions, the CMM rapidly captures shapes and compares results with the corresponding CAD model to ascertain fit and finish. Typical measurement cycle times are between 10 minutes and one hour. Features with a total tolerance down to ±7 µm require inspection, while some parts have reflective surfaces, which is why Horstman has not opted for the rapid, high-density point cloud acquisition of laser scanning. This process would entail surface preparation and, in any case, laser sensors do not offer the accuracy and repeatability of tactile probes, in the opinion of Ellis.

The SP25M scanning probe comprises two sensors in a single housing. Users can switch between a choice of five scanning modules with styli lengths from 20 to 400 mm, as well as modules compatible with Renishaw’s TP20 range of touch-trigger probes. This capability enables scanning and touch-trigger probing in a single probe system.

When using the scanning probe, the system can measure up to 1000 points per second to deliver a precise statement about deviations in profile and form that can affect product fit and function. Such high-speed performance is partly due to improvements incorporated into the latest LK CMM controller. These developments signify a major step forward in helping manufacturers to be competitive in today’s global market by reducing bottlenecks in the quality control department and cutting non-value-added inspection costs. Increased speed also enables metrology to keep pace with manufacturing and provide prompt feedback for adjusting production processes.

It is not only the LK controller and software that deliver superior tactile scanning capability. The stiffness of the CMM structure, with its ceramic beam and spindle, has optimal stiffness-to-weight ratio for high responsiveness and mechanical stability. Furthermore, LK’s single-orifice, grooved-face air bearings provide a smaller air gap with greater stiffness than standard air bearings to enhance rigidity. These attributes combine to suppress deflection of the machine structure during the repeated, rapidly accelerating and decelerating axis movements necessary for efficient continuous tactile scanning, especially on parts of complex geometry.

For further information
www.lkmetrology.com

Miyano with FANUC CNC and LFV

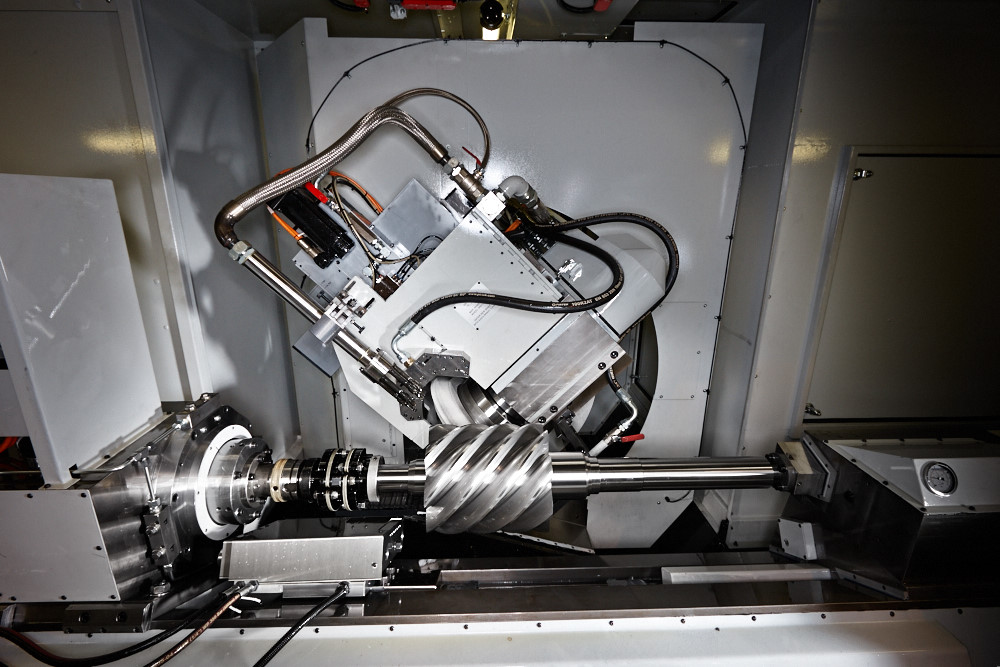
The first fixed-head lathe in Citizen Machinery UK’s Miyano range to feature the company’s patented LFV (low frequency vibration) chip-breaking software in a FANUC control system is the new, 42 mm bar capacity ANX-42SYY. It features 10 CNC axes including a ±35 mm Y axis on both the upper and lower turrets in addition to X- and Z-axis movements, enabling the production of complex components to tight geometrical tolerances.

LFV involves synchronising the rotation of the spindles with high-frequency oscillating motions of the tools in the X and Z axes to break what would normally be stringy swarf into manageable chips that can be disposed of easily. During turning and drilling, swarf is prevented from entangling around the component and tool, which would otherwise risk damage to both, and prove time-consuming to remove. Machine stoppage for swarf clearance is unrequired, even when machining materials such as stainless steel and plastics.

In addition to LFV software, which is programmable via G-codes in the part program, the 15” (380 mm) XGA touch panel FANUC 31i control features a new Citizen HMI and incorporates the company’s multi-axis technology. This configuration allows three-axis simultaneous cycles, double Y-axis cutting and superimposed machining whereby three tools can be in cut at the same time thanks to X-axis movement of the sub spindle. The technology also helps to share operations between the two spindles more evenly, which helps increase production efficiency and throughput.

The 6.2-tonne machine occupies only 2650 x 1630 mm of floor space. Both main and sub spindle have a bar capacity of 42 mm diameter and are powered by 11 kW/6000 rpm built-in motors.

For further information
www.citizenmachinery.co.uk

IoT solution leads to better output

For many production planners, IoT in manufacturing is still a visionary principle: machines form a fully integrated system that production planners monitor, control and evaluate from a central location. However, this approach is no longer a vision of the future, as demonstrated by an impressive production solution at MAT Machining Europe GmbH, headquartered in Immenhausen. The automotive supplier manufactures differential gear housings on Emag production lines where full automation includes extensive data monitoring and evaluation of machine data. MAT’s aim is to increase line output and process reliability significantly.

The production process for the differential gear housing is impressive: the company has a total of five production lines, each with seven Emag vertical turning lathes, linked via TrackMotion from Emag. A so-called TransLift unit travels “through” the machines on a rail system and transports the component from one pick-up station to the next. Various preliminary processes are carried out on the housings: turning of the first side, including machining of fits and bores; turning of the second side and the outer contour; and – in the final set-up – internal machining of the spherical shape and fitting bores. Finally, washing, measuring and marking follow. In total, MAT produces almost 2 million differential gear housings every year at its Immenhausen location alone.

“Digitisation is naturally an important topic here,” says Axel Dräger, head of engineering at MAT Machining Europe. “At the same time, we knew that Emag has made great efforts around IoT in recent years and is quite interested in testing new IoT solutions with users and getting qualified feedback. So for both companies, the whole thing is a win-win situation.”

For further information
www.emag.com

MTC launches courses in digitalisation

The Manufacturing Technology Centre has launched a suite of online courses to help manufacturing SMEs join the digital revolution sweeping through industry. ‘Practical Steps to Digitalising Your Manufacturing Business’ is a three-part certificate that intends to help UK manufacturers embrace the latest digital technologies and improve their businesses.

The CPD-accredited course – designed by the MTC’s digital manufacturing and SME experts – will introduce participants to new strategies, exploiting the wide range of digital manufacturing technologies already available or coming on stream.

For further information www.the-mtc.org