For manufacturers, it is hardly news that robots can boost productivity. But robots can also be a key asset for companies striving to create better workplaces for their employees – and can help businesses in their efforts to retain and attract talent. In fact, in an age of increasing labour scarcity, when younger generations need new reasons to enter manufacturing, the role of robots in creating better workplaces is pivotal.
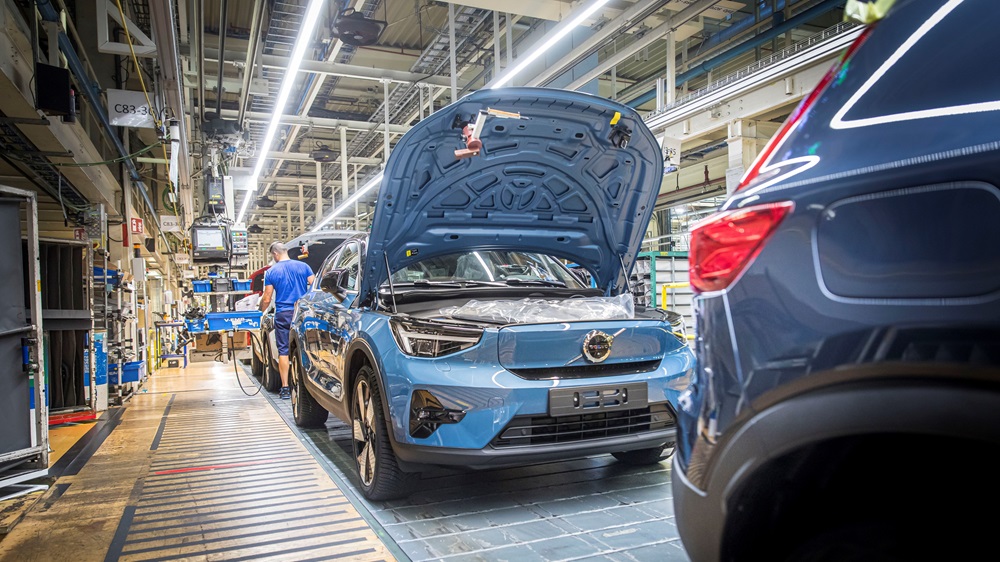
One of those businesses is Volvo Cars. The well-known and trusted Swedish car company uses robots throughout its production, mainly large, traditional industrial robots that are gated and lift several tonnes at a time. Now, the company is also starting to introduce smaller collaborative robots (cobots) working side-by-side with humans.
There are three ways robotic automation can help create better workplaces, with all the benefits it brings for both employer and employee.
Firstly, it lets people undertake meaningful work. At its very core, automation can take care of the dull, dirty and dangerous jobs that no one wants to – or should – do, releasing workers to do more stimulating tasks and develop into new roles. This is especially the case with cobots, as they are suitable for integration into existing workflows where they work alongside humans.
Like Dan Lämkull, technical expert in ergonomics and research leader at Volvo Cars, says: “If you hate it, automate it.” Working with strategy and innovation in the Volvo Cars manufacturing engineering team with a special focus on ergonomics, Lämkull says Volvo has seen a notable transition among his colleagues where cobots are present.
“We have to implement operations where employees are taken away from their normal tasks and shifted towards other roles, often relating to service or maintenance of the robot. We know the level of tasks that cobots can undertake, how precise and consistent they are, doing the very same thing again and again and not complaining. The cobot quickly evolves from being a competitor to an indispensable tool. It takes the bad jobs away, allowing humans to assume operator roles.”
Secondly, robotic automation can help reduce injuries and create an age-inclusive workforce. The benefits of automation extend far beyond the reduction of manual work; it can also help make for a safer working environment that protects the long-term health of workers. Take manual palletising, for example, workers typically tend to bend, lift and twist for hours on end, which can cause long-term musculoskeletal disorders including back, neck and upper limb injuries.
This is a central motivation for automating at Volvo Cars, where cobots find use for in-plant logistics and at pre-assembly stations. Here, human workers would sequence parts such as brake discs and calipers needed on the main line and put them into boxes that are then transported to the assembly line. These parts are quite heavy; the job definitely takes a toll on the body. However, even if the components are not heavy, high repetition and awkward body postures will still cause musculoskeletal disorders and personal suffering.
“These kinds of tasks are demanding ergonomically,” states Lämkull. “Parts can get tangled and some are not easy to grasp. Some weigh up to 2 kg, so during a whole week it easily becomes more than 20,000 kg per worker. And that’s not sustainable.”
But automating these tasks will pay dividends.
“I don’t have hard data, but I know that within our automated areas, the amount of sick leave and the number of injuries are definitely lower now. There’s a clear correlation between higher automation and less sick leave due to musculoskeletal disorders. The injuries disappear because we have automated.”
Lämkull stresses that safety in the automotive industry is not just about drivers and passengers: “We have a safety culture in the company. Everything we are doing is basically about safety.”
Minimising or removing the kind of strenuous activity that can lead to serious health consequences is also key in retaining tenured workers who have often had the same job type for many years. Adjusting the work environment to address age-related physical requirements can help all manufacturers create a more supportive atmosphere and amplify the input of senior workers.
Last but far from least, robotic automation enhances the appeal of a career in manufacturing.One of the main challenges for manufacturers all over the world is the increasing difficulty in attracting labour, especially skilled labour. This situation is partially due to demographic changes, but also down to younger generations having a negative perception of the manufacturing industry. Such an opinion stems from misconceptions that jobs are unsafe, unfulfilling and lacking in opportunities for professional development and career advancement.
In the past, many companies outsourced production, especially to Asia. But with wages dramatically increasing in many Asian countries, and with supply chain challenges in recent years caused by Covid and geopolitical uncertainty, this strategy seems outdated.
To attract younger talent, businesses must remember that each generation will have different expectations of work. For younger employees, job choices are often influenced by the clarity of a particular career path. Cobot automation can offer this group a dynamic business environment, where technology and automation make jobs more modern, exciting and intellectually stimulating.
For Volvo Cars, being able to attract and retain talented employees is a major part of its journey towards a higher level of automation throughout their operations.
Says Lämkull: “We have a philosophy that we’ll be the most wanted employer, and we want to attract the most talented people. This means we have to offer interesting tasks and picking things from a box all day is not very stimulating or sustainable. However, being a robot or surveillance operator, or programming, maintaining and installing robots, is much more attractive and interesting work. That’s more of an engineering job. Then we can attract the most talented people. And we also become a more wanted employer. This new technology is a facilitator for attracting younger and talented people and retaining them in the company.”
For further information www.universal-robots.com


