Kiwa appoints Dugard as UK agent

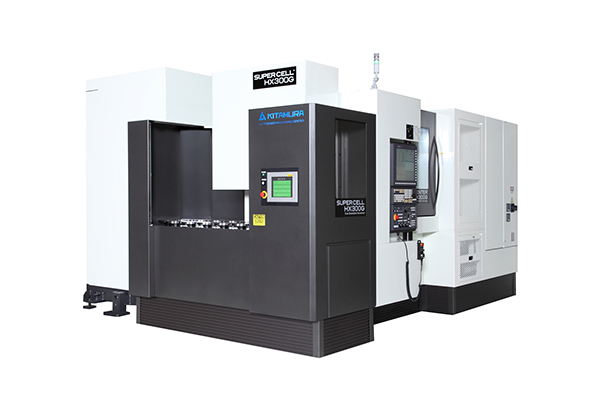
Dugard is the new exclusive agent throughout the UK and Ireland for Kiwa Machinery. Based in Nabari, Japan, Kiwa manufactures horizontal machining centres which feature a tool changer and multi-pallet system that is upgradable from a two-pallet, 120-tool machine to a six- or eight-pallet machine with 220 tools. This gives customers the necessary flexibility to meet any future expansion needs without having to buy a completely new machine.

OLYMPUS DIGITAL CAMERA

Featuring rapid traverse speeds (up to 80 m/min on the KH-400 model) as well as direct drive (up to 15,000 rpm) and built-in (up to 20,000 rpm) spindle options, Kiwa machines feature a patented hybrid slideway design that combines roller and boxways. A compact footprint is another attribute, at just 1.6m wide for a HMC with 500 x 500 x 500 mm travels (Kiwa KH-4100) in the X, Y and Z axes.
For further information www.dugard.com

RBS facilitates MBO at Fife Fabrications

Fife-based precision sheet metal manufacturer, Fife Fabrications, has secured a seven-figure funding deal from Royal Bank of Scotland to assist the company in undertaking a management buy-out.

The company will now be owned and operated by its four remaining directors John Penman, Craig McIntosh, Steven Smith and Roberto Morris, after they were supported by RBS to purchase the business from majority shareholder, Archie Smith, upon his retirement. As well as the recent funding support, Royal Bank of Scotland has also assisted the company in creating and implementing a three-year business plan.
For further information www.rbs.co.uk/corporate

Solving the UK’s productivity puzzle

SME manufacturers are looking for productivity gains from their workforce and existing equipment ahead of investment in automation, according to the latest National Manufacturing Barometer. The quarterly survey, which is conducted by SWMAS in partnership with Economic Growth Solutions, asked over 280 manufacturing industry leaders how they plan to increase productivity at their business.

Just 43% of respondents said they are planning to invest in new equipment and only 40% are planning to recruit to meet future increases in sales – the lowest recruitment figure the Manufacturing Barometer has reported since 2013. Despite this, an overwhelming majority of firms (61%) reported an increase in sales over the past six months, while 59% are confident this trend will continue.
For further information www.swmas.co.uk/knowledge

Measuring cogwheels at global press manufacturer

What can be done when the production machines for an essential component have been discontinued and the process simply takes too long? At Schuler Pressen AG, a manufacturer of pressing and stamping machinery, the decision was taken to find a new way of producing gears – using profile cutters. This is where Blum-Novotest’s TC64-Digilog scanning touch probe came into play. The probe enables the examination of the interlocking tooth and ensures that the process as a whole is consistent and verifiable.

At Schuler AG, gears for large press drive shafts were in the past produced with the aid of special gear-cutting machines. However, shaping the gears alone takes between 16 and 19 hours. Moreover, the machines are now obsolete.
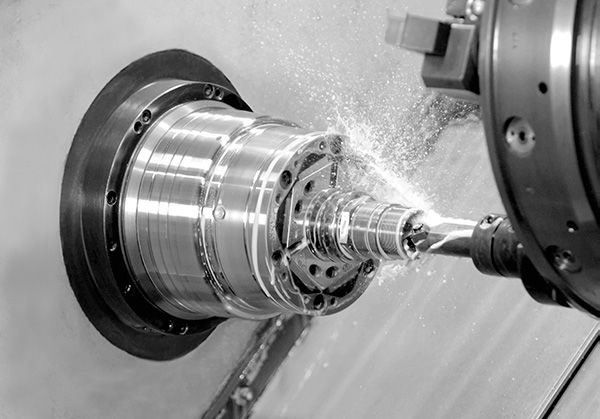
The solution to this issue came in the form of milling the drive shafts on a turn-mill machine using a specially manufactured profile cutter. To reduce handling and improve quality and consistency, the company decided to carry out measurements on the machine.
The advantage of the Digilog touch probe is that it can perform both digital measurements as well as analogue scans. This means that it is possible to guide the probe over a surface and register measurement data continuously.
Complete cogwheel inspection consist of 144 individual measurements on a slanted track along the whole tooth flank. This includes 36 teeth with two flanks each in both halves of the double helical gear. The entire procedure only takes 13 minutes at a scan speed of 1.8 m/min. During this time, the Digilog touch probe records 570,000 individual measurement values. However, only the linear axes are used during the scan as this then excludes any errors of the rotary axes used for production.
For further information www.blum-novotest.com

AFRC achieves standard for material tests

The University of Strathclyde’s Advanced Forming Research Centre (AFRC) has received international accreditation for three laboratory testing and calibration techniques, marking a significant endorsement for the centre’s materials testing and research capabilities.

OLYMPUS DIGITAL CAMERA

AFRC has become one of only a few organisations in the UK to gain ISO 17025:2005 for measuring the geometry and dimensions of parts with a CMM. Similarly, the centre is one of only a small number of places in the UK to be accredited to ISO17025 standard for measuring residual stress in engineering materials and components using both X-ray diffraction (XRD) and incremental central hole-drilling (ICHD) methods.
ISO 17025:2005 is the AFRC’s third accreditation, adding to its ISO 9001 and BS18001 certificates. The former recognises the centre’s ability to meet customer and regulatory requirements, while the latter assures a high level of health and safety.
Dr Salah Rahimi, principal materials fellow at the AFRC, says: “By achieving this international standard, our expertise in materials research has been recognised at the highest level. It underlines our commitment to advancing our research in this area and further develops the trust our customers place in us to work on their projects.
“For a number of years now we have been investing heavily in our materials research capabilities, particularly in the area of residual stress,” he adds. “These capabilities are the backbone of many of the centre’s research projects. This standard acknowledges all of this hard work and gives further credit to our research findings.”
For further information www.strath.ac.uk/research