Mazak debutsthree-turret turning centre

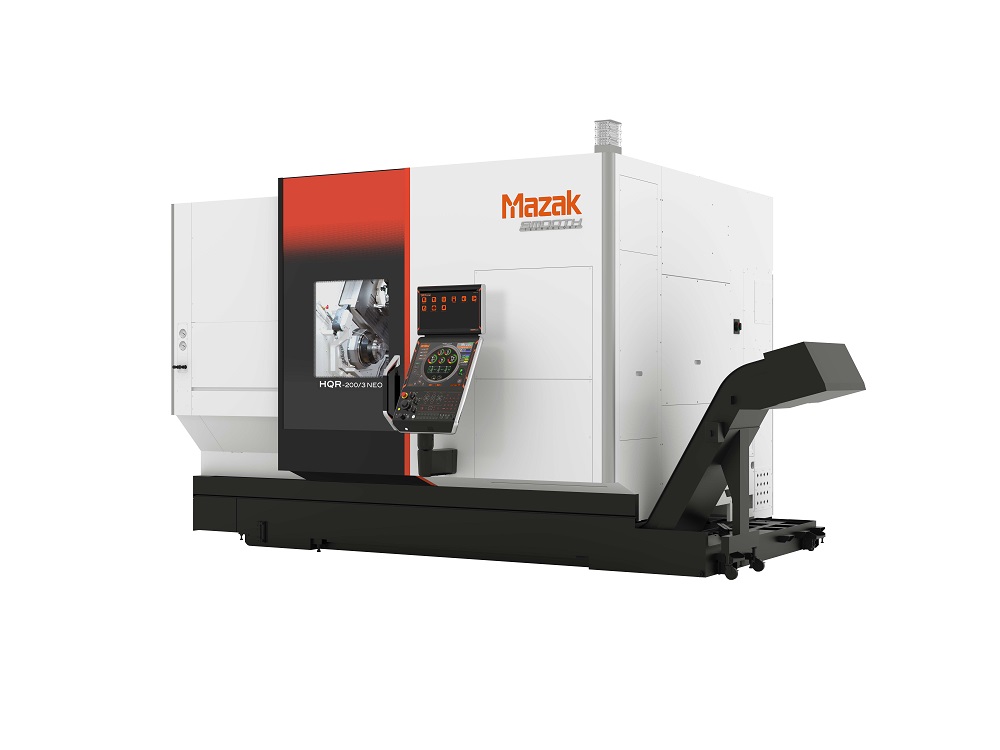
Yamazaki Mazak unveiled the latest addition to its range of high-volume turning centres at the AMB 2024 exhibition in Stuttgart recently. The new HQR-200/3 NEO promises increased levels of productivity alongside high accuracy and efficiency.

Mazak’s HQR-200/3 NEO features three turrets and two spindles. With manufacturers striving for productivity and profitability, the additional third turret achieves a faster return on investment by reducing cycle time by approximately 25%, based on an example component produced using a two-turret configuration. The added tool stations enhance processing capabilities to complete complex parts in a single set-up.

Suitable for medium-to-high batch sizes across the aerospace, automotive and general subcontract industries, the new machine design – which is only 120mm deeper than the two-turret version –increases the maximum workpiece size for lower-turret chuck work from 212 to 320mm diameter. 

The HQR-200/3 NEO on show at AMB was part of a model series comprising two spindle sizes and three turrets. Complementing the standard 65 and 80mm diameter bar-working capability, the HQR-200/3 NEO is available with an optional enlarged 112mm spindle bore for bar work up to 102mm diameter. Unique to Mazak, this enlarged spindle bore option facilitates the machining of prismatic components from bar material using only a turning centre – work that otherwise would require a machining centre to complete. 

Enhanced automation features include a redesigned unloading hand that contributes to a 20% reduction in unloading time compared with previous models, while the Smooth Oscillating Cutting function automatically breaks up chips and swarf to prevent unwanted build-up. 

More information www.mazakeu.co.uk

G-Tech invests in new Nakamura-Tome

When the turning department at Merseyside-based G-Tech Engineering was having difficulty keeping pace with demand, the company recognised it needed to reduce cycle times and lead times, and add one-hit machining that could take place lights-out. The answer to these dilemmas arrived in the shape of a Nakamura-Tome AS200LMSY turn-mill centre from the Engineering Technology Group (ETG).

As a high-precision subcontract machine shop, G-Tech Engineering has a host of machine tools from a variety of vendors, but two stand-out machinesinclude a 30+ year-old Nakamura TW10 and an ageing Nakamura WT150. Both purchased second-hand, these machines justify their place on the shop floor as they still retain their precision, productivity levels and reliability. So, when it came to buying a new machine, it was an obvious choice for the Wirral company.

Andy Kirkwood,senior production engineer at G-Tech Engineering, says: “We needed to replace a reliable but ageing two-axis chucking turning centre with something more up-to-date. We selected a Nakamura-Tome AS200LMSY to join our already mission-critical Nakamura TW10 and WT150 multi-axis turning centres.”

Undertaking a lot more one-hit machining of parts, the new Nakamura-Tome AS200LMSY saves both time and labour. 

“It also allows us to maintain demanding geometric tolerances consistently and repeatably, such as flatness concentricity of less than 0.03mm between spindle transfers over a diameter of 150mm,” says Kirkwood. “Another new feature proving invaluable is the Y-axis travel of 80mm (±40mm). This is excellent for the footprint of the workstation and saves us time by enabling us to complete a lot more milling operations in the same set-up, reducing the need for secondary milling operations.”

More information www.engtechgroup.com

Wenzel expands LH series of small CMMs

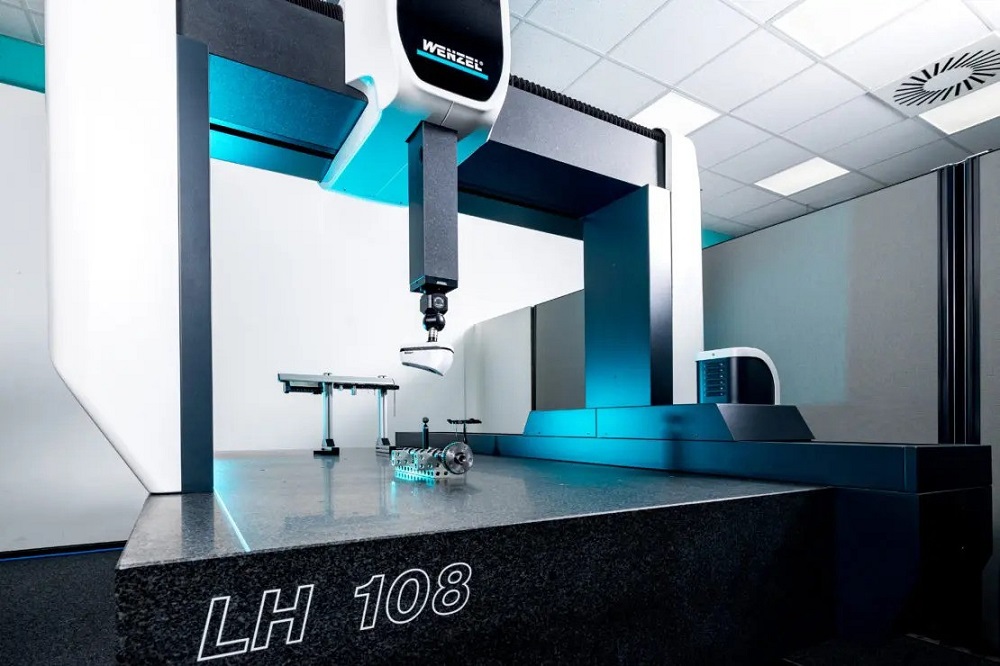
The requirements for precision and efficiency are becoming increasingly specific. For this reason,Wenzel is expanding the standard sizes of its small CMMs in the LH series. With the introduction of the new sizes LH 67, 85, 105 and 107, the company now offers a wider range of machine variants that cover different measuring ranges. In turn, the expansion enables Wenzel to respond even more specifically to the individual needs of customers.

Wenzel has not only expanded the range of variants that make up its small LH machines, but also significantly increased the productivity and dynamics of these CMMs. From the smallest size, the LH 65, it is now possible to integrate the Revofive-axis measuring system from Renishaw. Revo offers a fast and accurate measuring process that improves measuring throughput and even includes the option of roughness measurement.

Notably, Wenzel attaches great importance to sustainability. The new LH machines feature a design that minimisespower and air consumption. With an environmentally friendly concept that focuses on durability and minimal wear and tear, Wenzel says the LH series actively contributes to lower CO2 footprint. This environmentally conscious approach ensures that the machines are not only efficient, but also sustainable.

With the expansion of the LH series, the companysays it is taking a significant step towards the future. With precise, economical and environmentally friendly solutions, Wenzel’s aim is to continue offering advanced machines and providing customers with the best solutions for their individual needs.

More information www.wenzel-group.com

Laser reliably measures 10 µm tools at Zecha

When it comes to carbide tools, there are always products that push the boundaries of what was previously considered technically possible. Some of these products are made by Zecha Hartmetall-Werkzeugfabrikation GmbH,like a two-flute end mill with a diameter of 10 µm or a PCD tool that has 42 cutting edges with a diameter of 6 mm. This leads to the question of how to measure such small tools, which are many times smaller than a human hair, and how to ensure that the machining process is reproducible.

“It’s especially important that measurement takes place in the machine, because this is the only way to record and compensate for all influencing factors,” says Marcus Becker, milling application engineer at Zecha.

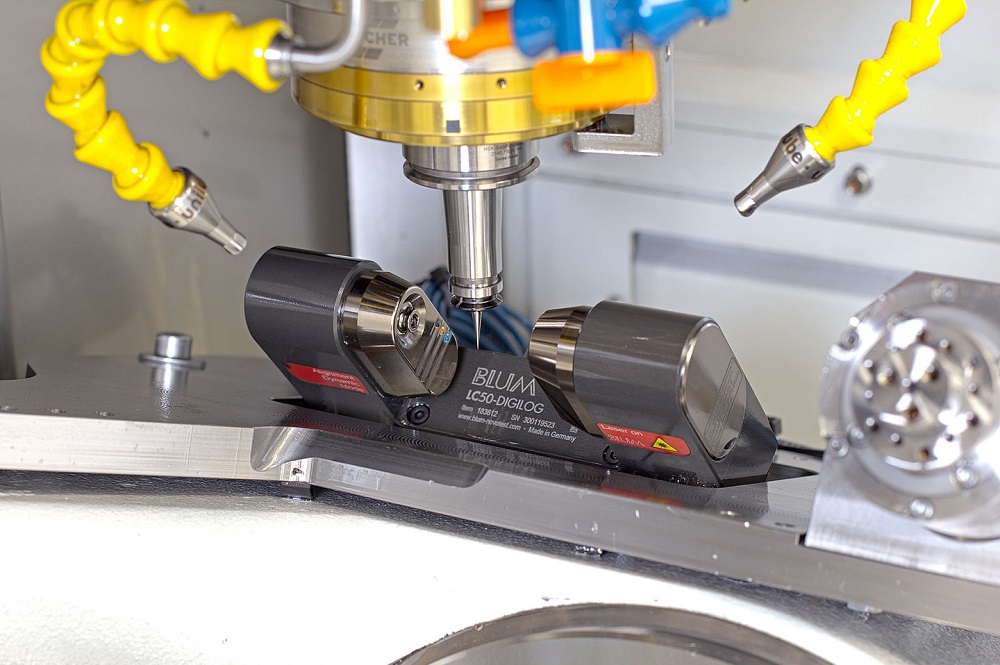
Since machine manufacturer Kern has been integrating laser measuring systems from Blum into its precision machines for many years and Zecha has its own high-end machine, it did not take long to decide on the LC50-DigiLog


In contrast to conventional laser systems that generate a single measured value when the laser beam is shaded to a certain degree, Blum says that the LC50-DigiLog laser measuring system determines the actual measured value based on thousands of individual values per second. In addition, thanks to the large number of measured values per cutting edge, the system detects contamination and cooling lubricant deposits on the tool and calculates them out of the result.

Unsurprisingly, in addition to tool measurement, tool breakage detection is also an important issue with micro-tools. This is where non-contact measurement at high machining speeds, made possible with the DigiLog system, offers great advantages.


Zecha also uses LC-Vision software from Blum-Novotest: measuring and visualisation software that generates, visualises and evaluates a variety of measurement applications on the control screen.

More information www.blum-novotest.com

Faster inspection in large-scale manufacturing

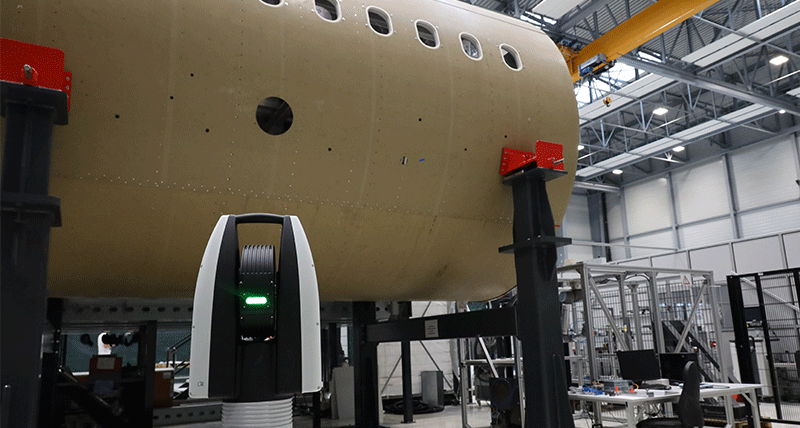
Hexagon’s Manufacturing Intelligence division has a new technology to reduce quality inspection delays in large-scale manufacturing operations. Combining laser tracking with laser radar functionality, it enables manufacturers to measure detailed features and meet tight assembly tolerances from tens of metres away. Built on established measurement and positioning technology, the new Leica Absolute Tracker ATS800 offers significant productivity improvements in large-scale part manufacturing and assembly operations by safely and rapidly measuring critical features.

The new system enables manufacturers to measure fine edges and features across large volumes productivity from a convenient stand-off distance. Whether inspecting large aerospace or automotive structures, ship sections, or wind turbine components, there is no need for operators or robots to be in close proximity to the part. This capability avoids unreliable measurements and safety issues,while also providing significant time savings. 

By combining direct scanning and reflector tracking capabilities, the system replaces two pieces of hardware with a single device. Using Hexagon’s patented PowerLock technology, the ATS800 automatically and immediately ‘locks on’ to a fixed reflector and tracks its movements in real time, providing an absolute position reference. The ability to measure target reflectors also greatly simplifies robotic automation processes, providing precise position referencing within a wider co-ordinate system when the tracker is mounted on a linear rail or an autonomous mobile robot (AMR). 

It is possible to measure an aircraft fuselage, for example, quickly and without bringing target reflectors to the part, reducing total inspection time from hours to minutes. Using multiple devices or an AMR, several fuselage sections or panels can undergo batch inspection overnight, further reducing inspection time and avoiding disruption during shifts. 

More information www.hexagon.com