Rigging Projects, a specialist in the design and manufacture of marine hardware and sailing
systems, is tapping into the advantages of Vericut CNC simulation, verification, optimisation
and post-processing software to drive home the gains available from a sizable investment in
its first five-axis machining centre. Using Vericut, the company has complete peace-of-mind
in the single set-up machining of complex parts with curved freeform surfaces – confident
there will be no collisions and no expensive repairs.
Tobias Hochreutener founded Rigging Projects in 2014 based on his vision of a rigging
consultancy business that put smart ideas, trustworthy services and high-quality products at
its core. From humble beginnings in his tiny home office, the company now has over 30
employees, four DAME Design Award Special Mentions and a high-technology
manufacturing facility in Hampshire.
Mostly serving designers and builders of superyachts and race yachts, Rigging Projects
produces an array of deck hardware that handles lines or sails. Both standard and custom
solutions are available, with the company offering an end-to-end design and consultancy
service for client projects, whether new build or retrofit. Component manufacturing takes
place at the company’s state-of-the-art machine shop in Totton, Southampton, which
should be ISO90001 accredited by later this year.
The impressive new centrepiece of the machine shop is a Matsuura MAM72-52V, a colossal
high-speed five-axis vertical machining centre described as a ‘factory in one machine’ for
variable-part/variable-volume production and extended unmanned operation. Standard
features include 130 tools on a 330 tool magazine base, a tower pallet system for extended
lights-out manufacturing and a chip-removal system.
“Prior to investing in our new Matsuura five-axis machine, we relied on three-axis machining
centres and Y-axis lathes,” explains Ian Foss, CNC programmer and machine shop supervisor
at Rigging Projects. “We could make complex parts, but it would require multiple set-ups, 9
or 10 in extreme cases. As we make most of our parts in small quantities, set-up was costing
us a lot of time.”
The five-axis Matsuura ensures Rigging Projects can make almost all of its components in a
single set-up, saving significant time and cost.
“In terms of complexity, the Matsuura is another level entirely,” says Foss. “It was clear in
my mind that, with such a high-value, we needed verification software to provide us with
confidence during machining.”
Rigging Projects scrutinised various options for its verification software. Some were ruled
out for reasons such as cost or lack of UK support, but Vericut ticked its boxes. Ian Foss had
also used Vericut previously and could vouch for the software’s capabilities. He visited the
MACH 2024 exhibition in Birmingham with Chris Whitwam, head of engineering at Rigging
Projects, to speak with the Vericut team, and the company never looked back.
Rigging Projects duly invested in a seat of Vericut, offering Verification, Multi-Axis
Machining, Machine Simulation and Auto-Diff capabilities. A cloud-based licence means that
the two CNC programmers at Rigging Projects share the single seat. It also supports home
working as necessary.
Complex parts are par for the course at Rigging Projects. Components that handle a line or
sail cannot feature sharp corners, while meeting the high expectations of yacht owners also
means aesthetic appearance is paramount. The company’s parts therefore feature many
radii, rounded edges, curves and freeform surfaces, all of which means programs with
plenty of 3D surfacing.
“We’re far more about right-first-time machining and safety than saving every second in
cycle time,” says Foss. “The Matsuura has driven huge savings in set-up time, so now we just
want to stay safe and avoid scrapping expensive workpieces. Vericut is a massive help in
that regard.”
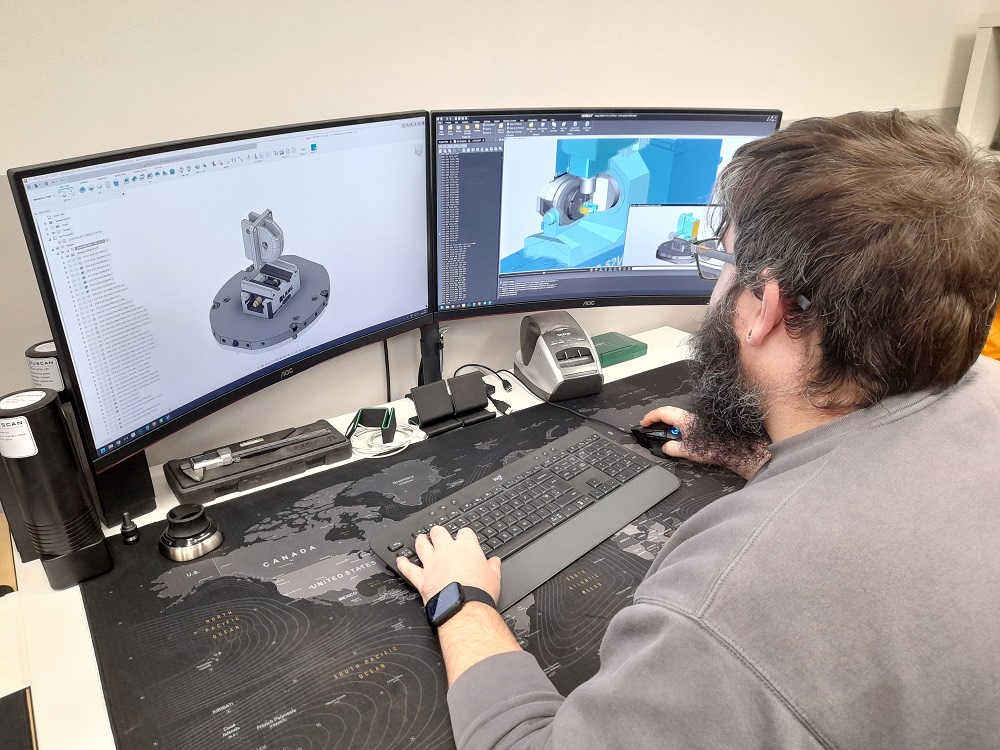
Every part programmed for the Matsuura using the company’s Autodesk Fusion 360
CADCAM software is run through Vericut. The Fusion 360 cascading post-processor
integrates with Vericut to transfer manufacturing data, a capability that allows users to
simulate and optimise NC programs in Vericut while continuing to work in Fusion 360.
“The whole process is seamless and Vericut simulation is a great asset,” he says. “Fusion 360
has simulation, but it’s a pre-post process and takes twice the time of Vericut. Moreover,
while Fusion will flag up potential collisions, there’s no tolerance-setting option. It won’t
send an alert if the tool or spindle gets within 5 mm of the table, for example. In contrast,
Vericut will let me know if we get within whatever tolerance I set. I can subsequently refine
the gap as confidence grows.”
The value of Vericut’s ability to avoid collisions on expensive machine tools should not be
underestimated. Repairs to hardware such as spindles are extremely costly, as is machine
downtime. Furthermore, a company like Rigging Projects would be forced to create new
programs for other machines while waiting for the repair. Avoiding just one collision will
likely more than cover the cost of Vericut.
“We’ve already had an incident when Vericut saved the day,” reveals Foss. “We
encountered an isolated issue with the Matsuura post-processor where it failed to pick up
the work co-ordinates after a homing routine to re-orient the table. It used the machine co-
ordinates instead, which means it would have tried to machine itself! Thankfully, Vericut
picked it up and we rectified the issue. It saved a lot of money that day and avoided a
potentially dangerous situation.”
Another valuable use of Vericut at Rigging Projects is AUTO-DIFF. Applied after simulation,
AUTO-DIFF makes sure the CNC programmers do not miss any features and avoid major
gouging or excess stock on the model that should be finished. The company also takes
advantage of Vericut’s X-Caliper measuring tool, clicking on critical features to ensure that
the programming of mid-limit tolerances meets with expectations, for example.
Concludes Foss: “With such a large, fast, five-axis machine like our Matsuura, Vericut is an
insurance policy. Moreover, with its pallet-change capability, we often leave the machine
running overnight. Knowing we have Vericut as a safety net provides real peace of mind.”
More information https://vericut.com/en-gb/


