Solving the UK’s productivity puzzle

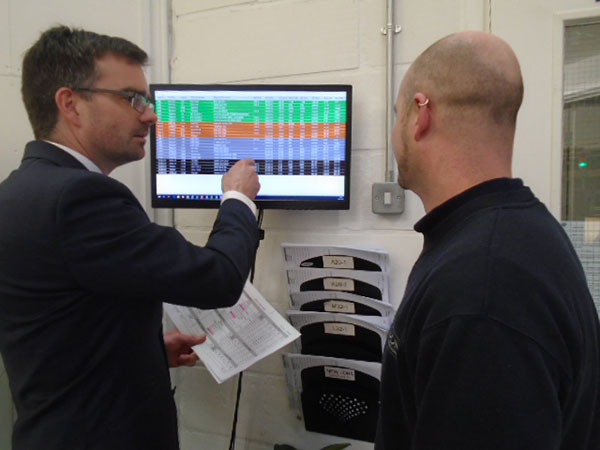
SME manufacturers are looking for productivity gains from their workforce and existing equipment ahead of investment in automation, according to the latest National Manufacturing Barometer. The quarterly survey, which is conducted by SWMAS in partnership with Economic Growth Solutions, asked over 280 manufacturing industry leaders how they plan to increase productivity at their business.

Just 43% of respondents said they are planning to invest in new equipment and only 40% are planning to recruit to meet future increases in sales – the lowest recruitment figure the Manufacturing Barometer has reported since 2013. Despite this, an overwhelming majority of firms (61%) reported an increase in sales over the past six months, while 59% are confident this trend will continue.
For further information www.swmas.co.uk/knowledge

AFRC achieves standard for material tests

The University of Strathclyde’s Advanced Forming Research Centre (AFRC) has received international accreditation for three laboratory testing and calibration techniques, marking a significant endorsement for the centre’s materials testing and research capabilities.

OLYMPUS DIGITAL CAMERA

AFRC has become one of only a few organisations in the UK to gain ISO 17025:2005 for measuring the geometry and dimensions of parts with a CMM. Similarly, the centre is one of only a small number of places in the UK to be accredited to ISO17025 standard for measuring residual stress in engineering materials and components using both X-ray diffraction (XRD) and incremental central hole-drilling (ICHD) methods.
ISO 17025:2005 is the AFRC’s third accreditation, adding to its ISO 9001 and BS18001 certificates. The former recognises the centre’s ability to meet customer and regulatory requirements, while the latter assures a high level of health and safety.
Dr Salah Rahimi, principal materials fellow at the AFRC, says: “By achieving this international standard, our expertise in materials research has been recognised at the highest level. It underlines our commitment to advancing our research in this area and further develops the trust our customers place in us to work on their projects.
“For a number of years now we have been investing heavily in our materials research capabilities, particularly in the area of residual stress,” he adds. “These capabilities are the backbone of many of the centre’s research projects. This standard acknowledges all of this hard work and gives further credit to our research findings.”
For further information www.strath.ac.uk/research

PCE to launch new inspection camera

For many years, PCE Instruments has been dealing with a wide variety of inspection cameras for all sorts of applications. The product range is continuously expanding with new models that are more compact and easy to use. When it comes to thermal imagers, ever-improving infrared image resolution and camera resolution are among market trends, as evidenced by this latest product release.

The new thermal imaging inspection camera PCE-TC 34, which complements PCE Instruments’ existing range of cameras, is about to be launched. This thermal imager stands out with its high IR resolution of 640 × 480 pixels, and its camera resolution of 5 megapixels, which is a relatively rare feature in the market.
PCE explains that the device works with an uncooled microbolometer FPA detector and can display temperatures between -20 and +350°C. Accuracy is ±2°C or ±2% of the reading.
The PCE-TC 34 recognises the coldest as well as the hottest spot, namely the hotspot, while the infrared camera has a thermal sensitivity of 0.05°C at 30°C. Further parameter specifications include a 24 × 18° field of view and a spectral resolution of 0.65 mrad. The spectral range is between 7.5 and 14 μm, while emissivity is adjustable between 0.01 and 1.0.
Image frequency on the PCE-TC 34 is 50Hz and the electronic zoom function allows 1 to 8 x zooming. Importantly, images and videos recorded via infrared can be saved to an SD card.
The 3.5” display allows easy viewing of the images and videos directly on the meter, although these can also be transferred to the computer via the USB 2.0 interface and then analysed further by means of software.
For further information www.pce-instruments.com

Greater vision with Venture XT

The Bowers Group has made available the latest Baty Venture XT vision system, which is said to include major advances in capability and software for both contact and non-contact measurement. Features include an extended 200 mm measuring range in the Z axis and a new FEA-optimised column design with integral counterbalance. The Z axis and lens/touch probe assembly have also been revised, while faster XY-axis drives, touch-screen compatible software, touch-screen joystick, greater field of view, and magnification up to 12 x zoom are among further enhancements.

Of particular note is a major redesign of the software, providing users with a self-calibrating zoom lens featuring field-of-view error correction and improved auto-focus that can now find and measure from a distance in one move. Furthermore, image-stitching capability allows a large XY area to be scanned and displayed as a single image, while a ‘layers feature’ allows other geographical information such as DXF files, dimensions and measured features to be overlaid on the camera image and reported.
Geoff Jackson, business and product development director at Baty says: “We are delighted to announce the release of the new Venture XT; a sophisticated vision system that paves the way for high-accuracy contact and non-contact measurement. We have received excellent feedback on the Venture XT since unveiling the system at the Control Exhibition in Stuttgart earlier this year, particularly regarding the new field-of-view tools, which have reduced program execution times. We are very excited to launch the product here in the UK.”
For further information www.bowersgroup.co.uk

Mitutoyo aids Cox Powertrain’s quality function

Shoreham-on-sea based Cox Powertrain has recently developed the world’s first 300 hp marine diesel outboard engine – the CXO300. Due to launch in 2018, the inspiration behind the engine was the defence industry’s drive to adopt diesel as a preferred fuel and thus reduce, or indeed end, its use of petrol.

In addition to dimensional checks, given the potential for the generation of friction and wear in moving parts, particular attention is paid to the components’ critical surface roughness parameters. Duncan Green, head of procurement, explains more: “As the surface finish characteristics of the CXO300’s parts have a massive influence on their performance, we recently searched for a surface roughness tester that was able to deliver precise results in the many surface roughness parameters that we use. After considering several alternatives, we found the answer to our needs in the Surftest SJ-500 from Mitutoyo. The instrument has proven invaluable in upholding the quality of our manufactured components throughout our engine development period and will also be kept busy coping with anticipated production volumes.”
Ken Edwards, chief inspector, adds: “As its menu-driven system is so easy to use, I was able to use all of the SJ-500 facilities immediately after its installation. It also helps that the unit has a high-resolution colour display with touch-screen operation, while the instrument’s automatic calibration function gives me confidence in the precision of the reading that I achieve. In addition to working in all of the surface roughness parameters that we use, it’s great that the unit’s detector system can be mounted laterally for transverse measurements.”
For further information www.mitutoyo.co.uk