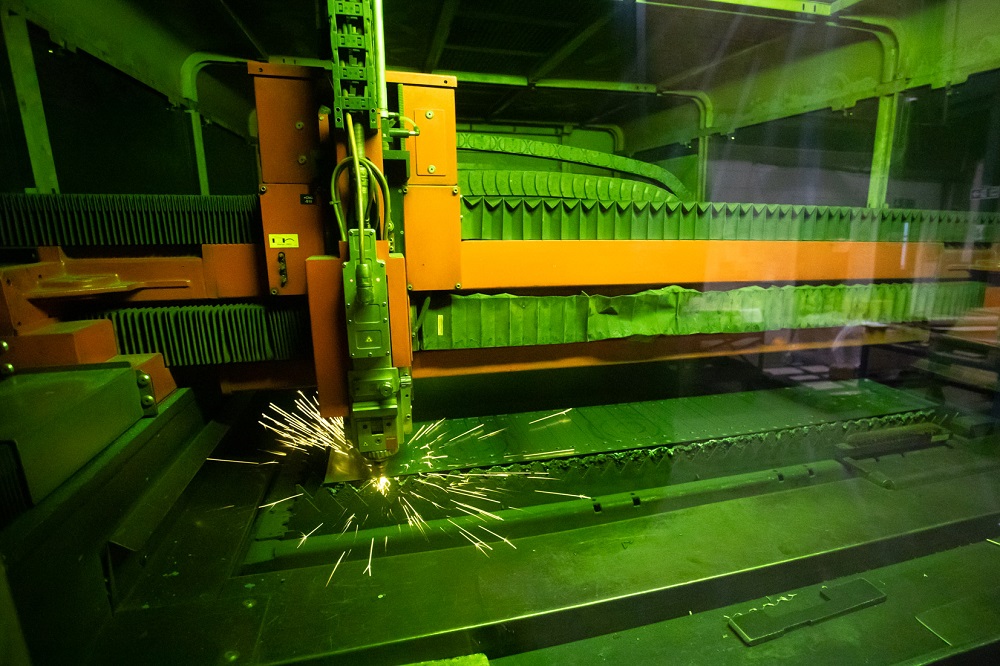
Technology puts wind in Eurotubes’ sails

Mills CNC, the exclusive distributor of Doosan machine tools in the UK and Ireland, has supplied Eurotubes UK, a global wire guide and stator/rotor winding needle design and manufacturing specialist, with four new high-performance machines. The machines – three Doosan DNM 4500 machining centres and a Doosan Lynx 2100LSY – are now operational at the company’s modern 18,000 sq ft facility in Portland, Dorset.

All four Doosan machines are machining high-precision wire guide tubes/nozzles used in the coil winding industry. The tubes/nozzles form part of automatic CNC-controlled machines that wind enamelled copper wire around a core to create electromagnetic coils.
In addition to machining its range of standard wire guide tubes/nozzles, Eurotubes also uses its new Doosan lathe and machining centres to produce customised work holding for the accurate and secure machining of its high precision tubes, nozzles and needles, as well as prototypes for OEMs and end-user customers seeking new and/or optimised tube or needle designs.

Says Greg Bedford, Eurotubes’ managing director: “The recent acquisition of four Doosan machines has helped strengthen our position in key markets and with specific customers.
“By improving our machining capacity and capabilities we’ve been able to achieve higher part accuracy and repeatability, reduce part cycle times and win contracts to machine ‘other’ complementary components used in the manufacture of electric motors and copper wound coils generally.”

The new Doosan machines have replaced several older machines at Eurotubes. These machines, although still performing adequately, could not be relied upon to deliver the consistently high and repeatable accuracies – or the superior surface finishes – required by Eurotubes and expected by its domestic and international customers.

“Consistency and repeatability are critical,” says Bedford. “When a customer purchases our wire guide tubes, nozzles and needles they have to be identical, not just in terms of their physical dimensions, but of the performance they deliver.”

The tubes and nozzles machined by Eurotubes on its Doosan machines are made from BS1407 British ‘silver’ steel, a versatile high-carbon, low-alloy tool steel that is generally supplied in 1 m bar lengths in a range of different diameters which are then cut to down to size by Eurotubes using its in-house bandsaws. Small batches are the norm (50-off maximum).

Once cut to size, blank machining takes place on the multi-tasking Lynx 2100LSY, making full use of the lathe’s integrated Y axis (±52.5 mm), 6000 rpm driven tooling capabilities and its 5” chuck sub-spindle, which enables front and back-end machining operations on the tip, neck and holder elements of the tubes in a single set up.

Tubes and nozzles designed, manufactured and supplied by Eurotubes are available in a range of sizes: the largest tubes can range from 20 up to 200 mm in length, while tube diameters/geometries vary enormously. For this reason, Eurotubes has over 7000 different designs of wire guides.

“We are involved in micro-machining and, as such, need access to technologies that can deliver tolerances to within 5 µm,” says Bedford.

A critical element of every wire guide tube is its centre hole. These can be incredibly small – down to 0.2 mm in diameter – and, as such, involve the use of small diameter drills and reamers, in conjunction with tube drawing and wire EDM technologies.

Drilling and reaming operations take place on the DNM 4500 vertical machining centres which, in addition to their rigid design and directly coupled 15,000 rpm spindles with integrated thermal compensation, feature large worktables (1000 x 450 mm) and through-spindle coolant.

The dimensions of the tables, combined with the small size of the components that require machining, enable multiple-part set up and machining in one hit using Eurotubes’ bespoke multi-vice work-holding solutions, thereby improving the company’s productivity and operational efficiencies.

Says Bedford: “Owing to the small and delicate nature of the components being machined, we design our own work holding and clamping solutions to protect the parts and ensure their integrity during machining.”

A critical feature of Eurotubes’ nozzles and tubes are the small diameter holes that run in perfect alignment from one end of each tube to the other. These holes require machining to high accuracy.

“The cylindricity, concentricity and surface finish of the internal holes are important, and affect wire feed rates and wire tension,” explains Bedford. “They also ensure protection of the enamelled copper wire and help reduce friction. Our DNM machines, combined with the skill and expertise of our staff, ensure that the wire guide tubes we manufacture are up to the job.”

Eurotubes’ three DNM 4500 vertical machining centres and the Lynx 2100LSY multi-tasking lathe are the first Doosan machine tools on site and, according to Greg Bedford, “they won’t be the last”.

He continues: “We’re committed to continuous improvement and are always ready to invest in our people, plant, equipment and processes when the time is right. When we entered the market for new vertical machining centres, we did our homework, drew up a list containing our needs and wants, and approached a number of suppliers. We needed vertical machining centres equipped with good-sized work envelopes, powerful and high-speed spindles, and the latest Siemens control.”

Eurotubes visited Mills CNC’s Campus facility in Leamington.
“We liked what we saw and recognised that the performance and reliability of Doosan machines – combined with Mills CNC’s best-in-class aftersales service and support – were difficult to beat,” says Bedford. “These strengths, plus the fact that Mills can deliver and install Siemens-controlled machines quickly from stock, all impacted on our decision-making.”

He adds: “The part accuracies, process reliability and machining flexibility we experienced from investing in the DNM 4500 machines meant that when, some months later, we were looking at acquiring a Siemens-controlled compact, multi-tasking lathe – we again approached Mills with our requirements.”

Eurotubes was created in 1987 by Rob Bedford (Greg’s father) who built the company from scratch and pioneered the use of wire guide tubes in the coil winding and motor winding industries. Fast forward to 2021 and the company now employs 21 members of staff and, in its 34-year history, has manufactured over 4.5 million tubes.

Concludes Bedford: “I am incredibly proud of what my dad achieved. His commitment to innovation and quality, and his entrepreneurial spirit are at the heart of the company.
“Through investing in the latest technologies and employing expert staff with a ‘can do’ attitude, Eurotubes is now the undisputed market leader in the design and manufacture of wire guide tubes and needles.”

For further information
www.millscnc.co.uk

Horstman invests in precision metrology

Part of the Renk group, Horstman is a manufacturer and global supplier of suspension systems for heavily armoured and tracked vehicles. The company also produces safety-critical engineering components allied to its core products for the subsea and aerospace industries. A transatlantic investment has seen the company advance its quality control procedures significantly by installing identical new co-ordinate measuring machines (CMMs) at its factories in Bath, UK and Sterling Heights, US. Made in Britain by LK Metrology, the new CMMs feature compact and versatile tactile scanning probe technology to capture data on the size and shape of components more accurately and much faster than was possible previously using touch-trigger probing alone.

The factory at the company’s headquarters in Bath, which dates back to the 1920s when the original suspension bogie for military vehicles was developed, was an early adopter of CMMs in the 1960s. Horstman has had a succession of different CMM models over the years, most recently three machines of small, medium and large capacity from another supplier. The new LK Altera M 25.15.12 bridge CMM, which has a large inspection volume of nominally 2.5 x 1.5 x 1.2 m and is equipped with traditional touch-trigger probing and a tactile scanning probe, replaced the smallest of the three earlier machines.

Trevor Prynne, business development director at Horstman, says: “The contact scanning capability of the new LK CMMs acquires many hundreds of surface points every second, enabling interrogation of form as well as size and position, including of bores 400 mm deep.
“This latest investment in technology is in line with our desire to remain at the forefront of high-precision, high-integrity engineering, allowing us to continue offering customers the guaranteed service in design and production that ensures soldiers have the best combination of armour, firepower and mobility.

“At Horstman, we are proud to supply products that exceed customer expectations,” he continues. “To do this we ensure quality is not just a word that is spoken about during component inspection, but something that permeates throughout the whole group. All three of our locations, including Ontario in Canada, have a minimum of ISO9001 accreditation, with the UK site also having AS9100 Rev D.”
Stephen Ellis, quality manager at the Bath factory adds: “As we’re involved in the supply of safety-critical defence products, we decided that we needed a second large-capacity measuring machine which could inspect every size of component that we manufacture to provide redundancy in our capabilities if one of the CMMs should break down or require servicing. LK offered us the best package in terms of technology and accuracy of measurement at a mid-range price.”

He adds: “We manufacture some components for our US factory and they produce others for us, so it was expedient to duplicate the metrology facility at our Sterling Heights plant. Crucially, LK is able to comprehensively support that installation as well, as it has a subsidiary in New Hudson, Michigan, just 40 miles away.”

Ellis goes on to say that LK provided a good training and support package in both locations, so the respective inspection teams either side of the Atlantic are able to prepare and share CMM programs seamlessly. LK also supplied the two factories with the latest version of its CAMIO 2021 software for programming and reporting. It is possible to retrofit the software to other CMMs on both sites in the future, thus enabling interoperability between the different makes of CMM. CAMIO features a convenient graphical user interface, single and multi-part loading instructions, program queuing, and advanced error recovery for automated inspection.

The Horstman group is introducing new designs with increasing regularity and to ever tighter tolerances for hydro-pneumatic suspensions, electronic and electro-hydraulic active vehicle ride management systems, military thermal management systems, and aerospace and subsea products. For this reason, the metrology departments were often under pressure and wanted to move quality control technology forward regarding speed of data acquisition and the accuracy of data collected, in particular for form measurement.
Component sizes are up to 1.15 m in length by 0.75 m in diameter. Materials include steel, titanium and aluminium. In addition to measuring dimensions, the CMM rapidly captures shapes and compares results with the corresponding CAD model to ascertain fit and finish. Typical measurement cycle times are between 10 minutes and one hour. Features with a total tolerance down to ±7 µm require inspection, while some parts have reflective surfaces, which is why Horstman has not opted for the rapid, high-density point cloud acquisition of laser scanning. This process would entail surface preparation and, in any case, laser sensors do not offer the accuracy and repeatability of tactile probes, in the opinion of Ellis.

The SP25M scanning probe comprises two sensors in a single housing. Users can switch between a choice of five scanning modules with styli lengths from 20 to 400 mm, as well as modules compatible with Renishaw’s TP20 range of touch-trigger probes. This capability enables scanning and touch-trigger probing in a single probe system.

When using the scanning probe, the system can measure up to 1000 points per second to deliver a precise statement about deviations in profile and form that can affect product fit and function. Such high-speed performance is partly due to improvements incorporated into the latest LK CMM controller. These developments signify a major step forward in helping manufacturers to be competitive in today’s global market by reducing bottlenecks in the quality control department and cutting non-value-added inspection costs. Increased speed also enables metrology to keep pace with manufacturing and provide prompt feedback for adjusting production processes.

It is not only the LK controller and software that deliver superior tactile scanning capability. The stiffness of the CMM structure, with its ceramic beam and spindle, has optimal stiffness-to-weight ratio for high responsiveness and mechanical stability. Furthermore, LK’s single-orifice, grooved-face air bearings provide a smaller air gap with greater stiffness than standard air bearings to enhance rigidity. These attributes combine to suppress deflection of the machine structure during the repeated, rapidly accelerating and decelerating axis movements necessary for efficient continuous tactile scanning, especially on parts of complex geometry.

For further information
www.lkmetrology.com

Faro’s ‘sum of the parts’ aids Darchem quality

“The whole is greater than the sum of the parts” is a phrase that could have been coined to describe the remarkable advantages gained through the interaction of three technologies from Faro. The synergy between the company’s FaroArms, laser line probes and proprietary eight-axis scanning platform, resulted in the creation of the Faro eight-axis ScanArm range – the first and still the only eight-axis portable metrology solution.

Faro says that its eight-axis Quantum FaroArm sets new industry performance standards for measurement consistency, reliability and speed. The use of an eight-axis rotary scanning platform removes the need for an operator to move around an item to scan it. Instead, the object under inspection mounts securely on to the rotating platform and revolves as scanning takes place. Each time the component is repositioned, precise data related to its orientation transmits to the system’s software. In addition, to reducing operator fatigue, Faro’s ergonomic innovation delivers reductions in inspections times of up to 40%.

With the intention of advancing the company’s scanning capabilities, increasing its precision standards and boosting inspection throughput speeds, Darchem Engineering recently implemented this advanced Faro system. A wholly-owned subsidiary of US-based TransDigm Group Inc, Darchem Engineering provides a range of products and services primarily aimed at overcoming the high-temperature and thermal engineering problems of customers.

Since its inception in 1954, the County Durham based business has developed into a leader in its chosen fields and now serves a range of technically demanding industries, including the aerospace, motorsport, on/off highway, marine, power generation, defence, nuclear, and oil and gas sectors.

Explaining the purchase and use of the Faro eight-axis Quantum FaroArm, Darchem Engineering metrologist Adam Clark says: “In collaborating with our customers across multiple industries, we design, develop and manufacture a variety of intelligent engineered solutions. We make our products from materials that include titanium and ‘exotics’ such as Inconel, which ensures their suitability for the most challenging of applications, like high-temperature lightweight thermal and fire protection fabrications.”

He adds: “Given the important protective functions for which our manufactured products are intended – and the safety-critical roles they perform – we carry out meticulous quality control checks at all stages of manufacture, then before dispatch we undertake thorough final inspection routines.

“Although we have been enthusiastic users of Faro Arms for many years, as an increasing number of our products are flexible and deformable, the contact probes of our previously used FaroArms had the potential to deflect some of our parts during inspection and cause dimensional errors.”

To remedy this situation, Darchem Engineering decided to contact Faro UK and check-out the company’s latest technologies.

“Along with looking to purchase Faro equipment that had both contact and non-contact scanning capabilities, we hoped to further improve our precision capabilities and boost the efficiency of our inspection routines,” explains Clark. “Faro’s technical staff suggested that an eight-axis Quantum FaroArm was would satisfy our needs and a demonstration was duly arranged.

“Having been happy with the performance of our previous FaroArm, in the course of the successful demonstration that was performed on a cross section of our products, it was interesting to see the many technical developments that had been made to the company’s latest-generation technology and an order was placed with Faro UK.”

He continues: “On delivery, it helped that our staff were already skilled in the use of our older Faro Arm. Therefore, following product training, our operators soon mastered the new instrument. Now in regular use, in addition to delivering advanced non-contact scanning, the Faro eight-axis Quantum FaroArm has enhanced our precision standards and significantly increased our inspection efficiencies.”

Before starting a scanning routine, Darchem fixes the component to its new FaroArm’s integrated eight-axis rotary scanning platform. Then, instead of moving the part around and manipulating the FaroArm into position, operators are able to remain in a relatively static position and rotate the component to ensure that all parts of the component can be easily accessed and quickly scanned. In addition to accelerating the company’s scanning routines, the use of the rotary scanning platform has reduced operator fatigue.

“It also helps that our Faro eight-axis Quantum FaroArm interfaces very easily with Polyworks, as we use this 3D dimensional analysis and quality control software throughout our factory,” states Clark.

For over 40 years, Faro has delivered 3D measurement arm technology, allowing manufacturers to quickly collect precise 3D measurements for verification of product quality during inspections, tool certifications, CAD comparison, dimensional analysis, reverse engineering and more.

The Faro eight-axis Quantum FaroArm, as purchased by Darchem Engineering, represents an all-inclusive contact and non-contact metrology solution that allows users to significantly accelerate and simplify their measurement and scanning activities. The high-resolution system provides high-accuracy, rapid data capture and is suitable for a multitude of inspection and quality control tasks. The Faro system is optimised for point cloud comparison with CAD, rapid prototyping, reverse engineering and the 3D modelling of freeform surfaces.

Darchem’s eight-axis Quantum ScanArm combines three innovative elements, a Quantum FaroArm, a FAROBlu laser line probe (LLP) and an eight-axis scanning platform.

The Faro LLP provides the optimum balance of speed and accuracy, with the added benefit of colour scanning. It features an extensive laser line width of 150 mm, enabling the scanning of a larger area quickly and efficiently. The extra-wide scan stripe and fast frame rate boosts productivity by increasing coverage and reducing scanning times.

Faro’s LLP is able to seamlessly scan across a multitude of challenging materials with diverse surface characteristics regardless of contrast, reflectivity or part complexity, without the need for special coatings or target placement.

The most recently introduced element to the Faro eight-axis Quantum ScanArm is its integrated eight-axis rotary scanning platform. This industry exclusive accessory decreases scan time by up to 40%, while maintaining accuracy. Whereas previously a user would need to register multiple point clouds together via post processing in point cloud software, through the use of Faro’s eight-axis table, the most complex of scanning tasks can be performed and captured in a single point cloud.

For further information
www.faro.com

CAM system delivers case load of benefits

When Pro-Cut Precision Engineering opened its doors for business just over 10 years ago, the objective was to invest in the very latest equipment to ensure the Milton Keynes business could machine high-quality components in short lead times. As a company that has acquired a multitude of three and five-axis Hurco machine tools for machining complex parts, component programming was becoming a time-consuming process – that was until Pro-Cut invested in the hyperMILL CAM system from Open Mind Technologies.

The subcontract business works across several areas, serving sectors such as motorsport, defence and industrial machinery. Explaining the reasoning behind investing in hyperMILL, Pro-Cut Precision Engineering programmer, Alex Parris-Hammons, says: “We previously had a CAM system, as well as programming many components at the machines, but we were losing time by not being able to stay ahead of the game. hyperMILL allows us to program offline and do all the programming while the machine is cutting a current job. This enables us to build a queue of future jobs.

“We were doing five-axis work with our previous CAM system, but found the collision detection wasn’t great,” continues Parris-Hammons. “In fact, we had to lie to the software system to get the parts we needed. With hyperMILL that isn’t the case; it identifies where the collisions are, both in an internal and external simulation. It provides a list of where the collisions are, and it makes it simple to correct any problems. hyperMILL is known for its collision detection and with that, you can trust the billets going on the machine will come out as 100% correct parts.”

Now with two seats of hyperMILL, Parris-Hammons recalls the initial installation of the system: “The plan was to use it initially for simple components and then build-up to the full capability of hyperMILL, which is five-axis simultaneous tool paths. This would give us better surface finishes and faster machining times. In the early stages, I called the Open Mind technical support team and they were able to walk me through any scenarios by using Team Viewer and a telephone call to resolve any issues.”

Steve Holmes, managing director at Pro-Cut Precision Engineering, takes up the story: “We purchased hyperMILL a little while ago actually, and Alex had done the training, but we naturally kept falling back to our existing CAM provider due to tight deadlines and several other factors. For a little while, hyperMILL was just sitting there, but then this one particular part came along. It was a challenging aluminium electronic casing component that was outside the scope of our current CADCAM system. So, we decided that this was the part that we begin with, where we jump in and manufacture with five-axis simultaneous hyperMILL machining.”

As the programmer tasked with creating the program for the complex aluminium electrical housing part, Parris-Hammons highlights the features that stood out: “The five-axis and the Z-level finishing is very good with this software. We just have to click on a surface, and hyperMILL will machine it. Once you understand how it works, it’s very easy to use and get up to speed. It means we can quickly reach competence levels where we can do complex work much easier.

“The tool library is also very good,” he adds. “It allows you to input a lot of information on each tool and the respective holder. When you put that information into the system to do the simulation, it will then calculate whether it is going to collide with your fixtures or the machine. It will detect and protect itself.”

Taking a closer look at the electrical housing part, Parris-Hammons says: “For the first operation we held the part in a Lang vice, machined the top and all of the internal sections, as well as the outside profiles. This first operation alone required upwards of 25 tools and the hyperMILL tool library keeps that information ready, so we can access it for other upcoming jobs. This makes the whole process of programming a lot quicker and easier.”

Discussing potential collisions and tool path and strategies, he says: “With the tool library we can set up a tool length and how far the tool protrudes from the holder; that data is used when hyperMILL is calculating. This avoids collisions and also tells us how much further the tool needs to stick out to avoid a collision.”

Following the first operation, the aluminium housing was turned over for machining on the opposite face.

“We made a fixture plate to locate on the inside of the component and threaded the tabs to pull down the periphery of the part,” explains Parris-Hammons. “On the second side of the part, we used six tools. Programming the component took a couple of days. However, now that I have undergone this steep learning curve and know what to do, programming similar future components would take significantly less time – we could probably program this part in half a day now.

“Previously, this part would have been very difficult to program without hyperMILL. The second side of the component would have undoubtedly made our previous CAM system crash as there is a lot of information and a lot of code being produced. With hyperMILL, we have machined the complete component in just 15 hours. Now that we have used this very complex part as the first push to get into hyperMILL, we’re very pleased to be using it for all of our parts.”

Concluding on why the company opted for hyperMILL, Holmes says: “Our previous system had its merits, but it didn’t have the process security, collision detection and avoidance, and it would have been incapable of the complex five-axis work that hyperMILL can breeze through. On the shop floor, it’s still early in our learning curve to qualify all the benefits, but we can already see that it’s improving surface finishes. Additionally, when we are rough machining, there is no ‘fresh air cutting’ with hyperMILL – our previous system didn’t have this level of intelligence. hyperMILL really is the next level.”

For further information
www.openmind-tech.com

MRT ‘turns the tables’ on Brother machines

Established in 1947, MRT Castings specialises in the manufacture of high-quality aluminium die castings. In addition to regularly investing in the most up-to-date casting technologies, the progressive family business has introduced a range of complementary end-to-end services over the past 70 years. Along with state-of-the-art high-pressure and gravity die casting, the Andover-based company now provides tool making, surface finishing, mechanical assembly and, not least, a comprehensive CNC machining provision.

The mainstay of MRT Castings’ impressive machining facility is its collection of Brother CNC vertical machining centres supplied by Whitehouse Machine Tools. MRT’s policy of standardising on machines from a single supplier provides enhanced flexibility, as both operators and products are interchangeable between machines.

Additional benefits include the use of standardised fixtures, tooling and CNC rotary tables.
Having previously used two well-known brands of CNC rotary tables, following advice from Whitehouse Machine Tools, the company’s most recently installed Brother VMCs feature PL Lehmann CNC rotary tables.

MRT Castings’ managing director Phil Rawnson says: “We are able to support our customers from initial ideas, through product development and design for manufacture stages, to full production and logistics. Our extensive in-house CNC machining facilities are at the very core of our operations. To help ensure short lead times and the manufacture of premium quality products we use a range of Brother machine tools, the fastest machining centres available.

“Such is the quality and cost-effective nature of our CNC provision, in addition to machining die castings that are produced in our own foundry, we also machine components cast by other companies,” continues Rawnson. “As we usually perform small-to-medium production runs on a diverse range of products, we need each of our machine tools to deliver the best possible levels of flexibility, while also striving to maximise machine utilisation times and minimise set-up times. Over several years, our use of rotary tables has made important contributions in these areas.”

As many of the components manufactured at MRT Castings are relatively complex, without the use of rotary tables the company would need to perform two or three different machining operations, rather than producing parts in one hit. The ability to finish components in a single cycle means that MRT does not face the issues related to the accurate relocation of workpieces for subsequent machining operations.

“Over the past 12 months we’ve been involved in the casting and machining of critical parts that were urgently needed for medical ventilators,” explains Rawnson. “To help keep pace with this challenging production schedule we brought the planned purchase of six Brother vertical machining centres forward, bringing our current Brother VMC count up to 25 machines. To provide highly efficient four-axis capabilities, each of our latest six Brother VMCs feature rotary tables from PL Lehmann, which has provided us with a range of advantages.

He adds: “Despite our Lehmann CNC rotary tables being extremely robust and able to perform all the tasks we require, when compared with our previous rotary tables they are relatively small. Their reduced footprints mean that, when mounted inside our Brother VMCs, they take-up minimal area. In addition to releasing machine bed space for other work holding, the reduced size of Lehmann CNC rotary tables means that, when they are not required, they can often remain inside our VMCs while other machining operations take place. Additionally, the reduced height of Lehmann CNC rotary tables helps to increase the available working volume of our machines.

“As well as benefiting from the quality of Lehmann’s products, we received excellent installation and interface help from Whitehouse Machine Tools and PL Lehmann’s UK service agent. The machining flexibility, precision and speed delivered by our Lehmann rotary tables is now proving invaluable to MRT Castings.”

PL Lehmann has been involved in the design and manufacture of high-quality rotary tables for over four decades. The in-depth expertise gained throughout this time is reflected in the quality of the company’s products. To help reduce parts and enable the availability of Swiss quality at a cost-effective price, Lehmann rotary tables are based on a novel modular design system. This highly efficient arrangement enables the availability of a wide range of CNC rotary table options to meet customer needs.

Four sizes of Lehmann CNC rotary tables are available – 507, 510, 520 and 530 mm – with centre heights from 110 to 240 mm. Due to the company’s modular design approach, from these size options it is possible to offer more than 170 different rotary table variants. Models are available from basic single-spindle 4th axis units, to four-spindle tilting rotary tables with 4th and 5th axis capabilities. Now, rather than compromise and obtain a rotary table that represents a close match to a machining requirement, Lehmann customers are able to take delivery of a high-quality CNC rotary table that corresponds exactly to their specific needs.

In addition, the company’s modular design system means that the purchase of a well-engineered Lehmann CNC rotary table represents a safe, future-proof investment. For example, if a customer’s manufacturing requirements change, instead of investing in a new rotary table, the existing Lehmann CNC unit can be easily modified and adapted to changes in use.

Lehmann’s standardised spindle arrangement allows the use of an extremely wide range of workpiece clamping systems. As a result, in addition to standard work holding being set-up for an initial workpiece range, the system can quickly convert to accommodate other workpieces.

PL Lehmann says that its heavy-duty CNC rotary tables have earned a global reputation for performance, quality and longevity. Further aiding efficient, precision machining, the company’s robust products benefit from high clamping torque, load weight capabilities and accuracy specifications.

For further information
www.lehmann-rotary-tables.com