Latest Y-axis, sub-spindle turning centre

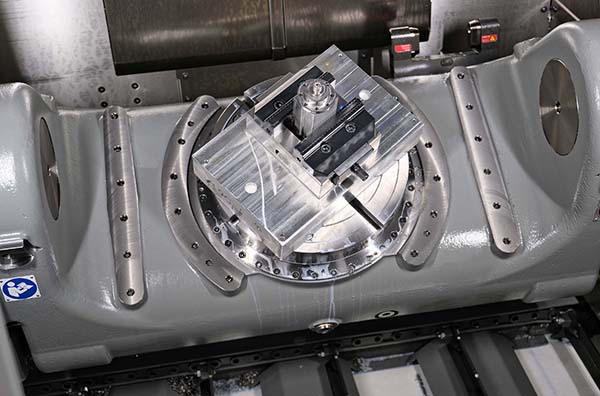
The next-generation Y-axis, sub-spindle Doosan Puma 2600SY Mk II turning centre series is now available from Mills CNC. Although the new machines are equipped with a 10” chuck, unlike Puma 2600SY Mk I models, they have a larger 81 mm bar diameter capacity. The machines are also supplied with built-in type spindles (as opposed to belt-driven spindles), which generate less vibration during cutting operations.

Further innovations include six strategically positioned heat sensors that automatically monitor and compensate for any thermal displacement during machining operations. In addition, the spindles feature a reconfigured bearing structure comprising two angular-contact bearings and two taper roller bearings to improve C-axis positional accuracy and spindle runout (less than 6 µm).
The Puma 2600SY Mk II uses high-performance NTN material (as opposed to Turcite) on its box-guideway axes, a move that is said to result in improved and more responsive movement, and reduced wear. Other performance improvements include a revised design of milling turret that incorporates a Curvic coupling piston structure delivering up to 12% additional clamping force; improved durability of the Y-axis carriageway; and a spindle air-purge function that helps prevent chip and coolant ingress.
The machine was exhibited for the first time in the UK at the recent Mills CNC open house, which took place in October.
For further information www.millscnc.co.uk

AM collaboration

Schaeffler Technologies, which manufactures roller bearings and owns the INA and FAG brands, has entered into a co-operation agreement on additive manufacturing with machine tool manufacturer DMG Mori.

Schaeffler is now using a DMG Mori Lasertec 65 3D hybrid machine to produce one-offs and small batches of bearing components, as well as spare parts in metallic functionally graded materials (FGM) to finished-part quality. The one-hit process combines the flexibility of additive manufacturing by laser deposition with five-axis subtractive milling.
For further information www.dmgmori.com

Measuring cogwheels at global press manufacturer

What can be done when the production machines for an essential component have been discontinued and the process simply takes too long? At Schuler Pressen AG, a manufacturer of pressing and stamping machinery, the decision was taken to find a new way of producing gears – using profile cutters. This is where Blum-Novotest’s TC64-Digilog scanning touch probe came into play. The probe enables the examination of the interlocking tooth and ensures that the process as a whole is consistent and verifiable.

At Schuler AG, gears for large press drive shafts were in the past produced with the aid of special gear-cutting machines. However, shaping the gears alone takes between 16 and 19 hours. Moreover, the machines are now obsolete.
The solution to this issue came in the form of milling the drive shafts on a turn-mill machine using a specially manufactured profile cutter. To reduce handling and improve quality and consistency, the company decided to carry out measurements on the machine.
The advantage of the Digilog touch probe is that it can perform both digital measurements as well as analogue scans. This means that it is possible to guide the probe over a surface and register measurement data continuously.
Complete cogwheel inspection consist of 144 individual measurements on a slanted track along the whole tooth flank. This includes 36 teeth with two flanks each in both halves of the double helical gear. The entire procedure only takes 13 minutes at a scan speed of 1.8 m/min. During this time, the Digilog touch probe records 570,000 individual measurement values. However, only the linear axes are used during the scan as this then excludes any errors of the rotary axes used for production.
For further information www.blum-novotest.com

Simplifying machine misalignment checks

Pinpoint Laser Systems, a manufacturer of precision laser measurement and alignment products, has launched its latest laser-alignment tool, the 90-Line-D, for monitoring and detecting misalignment and other errors in machinery and equipment.

The 90-Line-D is Pinpoint’s newest product innovation for aligning and checking planar squareness and parallelism on assemblies, machinery and equipment. No fuss, easy set-up, and fast, precise results ensure that users can now check gantries, web and roll equipment, presses and CNC machine tools for peak alignment and efficiency. The 90-Line-D is compact, portable and available in wired and wireless versions.
An accurate pentaprism, for bending the laser precisely 90°, redirects an incoming laser beam to a new ‘square’ laser reference line. By rotating the front nosepiece of the 90-Line-D, this laser reference line forms a laser plane for additional alignment and measurements. A fine-adjust feature is included to help direct the laser beam exactly where required, while a built-in detector monitors the incoming laser beam and actively corrects for any misalignments or small errors.
The 90-Line-D is machined from a solid block of aluminium with a durable anodised finish, and features stainless steel components and internal glass optics.
The 90-Line-D is fully compatible with Pinpoint’s Microgage PRO line and works well with a variety of laser receivers, mounts and software options for the Microgage PRO Smart Display and Capture software products.
For further information www.pinpointlaser.com

Okuma stages EMO retrospective

Earlier this month, Okuma Europe (which is represented in the UK by NCMT) welcomed over 200 visitors to its recently established Aerospace Centre of Excellence in Krefeld, Germany.

In keeping with the location, the manufacturer presented innovations introduced at EMO (Hanover, September 2017) with a particular focus on aerospace machining. Highlights included Okuma’s award-winning Laser EX series of super multi-tasking machines, the smart factory solution Connect Plan, as well as the manufacturer’s latest automation technologies.
In addition, Okuma demonstrated the cryogenic machining of a titanium disc on an MA-600 HII horizontal machining centre.
For further information www.okuma.eu