MRO facility first to install iMAP system

RPI UK, a specialist in rotary measurement, has installed the first of two integrated rotor measurement and assembly platforms (iMAPs) at a major aero-engine MRO (maintenance, repair and overhaul) facility.

Jim Palmer, RPI’s sales manager, says: “It’s great news that both the OEM and their approved MRO facility are choosing to invest in iMAP, which has been independently verified to give significant operational improvements over traditional measurement methods. With world-class accuracy, our iMAP machine achieves higher levels of quality, while helping customers save money and resources by reducing inspection times and the need for costly rotor tear-downs due to inefficient rotor assembly optimisation.”
iMAP is proven to reduce inspection times by 90%, and improve gauge repeatability and reproducibility by up to 10 times. The technology is used by the MRO facility after the engines are dismantled, to inspect each individual section for cracks, wear and distortion. Measurements are taken by iMAP’s data acquisition software AccuScan, to check that the geometry of components meets original and regional board specifications as part of the stringent MRO process.
After the components have been approved, repaired or replaced, the iMAP is used for engine assembly to ensure alignment and concentricity are correct and balanced as each section is rebuilt.
AccuScan enables the measurement of up to 4000 data points on up to eight surfaces simultaneously, per revolution, thereby reducing process times to just two minutes. The improved inspection data is then used by the rotor stacking software to solve the mathematical problem of optimising the assembly of a multi-stage rotor to achieve minimum runout or unbalance. This technology is fundamental to ensuring the operational quality of an engine entering back into service, for optimal reduction in vibration, greater fuel efficiency and longer service intervals.
For further information www.rpiuk.com

Carfulan Group gets consecutive accolades

The Carfulan Group has for the second year running been selected to appear in the London Stock Exchange’s ‘1,000 Companies to Inspire Britain’ report, a publication that celebrates the nation’s most outstanding SME businesses. To make the cut, companies are required to show consistent revenue growth over a minimum of three years, significantly outperforming their industry peers.

Comprising OGP UK, SYS Systems, Zoller UK and ViciVision UK, the Carfulan Group provides a range of manufacturing-related technologies and employs around 50 people, a staffing increase of 400% since 2002. With more than 1500 machine supplied to the UK market, in excess of 700 customers and a turnover approaching £15m, the group specialises in multi-sensor inspection equipment, 3D-printing technology, tool pre-setting and inspection devices, and turned-part measurement solutions.
Chris Fulton, Carfulan Group’s managing director, says: “Demand and confidence in UK manufacturing continues to grow, and our intuitive products are helping businesses to move smoothly towards Industry 4.0, a new era of interconnectivity, automation and self-monitoring that will deliver smoother processes and more productive smart factories.
“In the past 18 months we’ve redoubled our efforts to reach out to new markets at industry shows, hosted our first ever ‘pop-up’ technology event in London, achieved ISO 9001:2015 accreditation across all companies and held the inaugural ‘Manufacturing Performance Network’ at our headquarters in Foston, attracting scores of engineering professionals from across the UK,” he adds.
David Schwimmer, CEO at London Stock Exchange Group, says: “SMEs drive growth, innovation and job creation, and are the lifeblood of the British economy. We believe that supporting the growth of these businesses is critical to the UK economy and the creation of a society that works for everyone.”
For further information www.carfulan.com

William Hughes acquires JK

William Hughes, a spring, wire-form and assembly specialist, has expanded its range of services for the manufacturing industry with the acquisition of Liskeard-based JK Metrology & Quality Services.

JK Metrology is an established metrology and quality consultancy that is accredited to ISO 17027 and ISO 9000. The company also offers a UKAS calibration service in line with ISO 17025.
“The acquisition will be of particular interest to our many customers involved in the manufacture of high-specification, high-precision components, where accurate measurement is key to their success,” says Max Hughes, managing director at William Hughes. “By investing resources and people into this established and well respected business, we will be able to offer a range of benefits for customers, including a reduced turnaround time.”
With a worldwide portfolio of customers, JK Metrology is one of only three UK laboratories offering UKAS calibration of gauge blocks by interferometry (Class A). Interferometry is the highest level of accuracy for length measurement, and JK Metrology can measure items up to 1 m long at 20°C ±0.05°C.
The company is also a supplier of metrology equipment, from micrometers and gauge blocks, to CMMs. In addition, JK Metrology continues to supply and service the metrology equipment previously manufactured by Select Gauges Ltd, following its closure.
Says Hughes: “We’re delighted to announce that John Kelly, a director of JK Metrology for many years, following a long career in the world of gauge calibration, will transfer to William Hughes. Here, his range of contacts, depth of experience and wealth of knowledge will be a valuable asset in the integration of the business.”
For further information www.wmhughes.co.uk

Enhanced view, capture and measure tasks

All microscope users looking to boost their view, capture, measure applications will benefit from a new innovation from Keyence.

The VHX-7000 digital microscope, which is now available in the UK and Ireland, offers high magnification and accuracy, and is said to be both versatile and easy to use.
Using the Keyence VHX-7000, both 2D and 3D measurements can be performed. Just one microscope is required to take roughness, contamination, grain size and a host of other measurements. Observation is provided with an optimal balance of brightness and clarity. Moreover, images can be easily saved on the 1 TB hard drive (enough capacity for millions of images) and shared over LAN or USB. Similarly, reports can be automatically created and shared.
Features such as ´Optical Shadow Effect Mode´ make subtle contours stand out (in colour) and enhance uneven surfaces and stains at the push of a button. By combining a 4K CMOS image sensor with a new multi-directional lighting variation technique, the VHX-7000 can deliver images that rival an SEM (scanning electron microscope).
Even novice users can easily capture high-resolution images, says Keyence. The operator simply places the target on the stage, and everything else – including alignment and focus adjustment – is fully automatic. A handheld controller puts functions such as magnification switching at the fingertips of
the user.
A combination of optics, digital camera, electronics, software, and a wide choice of motorised XYZ and rotary stages, means users can perform complete inspection and analysis using a single system.
For further information www.keyence.co.uk

Structured light 3D scanner for design

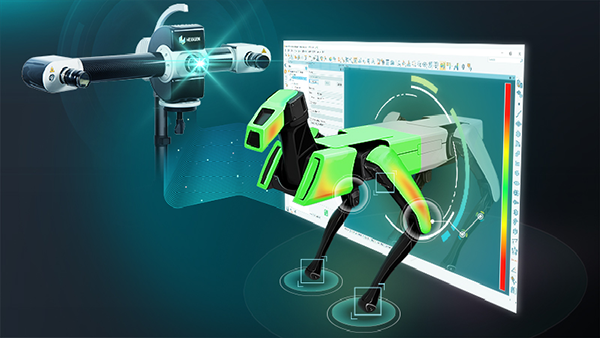
Faro has launched its Cobalt Design structured light scanner product family. Structured light scanning technology uses projected light patterns with a camera system to capture large areas at once and, as a result, significantly reduces data capture time and delivers quicker results.

Cobalt Design, combined with the recently introduced RevEng software platform, delivers a one-stop digital design solution where small-to-medium objects can be scanned with precision, in colour, with multiple levels of resolution. As such, it is the first colour structured light scanner from Faro specifically developed for design applications. In particular, the device is said to be suited to the scanning of complex surfaces, especially highly detailed organic shapes. Cobalt Design addresses a variety of design requirements, including reverse engineering, prototype design, packaging design, digital cataloguing, and even jewellery and fashion design.
The device enables design professionals to set up scan parameters once and then proceed to scan similar objects at the push of a button. Furthermore, several pre-configured scanning and meshing settings are available by default. This functionality, in turn, translates to less time per scan position, more scans per day and faster completion of scan projects.
An integrated, rotational axis improves the 3D scanning process and maximises scanning coverage. The object/part is placed in a fixed position on the axis, after which the axis can be set to automatically rotate up to 360° as it is being scanned.
Cobalt Design captures millions of 3D measurement points in as little as one second, with up to 3.1 Mpx accuracy for small-to-medium complex objects.
Precise and high-quality textured scans can be captured in colour and delivered as realistic images that enable even more detailed representations of geometric surfaces and finishing.
For further information www.faro.com