Disrupting the metal AM market

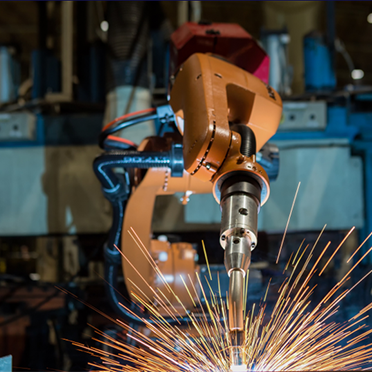
The AMRC has joined forces with a UK technology start-up and a global engineering giant in a transatlantic bid to disrupt the $3bn metal additive manufacture (AM) market by using AI and robotics to carry out the otherwise labour-intensive removal of support structures.

Project SALSA (Separation of Additive-Layer Supports by Automation) will see the development of a tool that will use robotics and machine vision to detect and remove supports from metal-additive parts. Led by Bristol-based Additive Automations, SALSA also involves Renishaw Canada, the National Research Council Canada (NRCC) and the AMRC.
For further information www.amrc.co.uk

RPI unveils TruMotion

RPI UK, a specialist in positioning devices for high-accuracy rotary and angular inspection systems, launched its TruMotion system at the recent Quality Show 2019 in Rosemont, USA.

Jim Palmer, RPI’s sales manager, says: “TruMotion is our latest innovation in the measurement of circular geometry (TIR) for internal and external diameters, and faces of small and medium-sized round parts in machining and grinding applications such as gears, gauges, bearings and aircraft engine components.”
The TruMotion range of precision, manual spin, mechanical bearing rotary tables is designed to inspect circular components in a shop-floor environment. Available in two sizes (200 and 400 mm), the systems offer a maximum load capacity of 50 kg, delivering radial and axial runout targeted at 3 µm. Moreover, TruMotion units feature a user-friendly interface with an optional touchscreen.
Also demonstrated at the show was QuadProfile, a small, precision rotary table for turbine blade inspection.
The Quadrant range of rotary tables provides an additional axis for any high-precision CMM inspecting parts such as gas turbine discs and fan blades. A component is simply rotated to meet the CMM’s measurement probe rather than the three-axis probe being programmed to reach multiple measurement points around a part. Not only does this design simplify the measurement procedure, it helps to deliver fast and accurate indexing, as well as increase the CMM’s application range and effective measuring volume. Overall, this improves the flexibility, productivity and efficiency of the CMM inspection.
For further information www.rpiuk.com

20,000 microscope sales in five years

A manufacturer of visual inspection and measurement technologies, Vision Engineering, has sold over 20,000 Mantis microscope products in the past five years.

The Mantis ‘eyepiece-less’ stereo microscope is said to offer high levels of optical performance with magnification options up to 20x, making it a desirable alternative to more traditional inspection stereo microscopes. Vision Engineering’s Mantis was first introduced in 1994. Today, the microscope is still Vision Engineering’s most successful and popular product range, and now comprises Mantis Compact, Mantis Elite and Mantis Elite-Cam HD.
For further information www.visioneng.com

Rotamic installs Mitutoyo CMM

To make sure that Exeter-based Rotamic Engineering’s inspection provision was able to keep pace with its recent rise in production levels, the company invested in a Crysta Apex S574 CNC CMM from Mitutoyo, which offers a working range of 500 x 700 x 400 mm.

Kai Kidson, Rotamic quality engineer, says: “When compared with other CMMs, we considered that the accuracy and repeatability of the Mitutoyo CNC CMM would provide the capability to inspect components with challenging dimensional specifications. Also, not only would the speed and efficiency of the machine be able to keep pace with our current levels of manufacturing, we believe it will cope with all foreseeable rises in production.
“In addition to inspecting single parts, we are now able to place a large batch of components on to the CMM’s granite bed, recall a pre-written program and perform a mass inspection routine in fast, fully automatic CNC mode. We are then able to generate detailed inspection reports that can be archived for our traceable records.”
Over the past 40 years, Rotamic Engineering has established a reputation for the manufacture of precision machined components. In addition to serving the defence, Formula One and medical industries, Rotamic has been a supplier to the aerospace sector for more than 20 years. This challenging field currently constitutes the company’s largest market. To meet the requirements of its aerospace clients, the ISO9001 accredited business obtained AS9100 in 2006.
In addition to ensuring that all materials are traceable and sourced from approved suppliers, in-process quality checks are made by the company’s machine operators throughout each manufacturing stage. Lastly, before component dispatch, in-depth final inspection routines are carried out.
For further information www.mitutoyo.co.uk

Busi moves to five-axis CMMs

Italian subcontract manufacturer, R Busi, has made a strategic decision to move to five-axis CMMs. The use of Renishaw five-axis measurement heads has enabled the company to meet the verification needs of increasingly complex part designs and deliver the tolerances and repeatability required.

R Busi operates from a 22,000 sq m facility in Mezzanino, where its factory houses 40 production machines that include lathes, five-axis vertical milling machines and four-axis horizontal machining centres. Some 40 production personnel are employed, working in two shifts.
The five-axis measurement technology adopted by the company had to provide the flexibility required to verify a highly diverse range of parts produced for a range of sectors.
Initially, the company had a measurement head retrofitted to an existing three-axis CMM. Once the system was proven, two new CMMs were added, both specified to include five-axis measurement heads at the outset. Renishaw’s Revo and PH20 five-axis measurement systems were selected.
Head of quality at R Busi, Paolo Orlandi, says: “We already used Renishaw machine probes throughout our production processes, so equipping a dedicated measuring room with closely related technology from the same supplier was a logical and easy step to take. Since our production activities can often include some quite complex bespoke parts, we really wanted to adopt something a little better than a standard three-axis CMM; something that would give us the accuracy, flexibility and speed needed.”
The introduction of five-axis measurement technology has had a wide-ranging impact on R Busi’s precision manufacturing operations, as Orlandi explains: “By dramatically increasing measurement speed and significantly reducing production downtime, the business has gained a serious productivity advantage.”
For further information www.renishaw.com