Plug in, automated, non-contact measurement for cobots

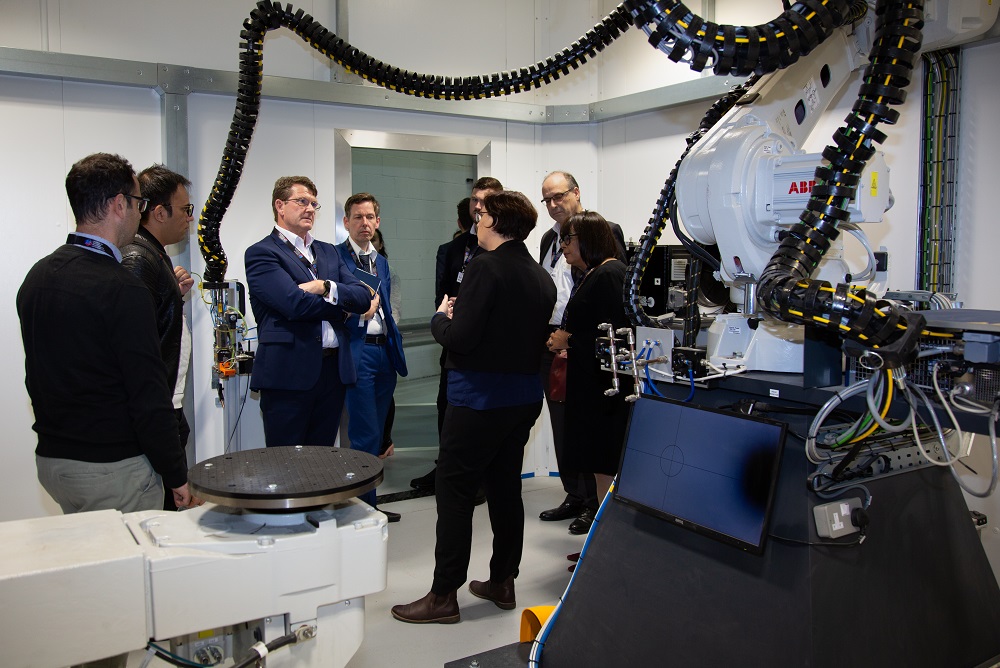
The UK’s only fully traceable, automated non-contact gauging system is now available from RARUK Automation. Introduced as a plug and play accessory for the company’s e-Series range Universal Robot six-axis collaborative robot (cobot) arms, the Vectro-2 is the brainchild of Third Dimension, a company with a long track record of supplying non-contact optical measurement systems.

Vectro 2 enables automated 2D profile measurements to be taken quickly and accurately. The kit contains all the pre-configured hardware and software required for easy installation and rapid deployment. Measurement data can be used for inspection and quality control purposes or fed back to the production process for closed-loop control to minimise defects and waste.

The system can measure a variety of parameters: gap and flush, edge, radius, chamfer, angle and many other critical features in the manufacturing process. Thanks to the violet laser technology used in the Vectro 2’s new T-series sensor heads, it can be used on challenging surfaces such as high-gloss paint, glass, plastics, bare metal and fabrics.
RARUK Automation is the only UK distributor to hold platinum status, achieved through the depth of its technical expertise in identifying applications that can be successfully automated. The addition of Vectro 2 to its portfolio, significantly widens the scope of this work.

Through easy graphical programming, Vectro 2 makes it easy to create powerful, data-driven inspection and measurement processes that improve productivity. And, in line with all automation systems from RARUK Automation, Vectro 2 is system that can be applied in any manufacturing environment, from small start-ups to volume production.

RARUK Automation and Vectro 2 can be seen later this week at the North East Automotive Expo 2022 (stand B29) on 29 September at the Beacon of Light, Sunderland.
For further information www.rarukautomation.com

How to benefit from subcontract measurement

Following assembly, manufacturers must measure parts to ensure they meet specification. However, if they only have one CMM, or they measure parts by hand using micrometers, manufacturers will do so at a much slower rate, significantly delaying time-to-market. Furthermore, measuring any component manually not only slows down production, it also introduces the risk of human error.

While investing in more measurement equipment could be a simple solution to removing any bottlenecks, it might not be the most practical option. As well as the initial cost of the machine, manufacturers must invest in training to ensure that they can use the equipment correctly. Smaller manufacturers may not be able to buy equipment outright, so instead they can look to subcontract measurement services.

By working with a metrology specialist such as The Sempre Group, manufacturers can have peace of mind that someone else is measuring their parts accurately. Metrology engineers can take information from drawings and CAD files to determine the method of measurements and which machines to use. To measure complex parts, subcontract measurement experts can develop bespoke fixtures to hold parts steady. Once the customer agrees to the quote, engineers will measure a small batch of parts, sending reports back to the customer to verify they have met expectations. Following verification, engineers will measure the rest of the components, deliver reports and send the parts back.

Instead of relying on one trained engineer and one in-house CMM, manufacturers can take the pressure off and speed up production by outsourcing measurement to dedicated experts.
For further information www.thesempregroup.com

CMM enables most accurate Lotus car ever

Since the first Lotus car was built in 1948, the company has been a beacon in the automotive industry for the design and manufacture of high-performance cars born out of success on the racetrack. The latest sports car, the Emira, is by far the most accurate model ever built by Lotus thanks to an upgrade in quality control at the company’s factory in Hethel, Norfolk. The upgrade includes investment in a five-axis HC-90TR twin-arm CMM manufactured in the UK by LK Metrology. This automated, multi-sensor inspection cell, part of multi-million pound investments made by Lotus since 2017, delivers absolute, 100%, non-contact dimensional inspection at production line speed, enabling real-time quality control.

The CMM is set 1 m into the floor on a special foundation. This configuration means that a car for inspection carried on an automated guided vehicle (AGV) can access the area without the need for any lifting equipment. The machine has a measuring volume of nominally 6.3 x 1.6 x 2.5 m, easily large enough to contain an entire car body.

Triple-laser cross scanners are deployed on both arms to measure features automatically on both sides of the Lotus Emira simultaneously. LK says that the HC-90 is the world’s most accurate range of horizontal-arm CMMs, able to measure to a volumetric accuracy of 10.0 μm + L/200 and with 6 μm repeatability. The machine combines the high performance of a bridge-type CMM with the flexibility of the horizontal-arm configuration widely used in car plants.

The CMM completes automated measuring cycles so quickly that it can keep up with the quick TAKT time that defines the speed of the Emira production line.
For further information www.lkmetrology.com

Providing all-round precision to Tenon Engineering

Dorking-based Tenon Engineering specialises in the integrated design and production of complex electromechanical assemblies. To support Tenon’s company-wide quality philosophy and aid its high-precision capabilities, the business provides its quality control staff with a range of cutting-edge inspection equipment. An example of Tenon’s willingness to invest in its quality function is the company’s recently purchased Mitutoyo RoundTest RA-2200 CNC instrument.

Tenon’s chief engineer Terry Healy says. “Much of our output has challenging roundness and cylindricity measurement parameters. In addition to the accuracy of the proposed new equipment being vitally important, because of the continuous throughput of high-precision components in our busy quality department, the speed and ease of use of the chosen system were also major considerations.

“Having studied the available options, we concluded that a RoundTest RA-2200 CNC was the best choice for our demanding precision and efficiency needs,” he continues. “As the Mitutoyo roundness and cylindricity measurement instrument is so easy to use, our quality control staff quickly mastered its operation. Now, in addition to measuring one-offs, we’re able to load batches of components on to the instrument’s table, recall previously written part-programs and start rapid, CNC inspection routines. Once underway, the instrument’s ability to undertake fully automated inspection tasks allows its operator to undertake other duties.

“In addition to the RoundTest RA-2200 being able to achieve the high levels of precision that we require, its fast CNC operation has reduced the possibility of bottlenecks in the areas of roundness and cylindricity inspection.”

A wide variety of RoundTest models are available to suit most applications, and despite their speed and ease-of-use, the instruments offer multifunction analysis capabilities.
For further information www.mitutoyo.co.uk

Renishaw ACS-1 keeps calibration simply accurate

Spindle probes for CNC machine tools can be highly repeatable, but their performance relies on accurate calibration. Renishaw has developed a simple solution to overcome the challenges associated with the manual probe calibration process, while consistently achieving high levels of repeatability. Accurate calibration ensures the probe’s performance is repeatable within the machine tool environment.

Today, many users perform the probe calibration process manually, which can cause variability even among skilled operators. Inaccurate probe calibration can affect all subsequent measurements; ACS-1 addresses this via a lockable mechanism that removes the need to use precision gauge blocks or slip gauges.

ACS-1 is mounted on the machine tool table or chuck using its magnetic base. A test bar (or a tool of known length) establishes an accurate datum surface by pushing the plunger down to the desired position; the plunger is locked in place. The probe’s overall length can be accurately calibrated, using the calibration disk (the top surface of the lockable plunger). The probe’s stylus ball diameter calibration takes place on the datum sphere, which can be mounted in two different positions on ACS-1, according to the CNC machine configuration.

In terms of advantages, the datum sphere can be mounted on one of two faces, both at a 45° angle. According to Renishaw, the mounting options allow ACS-1 to be the optimal probe calibration device for various CNC machine tool configurations. This includes vertical mills, lathes, turn-mills and five-axis machining centres, as the magnetic base allows the artefact to be mounted vertically or horizontally. The ACS-1 can determine the probe’s overall length and stylus ball diameter within minutes, and does not require batteries.
For further information www.renishaw.com/acs