Richard Moser KG Präzisionsdrehteile in the Swabian municipality of Bubsheim, Germany, is a success story tightly interwoven with the Swiss turning centre manufacturer, Tornos.

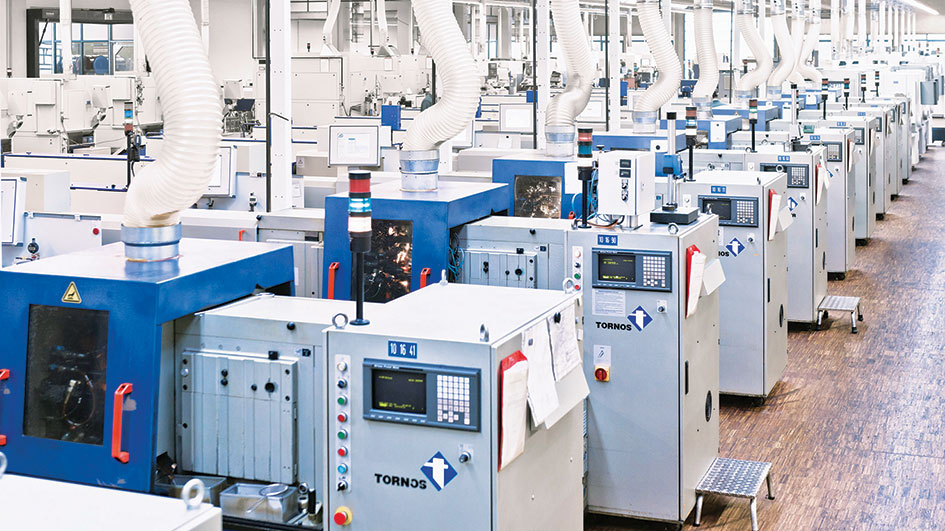
“If you want to be successful on the Heuberg, the stronghold of the turning industry, you have to be better than everyone else.” This is the attitude that drives Richard Moser, the company’s managing director. When Moser took over the family business in 1993, he had four employees and 10 machines. Working for his company today are 140 specialists and 100 lathes, 50 of which are multi-spindle models. There are many reasons for this rapid growth. For one thing, Moser has consistently employed the latest technologies. And, it would seem that this ethos is in his blood. His father and his uncle were among the first to bring multi-spindle technology on to the Heuberg.
Complex workpieces in demanding materials, of superlative quality, produced on a mass scale, are his strengths. These factors are what the team and machine inventory of Moser Präzisionsdrehteile are geared towards.
Enrico Barbagallo, a young project planner at Moser, says: “We manufacture parts on our multi-spindles that hardly anyone else would dare attempt.”
The automotive industry, one of Moser’s main customer bases, is currently in search of new high-strength materials to optimise parts for engine management systems.
“That’s why we are increasingly processing high-alloy steels costing sometimes up to €18,000 per tonne,” says Barbagallo.
The make-ready stage, in particular, calls for a great deal of intuition, and is where the experience and flexibility of the young team come into play.
“When we’re under pressure, we can make a multi-spindle ready in two to three hours,” says Barbagallo. “For initial samples, the multi-spindles at Moser are even set up for 100 parts, while in series production, the multi-spindles are usually prepped for quantities of 20,000 or more components.
At the turn of the millennium, Industry 4.0 was not even born when Sandra and Richard Moser decided that they would need a new ERP system. Instead of settling for the existing solutions of major software providers, they had their own system programmed, employed IT experts and are now profiting from a system unlike any other.

As all machines are linked to the system, Moser always has an up-to-date overview of each and every production job. The hardware equipment of all the machines alone cost around €500,000. The system supplies up-to-date information on manufacturing times, machine capacity utilisation and production quantities. In the flow of goods, the manufacturing status is clear to see at any time, which means that every employee can immediately provide the customer with progress updates.
Ever since his father and uncle purchased the first Tornos multi-spindle turning machine, an AS 14 in 1968, there has been a close relationship between Moser and the Swiss lathe manufacturer. Even today, Richard Moser remains fascinated by its successor model, the SAS 16, and regrets that these machines are no longer being made.
“This quality, productivity and reliability is so rare to find these days,” he states.

Moser is delighted, however, that Tornos has been able to continue with tradition through the MultiDeco and the new MultiSwiss. These machines are almost as productive as the SAS but, of course, they are fundamentally more versatile. Moser is particularly keen on the MultiSwiss. He saw it for the first time at EMO in 2011 and purchased one there and then, making him the first customer.
A few weeks ago, he took delivery of the 300th machine of this type that Tornos has made, expanding his inventory to 15 MultiSwiss machines. Moser has already ordered his next three and, by doing so, continues to contribute to the success of this model.
The MultiSwiss was launched in 2011, when multi-spindle technology was still considered highly complex, and is known today for its ergonomics and machining performance, says Tornos. Conceived as a solution to bridge the gap between multi-spindle and single-spindle turning machines, the MultiSwiss 6×16 features six spindles, while the spindle drum is positioned by means of torque motor technology. The cycle times of this solution rival those of cam-controlled, multi-spindle automatic turning machines.
Thanks to its hydrostatic spindle bearings, the MultiSwiss is said to achieve high levels of surface finish (0.15 Ra) and smooth-running performance, even with materials that are difficult to machine. It is also distinguished by its generous tool package. Unlike some other machinists, Moser also finds the compactness of the machine, with its 1.5 m bar stock, to be the ideal size.
Above all, however, experts in multi-spindle turning machines are not required to program the MultiSwiss 6×16. Set-up and start-up are said to be a breeze. This user-friendliness and ergonomics are what Barbagallo finds so attractive, but Sandra Moser does see one small downside. “Those who work on the MultiSwiss for the first time tend to prefer not to work on any other machine afterwards,” she says.

The turned parts industry currently faces some major challenges. Geopolitical upheavals, radical change in the automotive sector, new technologies and the economic downturn are leaving their mark in this sector. In an era when some competitors are reining in their spending, Moser is consistently investing in improvements to his processes and workflows. Furthermore, thanks to a special energy efficiency programme, he expects to make appreciable savings over the next few years. To this end, the cooling of the machines has been coupled to their capacity utilisation, the heating/cooling circuit closed, and a photovoltaic system installed on the roof.
For further information www.tornos.com


