Renishaw launches longer-length FORTiS encoder

Metrology specialist Renishaw can now offer longer sealed encoder scale lengths to support the development of large machine tools. Customers can choose FORTiS enclosed encoder linear scales as long as 4.24 m.Applications include machine tools for making large casting moulds, vertical turning lathes (VTLs) and gantry-type machines.

The FORTiS encoder design is built upon Renishaw’s ‘Resolute’ encoder technology, providing resistance to the ingress of liquids and solid debris contaminants. It features an extruded enclosure with longitudinally attached interlocking lip seals and sealed end caps. The read-head body is attached to a sealed optical unit via a blade that travels through the DuraSeal lip seals along the length of the encoder.

Linear axis movement causes the read-head and optics to traverse the encoder’s absolute scale (which is fixed to the inside of the enclosure) without mechanical contact.

Customers can choose from two different extrusion profiles to suit their space requirements. The FORTiS-S linear encoder is the standard-size encoder, available with measuring lengths from 140 to 4240 mm, and installs directly to a machined surface via flexure holes in the extrusion’s body.

The FORTiS-N encoder, available with measuring lengths from 70 to 2040 mm, features a narrower cross-section extrusion and a more compact read-head to enable installations in confined spaces. This model mounts directly to a machined surface via two end cap mounting holes or a mounting spar for greater rigidity.

Renishaw FORTiS absolute encoder systems have CE approval and are manufactured in-house using strict quality-controlled processes certified to ISO 9001:2015.

More informationwww.renishaw.com/fortis

Laser radar suitable for automotive metrology

Nikon Metrology has welcomed the recent update to Volume 5.1 of the automotive measurement standards issued by the German Association of the Automotive Industry (VDA). The newly updated VDA standards cover a more comprehensive array of measurement applications within the automotive sector, addressing the industry’s growing demand for more diverse and sophisticated metrology solutions.

“We already offer innovative, traceable measurement solutions based on national and international standards for the automotive industry,” explains Andreas Fuchs, application engineer at Nikon Metrology. “The new standard defines very clearly the procedures for evaluating the precise technology that we provide. After all, with the APDIS laser radar, our portfolio has featured a product for some time now that can also deliver traceable inline measurements as described in VDA Volume 5.1. Incidentally, those who use this technology no longer need a dedicated measuring room for a fixed CMM, enabling them to save a great deal of money, time and space.”

The APDIS laser radar measures details at a distance without needing handheld probes, targets or surface preparation, making it suitable for automating repetitive inspection tasks with high accuracy. The system covers many manufacturing, industrial and research applications, including those that involve hard-to-reach features and are complex, delicate or labour-intensive.

Additional benefits include fast and accurate automated measurements with minimal set-up time for high productivity with flexible and portable installation. This capability allows for the absolute and accurate measurement of parts during production or wherever required, including directly on the production line. In particular, Nikon Metrology says the APDIS laser radar displays its strengths in the automotive industry. For example, the system can measure automotive features with absolute accuracy at high speed with no part preparation, whether inline or offline.

More information www.bit.ly/3Tt6d9a

Reducing rail-tip measurement time by 97.5%

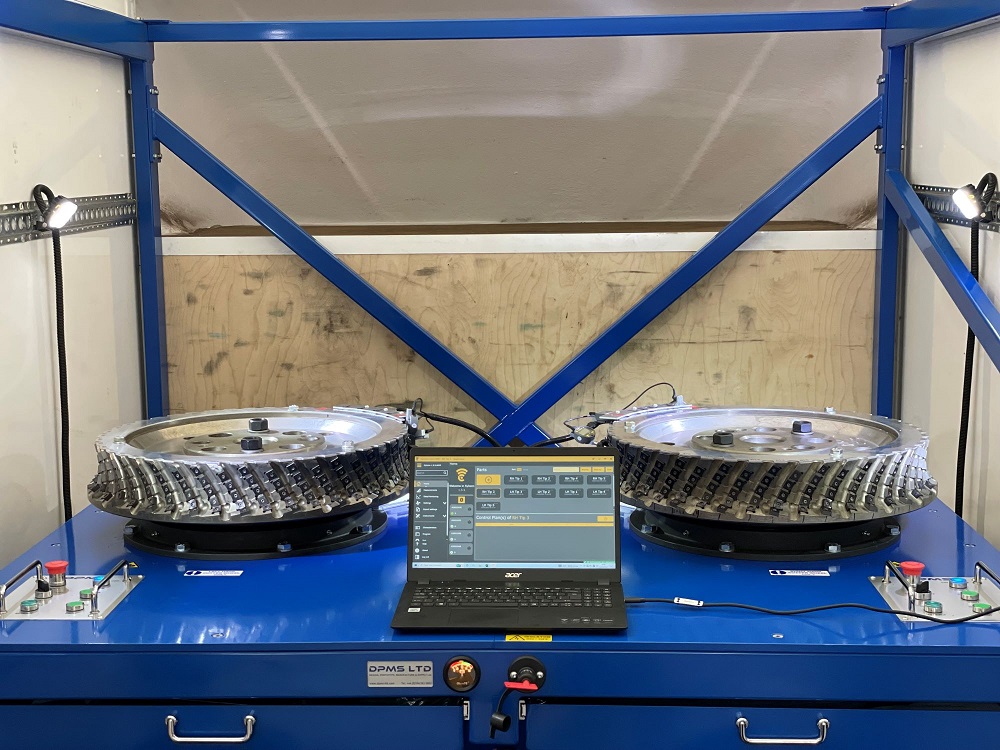
Bowers Group recently assisted DPMS in the development of an advanced rail-tip measurement solution that reduces the time needed to inspect milling wheels by 97.5%.Collaborating with its distributor H Roberts, Bowers Group worked to construct a tailored solution for the tip measurement station. 

Andrew Yarrow, mechanical engineer at DPMS, says: “We believe our rail-tip measurement system has the ability to transform rail maintenance globally. Collaborating with Bowers Group has been instrumental in achieving our goals of functionality and accuracy. Together, we navigated challenges to develop a system that prioritises accuracy, user efficiency and safety in a high-risk industry.”

Rail operators work tirelessly to maintain and upgrade track infrastructure and ensure smooth operation. A key aspect of this objective is the milling process, where train-mounted wheels with rotating carbide tips remove irregularities and defects from rail surfaces, enhancing train performance and safety.

Inaccurate measurement of milling wheel cutting heads can lead to uneven rail surfaces, affecting train stability and comfort, and causing excessive wear and tear on both the grinding wheel and the rail.DPMS developed a tip measurement station that allows for synchronised inspection of both the left and right milling wheels. Here, Sylvac P5i inductive probes from Bowers enable direct connection to a laptop. The Bowers Group team of experts developed a customised reporting program, using Sylcom, allowing for the export of data to Excel for report generation.

This new system enabled the mounting of all five readout heads in a stack, permitting immediate measurements and collecting data simultaneously. The result?A more accurateprocess that supportssimultaneous measurements. DPMS thus witnessed a reduction in measuring time for both milling wheels from over 1 hour to just 90 seconds.

More information www.bowersgroup.co.uk

Mitutoyo aids quality control at HB Bearings

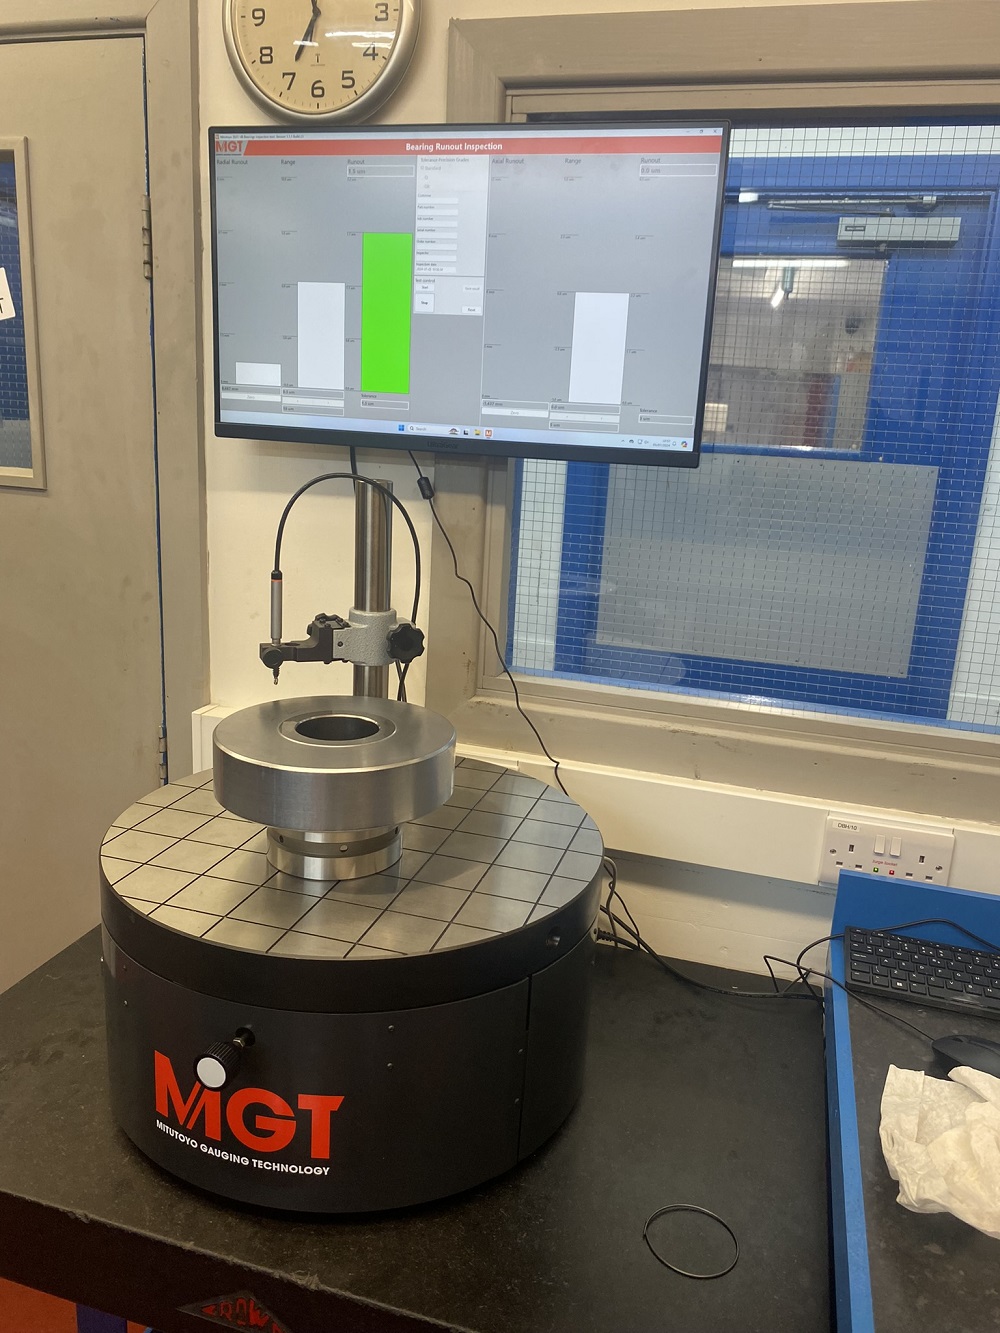
Based in Huddersfield, HB Bearings specialises in the manufacture of metric and imperial bearings that are difficult to source. Bearing types manufactured include radial, deep groove ball, cylindrical roller, angular contact, duplexand others.In accordance with the company’s policy of regularly updating its facilities, HB Bearings took the recent decision to replace its existing bearing run-out test rig.

Darren Mawhinney, technical director at HB Bearings, says: “Having previously established an excellent relationship with staff at close-by Mitutoyo in Elland, I contacted them with my ideas for our proposed new bearing run-out test rig. They quickly understood our requirements, then, through close liaison and co-operation, a design soon evolved into the required system.”

He continues: “Now up and running, we’re delighted with the system’s speed, ease of use and accuracy. Simplicity is critical in the test application and we can operate the new rig with just one click. Compared with our previous rig, a major improvement is the inclusion of a coarse scale, enabling the fast and easy alignment of components. In addition to inspecting our HB bearing range, the new system is able to perform accurate quality control checks on our Gamet Bearings brand, super-precision bearings with a radial runout specification of 0.5 µm.

“Even though our previous jig was fit for purpose, our new bespoke Mitutoyo system has further improved confidence in the premium quality of our bearings.”

Simon Elliot, general manager at Mitutoyo Gauging Technology, adds: “We were delighted to work closely with the staff of HB Bearings to enable the delivery of a system that exactly matched the company’s requirements, at a cost effective price.”

More information www.mitutoyo.co.uk

Fast inspection of large, close-tolerance parts

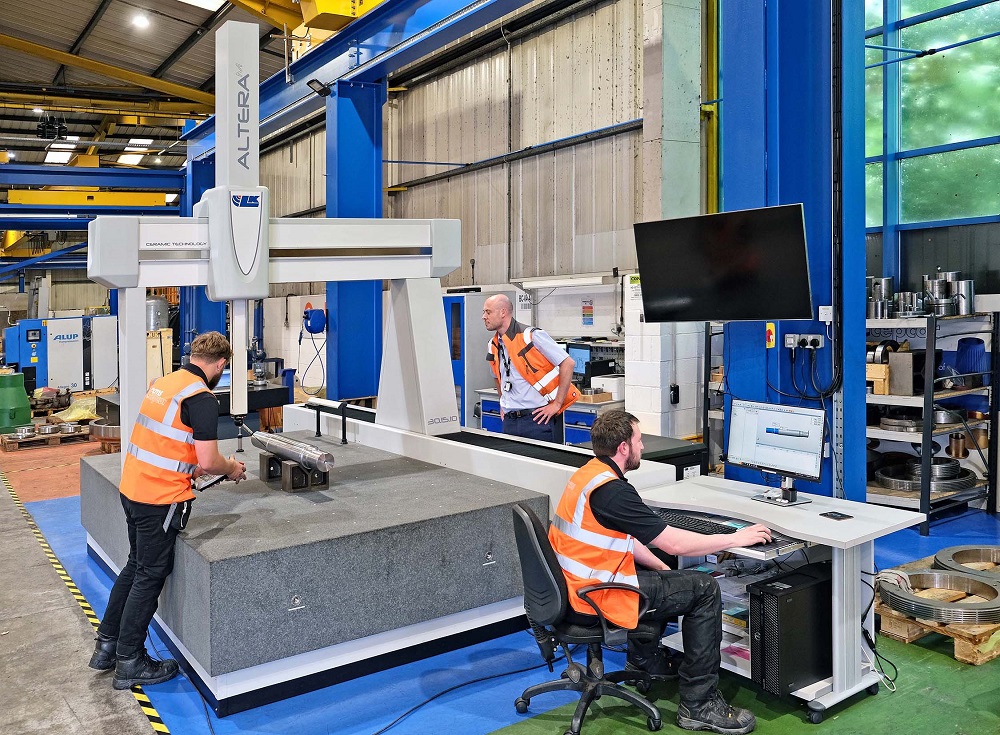
Founded in 1989 and headquartered in Coalville, Leicestershire, CMS Cepcor is a supplier of aftermarket crusher spares, manganese-steel wear liners and other equipment to the mining and aggregate production industries worldwide. In February this year, the company took delivery of its first CMM, enhancing the quality control of the products it manufactures or refurbishes to tight tolerances. Offering a nominal inspection volume of 3000 x 1500 x 1000 mm, the CMM is an Altera M built by UK firm LK Metrology.

Previously, CMS Cepcor had been using a pair of manually-operated, portable six-axis arms with 2.5 and 3m reach respectively to check components by touch-probing. This was a lengthy process and insufficiently precise to measure some parts without difficulty. For example, it was challenging to inspect bearing seats with tolerances down to 30 µm, shafts up to 500 mm in diameter which need accuracy within 20 µm, and various features on housings tied up to half that tolerance.

Consequently, there was a requirement to use micrometers and other traditional manual gauges to measure those dimensions, which was even more time-consuming and subject to operator-dependent inconsistencies. Additionally, some parts up to 400 mm in diameter by 700 mm long have eccentric tapers with tolerances down to as little as 15 arc-seconds, which were problematic to check manually.

Les Hickens, quality manager at CMS Cepcor, says: “The LK CMM has a maximum permissible first-term error of less than 2µm, so is able to measure even very large parts exactly and repeatably. It’s at least an order of magnitude more precise than a portable arm, giving us – and more importantly our customers – extra confidence in the results.”

More information www.lkmetrology.com