Vision unveils DRV-Z1

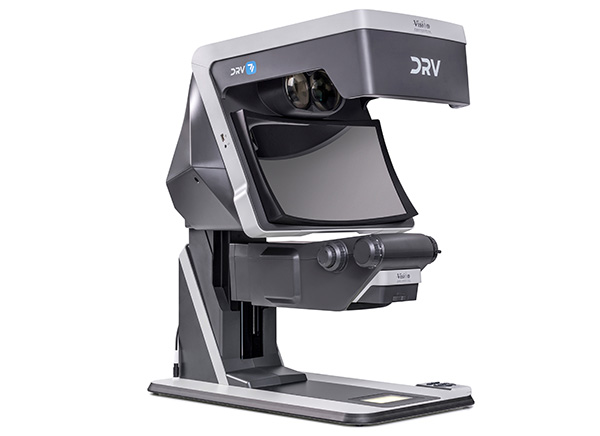
Vision Engineering, a manufacturer of visual inspection and measurement technologies, has introduced its latest flagship product, the Deep Reality Viewer (DRV-Z1) microscope.

Designed at its Woking, UK headquarters, the DRV-Z1 enables the user to view high-definition 3D images under magnification without using a flat screen, or requiring operators to wear goggles or specialist glasses. Innovatively, by linking multiple DRV systems via wired or wireless technologies, users can share and manipulate 3D images of components or products in real time.
Vision Engineering says that the DRV-Z1 is set to transform supply network collaboration in manufacturing and quality, design and rapid prototyping, and even in the healthcare and medical sectors. The ability to simultaneously share and discuss full 3D images of critical parts, repairs or design enhancements without any delay offers tangible benefits.
In terms of transferring vital information and quality of view, colleagues across multi-site organisations, suppliers and their customers and designers and manufacturing engineers can use the DRV’s real-time connectivity to accelerate and improve both product design and client response.
Using Vision Engineering’s globally patented TriTeQ3 digital 3D display technology, the DRV-Z1 moves these advantages even further forward, combining improved ergonomics with real-time transfer of 3D product images for rapid and informed decision-making. DRV-Z1 systems are designed to address important quality control and production requirements in sectors including electronics, aerospace, automotive and medical.
Mark Curtis, managing director, Vision Engineering says: “This breakthrough technology sets a new industry standard, offering users an incredible 3D viewing experience, without the need for glasses or headsets. The ability to share high-definition images with other users anywhere in the world presents a huge opportunity to improve standards across key industries such as healthcare, manufacturing and automotive.”
For further information www.visioneng.com

Workforce grows by 50%

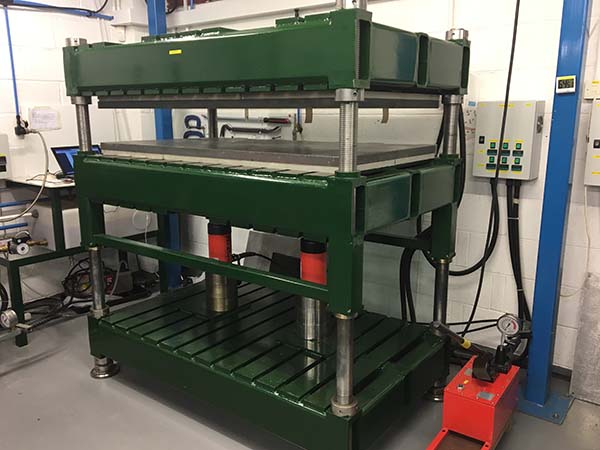
Rockwood Composites has increased its workforce by 50% in the past six months. The company is also building two new 100 tonne presses, which will be on stream in October.

Presses are used by the firm to apply the heat and pressure needed to cure raw composites materials into components and structures for sectors such as aerospace, defence, nuclear and medical. In addition, the company has invested in a Hurco CNC machining centre, which is aimed at complementing the increase in capacity for pressing, moulding and laminating.
For further information www.rockwoodcomposites.com

Rotary axis error checks made simple

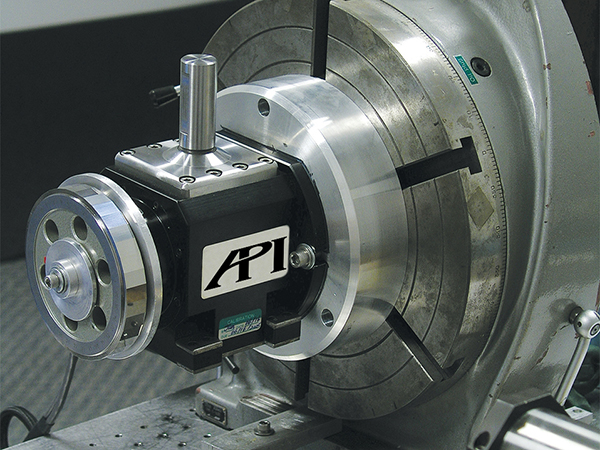
SwivelCheck from API measures and calibrates machine-tool rotary axes, tilt tables and pendulum axes. The instrument utilises a servo-driven motor in conjunction with an electronic level and precision rotary encoder to measure multiple parameters in a single set-up. Availability in the UK is via reseller OR3D Ltd.

API’s SwivelCheck can operate in automated or manual mode, and includes API’s Intellicomp software for control, data acquisition and reporting. The device can also be used in conjunction with the API XD laser interferometer to measure horizontal rotary table position. SwivelCheck can be mounted off-centre of the rotating axis to measure the swivel axis of trunnions without any need for the disassembly of critical machine-tool components.
According to the company, SwivelCheck is easy to set-up, offers ±400° swing and allows tilting axes to be checked at the spindle nose, thus offering true accuracy to be reported over systems that check at the motor and do not detect ‘lost motion’. The Intellicomp software provides a direct import of measured axis data to machine-tool controllers, allowing an update of system parameters for improved precision.
API says that SwivelCheck provides a tool to validate the performance of machine-tool rotary axes in general machine shops and at users of five-axis machining centres.
API founder and CEO, Dr Kam Lau, invented the laser tracker while working at USA’s National Institute of Standards and Technology (NIST) to allow industrial robot accuracies to be determined.
For further information www.apimetrology.com

Structured light scanners for designers

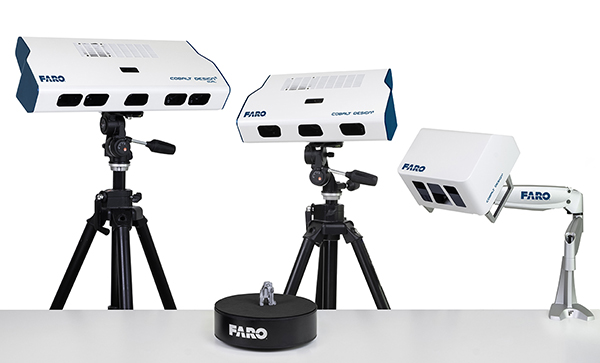
Faro has released its Cobalt Design structured light scanner product family. Structured light scanning technology uses projected light patterns with a camera system to capture large areas.

As a result, data capture time is reduced and results are delivered quicker.
In combination with the recently introduced RevEng software platform, Cobalt Design delivers a one-stop digital design solution where small-to-medium objects can be scanned with precision, in colour, with multiple levels of resolution. As such, it is the first colour structured light scanner from Faro specifically developed for design applications. In particular, the device is said to be suited to the scanning of complex surfaces, especially highly detailed organic shapes. Cobalt Design addresses a variety of design requirements, including reverse engineering, prototype design, packaging design, digital cataloguing, and even jewellery and fashion design.
Faro’s Cobalt Design enables design professionals to set up scan parameters once and then proceed to scan similar objects at the push of a button. Furthermore, several pre-configured scanning and meshing settings are available by default. This functionality, in turn, translates to less time per scan position, more scans per day and faster completion of scan projects.
An integrated, rotational axis improves the 3D scanning process and maximises scanning coverage. Objects/parts are placed in fixed positions on the axis, after which the axis can be set to automatically rotate up to 360° as it is being scanned.
Cobalt Design captures millions of 3D measurement points in as little as one second, with up to 3.1 Mpx accuracy for small-to-medium complex objects. Precise and high-quality textured scans can be captured in colour and delivered as realistic images that enable even more detailed representations of geometric surfaces and finishing.
For further information www.faro.com

Mitutoyo sparks quality revolution

First introduced in 1987, Starline Track Busway today claims to be the industry-leading electrical power distribution system for the data centre, retail, industrial and higher education markets. The UK division of its manufacturer, Universal Electric Corporation (UEC), moved into a new 60,000 sq ft factory in Reading over 12 months ago to support the European customer base.

Clive Larke, quality director at the facility, says: “As part of the global strategy, we wanted to produce mirror image labs on this side of the Atlantic, the US and in our other hub in Asia. We control all three labs from this hub here in Reading.”
Tasked with implementing a standardised measurement facility on three different continents, Larke approached Mitutoyo.
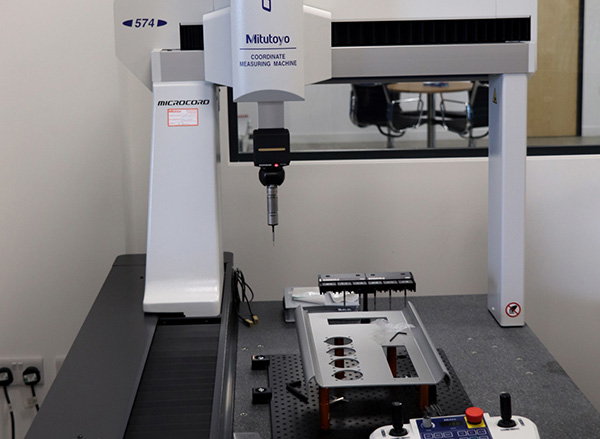
Mitutoyo’s southern area technical sales engineer, Trevor Stubbs, takes up the story: “Initially, Clive brought a number of parts to our Andover headquarters, where we conducted extensive testing, trials and conformance reporting. From this, we recommended the Crysta Apex 574 three-axis CMM, the Quick Vision Active QVL-404 two-axis vision measuring machine, the Quick Image QI A2010 image recognition and measuring system, the LH600E height gauge, a selection of hand tools, a granite table, and a number of other ancillary products.
“Much to our surprise, Clive didn’t only order the equipment for the Reading facility, he also placed an order for the Singapore and US sites,” adds Stubbs. “By mirroring the Mitutoyo equipment specified for the Reading site, the company can ensure complete uniformity across all its manufacturing facilities.”
The Crysta Apex CMM is used by the firm for measuring critical dimensions, as well as the dimensions on mating parts that require an optimal fit.
For further information www.mitutoyo.co.uk