Measuring up to 3D-printed parts

Quality assurance is vital in the production of accurate, patient-specific implants, endoprostheses and surgical guides. Consequently, Baltic Orthoservice in Kaunas, Lithuania is now using a multi-sensor CMM with laser scanner in conjunction with a micro-CT (computed tomography) system, all supplied by Nikon Metrology.
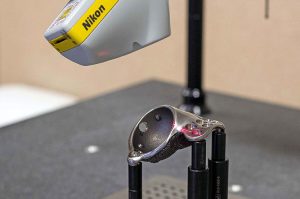
The Altera CMM with LC15Dx laser scanner supports the fast inspection of 3D printed implant surfaces and screw holes, while the XT H 225 CT guarantees internal structure quality and accurate geometrical correlation between CAD implant model and manufactured product.
Paulius Lukševičius, mechanical engineer, says: “3D printing is a complicated technology and there is a big variation in processing parameters, so predicting the quality and geometry of printed objects is quite a challenge. Patient-specific implants mean that the surgery must be ‘pre-planned’, virtually, so the implant can simply be put in place. To be able to execute the virtual plan, it is vital to be 100% sure that the implant geometry is exactly the same as the CAD model, and that the holes are machined to high accuracy.
“To fulfil these goals, we use a variety of metrology equipment,” he continues. “The CMM with laser scanner is irreplaceable when we need to perform fast checks after each manufacturing and post-processing stage, especially to check spherical surfaces, bearing surfaces and hole angles.”
Using this non-destructive, accurate metrology solution in its new quality control laboratory, together with a Nikon XT H 225 micro-CT system, helps
Baltic Orthoservice gain a deeper understanding of its products. In turn, this allows the company to “confidently produce bespoke implants and improve the quality of treatment for patients”.
For further information www.nikonmetrology.com

Measurement is Renishaw’s focus

Intelligent machining processes are critical to companies that want to exploit the full benefits of Industry 4.0, and throughout its main stand at EMO in Hanover last week, Renishaw demonstrated the integration of its latest measurement technologies within a manufacturing process.

Products highlighted included a new contact-scanning system for CNC machine tools, new software for the Equator flexible gauge which allows users to integrate the system with CNC machines, new on-machine and mobile apps that simplify the use of machine tool probing, an enhanced non-contact tool setter for machining centres, a new multi-probe optical interface system, a new surface finish probe for CMMs, and new software that enhances the functionality of Renishaw’s XM-60 multi-axis calibration system.
A new machining cell concept with integrated process control was also shown, demonstrating how complementary technologies can contribute to high levels of productivity and manufacturing capability.
The new on-machine scanning Sprint system with SupaScan is designed for simple integration into machine tool applications requiring fast workpiece set-up, and where overall cycle time is critical. Renishaw’s system also provides the ability to perform advanced scanning functionality, such as monitoring the final condition of a component surface. Testing on typical industrial components has seen cycle time reductions of over 70% when compared with standard high-speed touch-trigger cycles, says Renishaw.
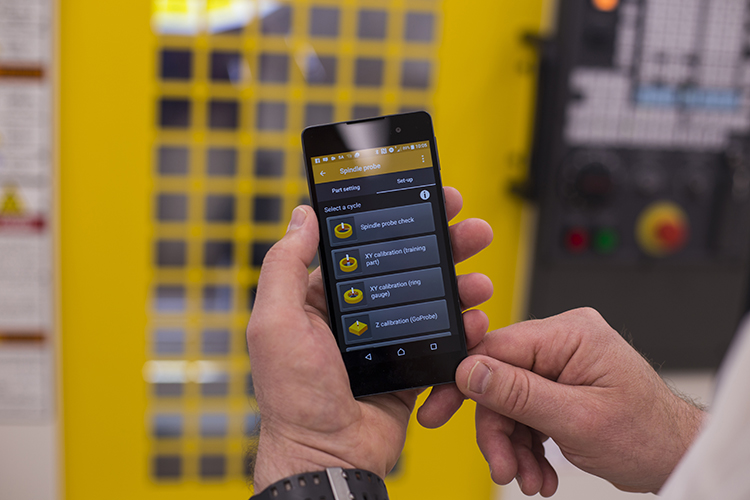
Renishaw also demonstrated its developing range of smartphone apps for machine tool probes and tool setters. GoProbe (pictured) is an enabling technology embedded within the latest Renishaw macro-based software packages. Together with associated training materials and user reference tools, this technology is designed to simplify the use of the company’s machine tool probes and tool setters.
For further information www.renishaw.com/emo

Xtrac gets into gear with Mitutoyo

Thatcham-based Xtrac, a manufacturer of transmission and drivetrain technology, has added to nearly 30 years of specifying Mitutoyo equipment by investing in three Crysta S776 CNC CMMs in the past 24 months. These most recent arrivals are all direct replacements for Mitutoyo BHN series CMMs that had been at Xtrac for over 20 years.

“The technology in modern CMMs, and particularly the MCOSMOS software, enables us to import CAD data, program our parts faster, improve both online and offline part-program creation from imported CAD models, and extend our geometry handling of freeform surfaces,” explains inspection manager Neil Warwick. “Added to this, the axis movements and motors in the new CMMs are faster than previous generations, resulting in reduced inspection cycle times.”
All six current CMMs at Xtrac utilise the same Mitutoyo MCOSMOS software, the same workholding jigs and fixtures, and the same Renishaw probing systems.
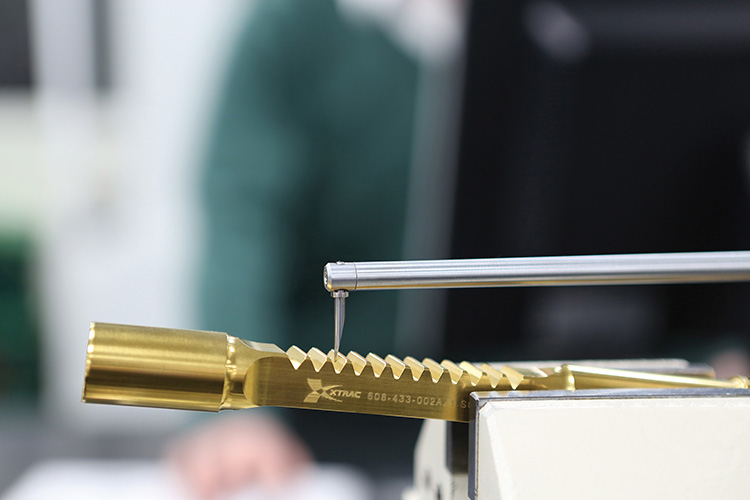
However, with the ever increasing complexity of parts, a CMM cannot support the measuring of all geometries and features. This was apparent for Xtrac when a particular Formula One component had undercuts on form gears that needed to be machined and measured to tolerances of ±5 µm. Here, Mitutoyo recommended its Formtracer contour measuring machine (pictured).
A precision arc scale built into the Z1-axis detector of the Formtracer SVC-3100W8 allows the arc trajectory of the stylus tip to be read directly. The capability and success of the Formtracer soon brought the arrival of two Contracer CV-3100H8 machines with X- and Z2-axis travel of 200 and 500 mm respectively. This was followed by a smaller CV-3100H4 machine.
For further information www.mitutoyo.co.uk

Try-out press

Poland-based CAD/CAM Solution has ordered a new try-out press from Bliss-Bret, a Haco Kingsland group company. CAD/CAM Solution, which has international customers that include Audi (Hungary), Gestamp (Spain) and Electrolux (Poland), specialises in the design and manufacturing of press tools, namely transfer dies, single dies and progressive dies. The try-out press must simulate subsequent production systems, which is why the company selected the Bliss-Bret hydraulic press with a main capacity of 15,000 kN and table dimensions of 2500 x 5000 mm. Furthermore, the press is fitted with several advanced technology options.

For further information www.kingsland.com

Honorary degree

The chairman and chief executive of Renishaw plc, Sir David McMurtry, will collect an honorary award from the University of Huddersfield, where he and his company have been heavily involved for many years. Sir David is a visiting professor at Huddersfield and Renishaw is a key industrial partner in the university’s EPSRC Centre for Innovative Manufacturing in Advanced Metrology. Now, he has the same role with its successor, the EPSRC-funded Future Metrology Hub, a £40m research centre. During his time at Rolls-Royce, Sir David was named as inventor on 47 patents or patent applications, and over 150 at Renishaw.

For further information www.renishaw.com