Arch Motorcycle partners with Hexagon

Hexagon’s Manufacturing Intelligence division andArch Motorcycle, a manufacturer of high-performance bespoke motorcycles, are partnering to support the quality control demands of engineering and producing unique riding experiences for Arch customers.  

By combining artistry and engineering with precision technologies, Arch maximises the performance potential of its motorcycles while keeping innovation at the forefront of design. The partnership is geared to help Arch expand its commitment to producing bespoke motorcycles by fully digitising quality processes throughout engineering and manufacturing with new measurement technologies. 

Among the 3D scanning technologies to be implemented by Arch Motorcycle include Hexagon’s equipment and software for reverse engineering, which will enable the company to retain classic design elements for application to products in development. The technology will also help Arch Motorcycle, which was co-founded by actor Keanu Reeves in 2011, create tailored ergonomic motorcycle designs that incorporate individual customer specifications for shocks, seats, handlebars, foot controls and overall fit. 

The ability to perform quick digitisation of part dimensions and surface finishes for comparison with CAD models and quality standards will enable Arch to improve both throughput and quality control easily and with confidence in the data. It also allows the company to keep an accurate digital 3D record of each customer’s motorcycle to support future customer service. 

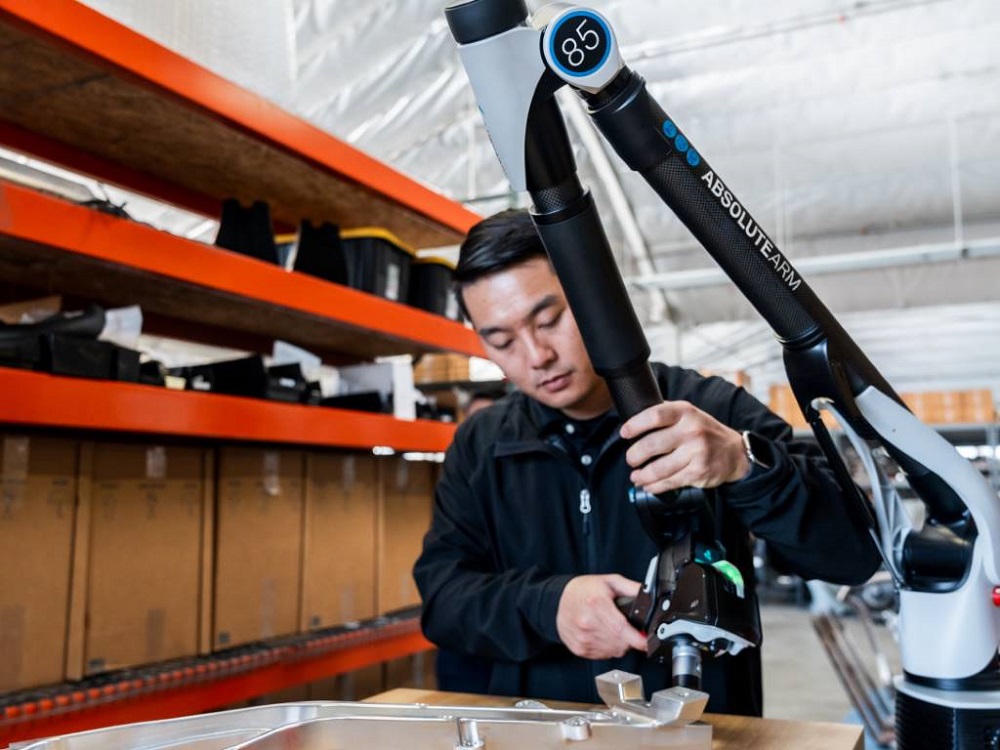
Hexagon devices to be used by the Arch manufacturing team include a measurement arm (Absolute Arm) with line-scanner (the AS1 laser scanner) that enables even inexperienced users to capture measurements directly into associated software. The 3D laser scanner provides a guided workflow that helps users visualise 3D models and guides them through successful coverage of critical features and surface measurements. Paired with tightly integrated measurement software, the laser scanner also makes it easy to scan large components and reverse engineer parts. 

For further information www.hexagon.com

RPI chooses Apex Dynamics gearboxes

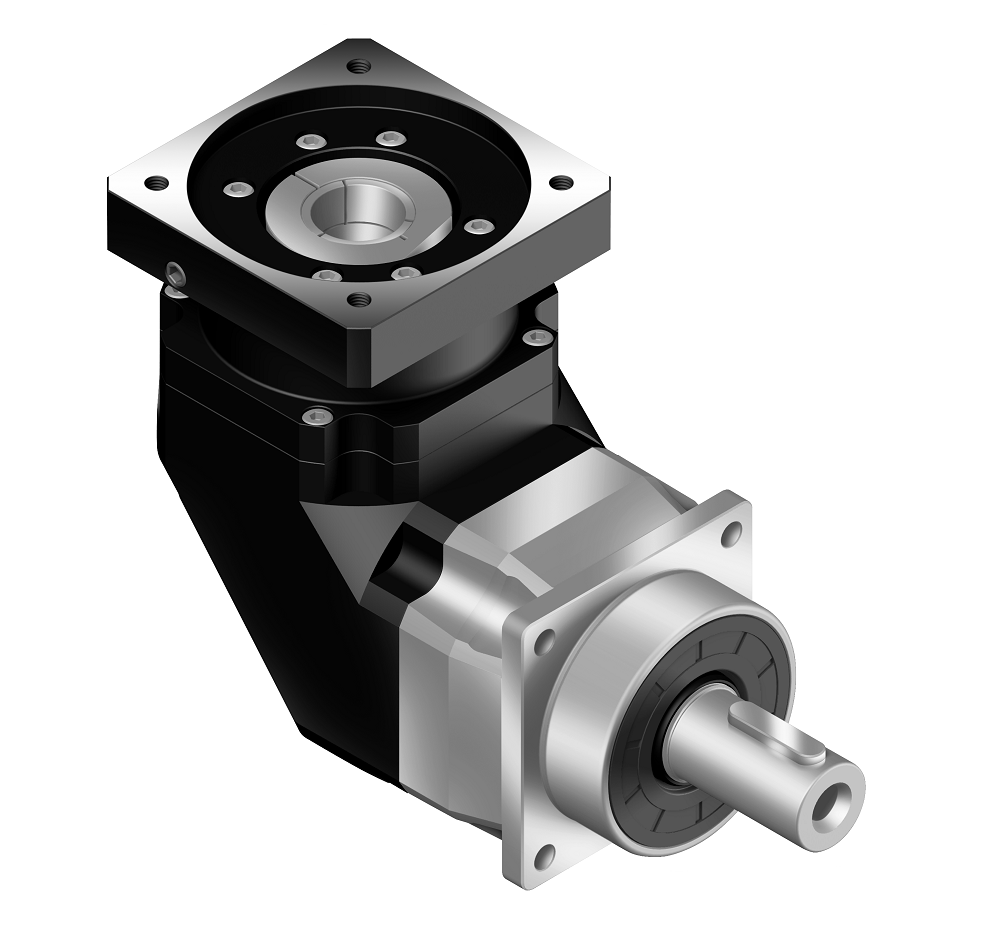
Apex Dynamics has been selected as the supplier of a key component by rotary measurement specialist Rotary Precision Instruments (RPI) UK because of the fast delivery, low backlash, low noise and good value offered by its AF series precision planetary gearboxes.

The world’s largest manufacturer of rotary devices, RPI UK was looking for a new supplier when lead times rose sharply after the Covid-19 pandemic and the company found it more difficult to source parts. After seeking a reliable supplier that could meet its very specific requirements for high-accuracy measurements and angular positioning, the company turned to Apex Dynamics, which provides delivery times of 2-3 weeks.

In this case, the gearbox had to fit into the existing design of a rotary table for CMMs. The AF series gearbox is now used in RPI UK’s LabStandard and QuadDualPurpose assemblies. Itmounts to a motor via a pulley arrangement with a belt that drives a worm and wheel arrangement.

Each Apex AF series gearbox has 100% optimised helical gearing, low backlash and easy mounting, reports the company. High precision taper roller bearings equip the gearboxes to handle high axial and radial loads and output torque ranges from 14 to 2000 Nm.

RPI UK technical manager Adrian Blake says: “High levels of accuracy are key to the success of our application-specific products. As a key component of our CMM rotary table, the low backlash provided by the AF series gearbox means that it positions correctly, an essential feature for our machines as it forms part of the drive assembly.All the gearboxes we’ve purchased are running smoothly and have met our calibration standards.”

For further information www.apexdynauk.com

Investments boost efficiency at Alrose

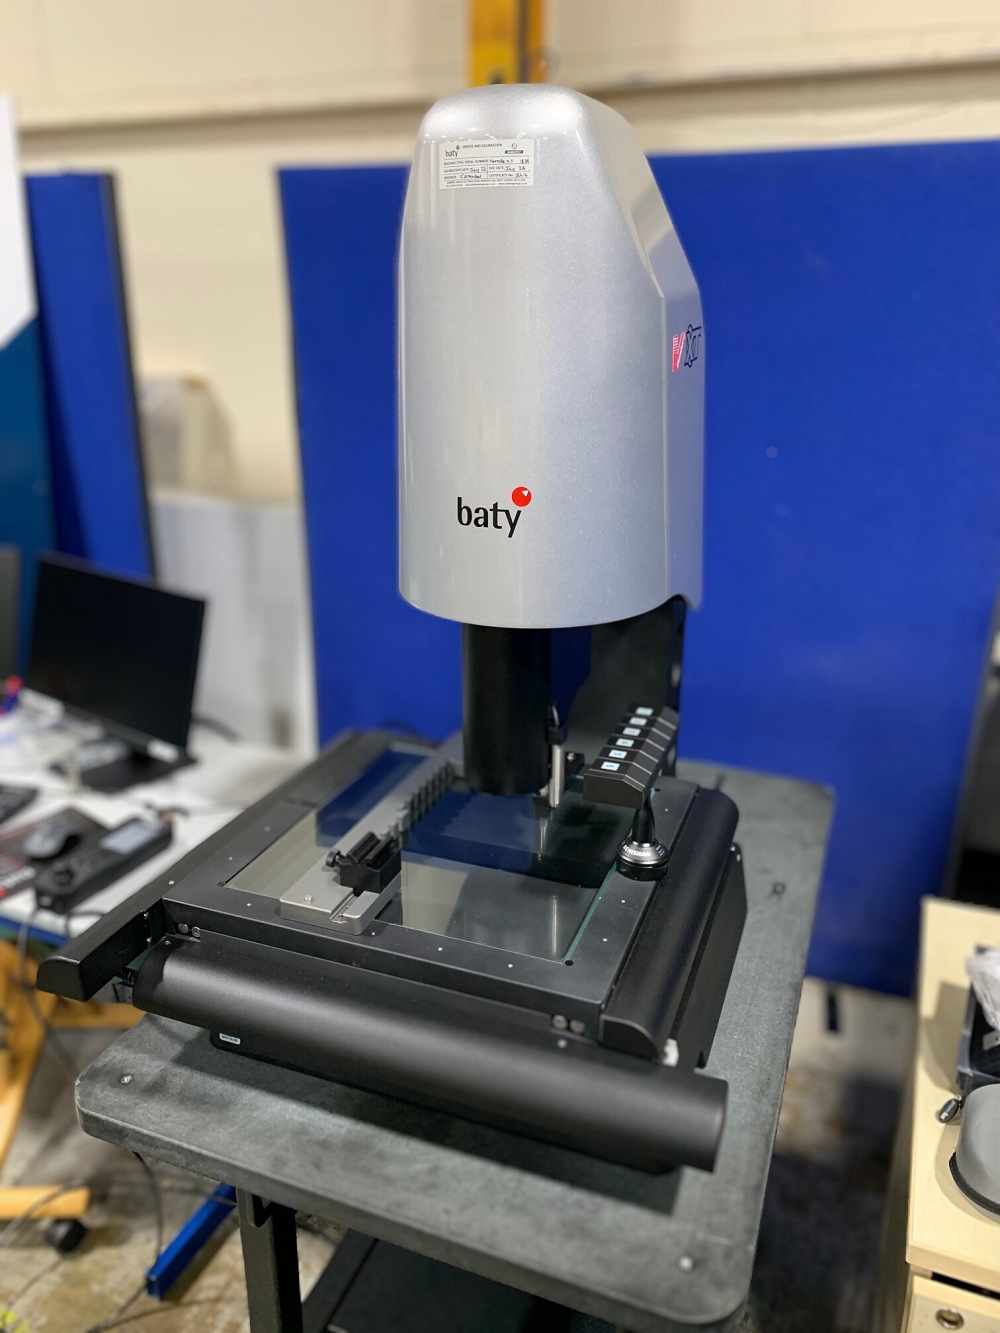
Due to the significant growth of its subcontract CNC turning and machining service, Alrose Products invested in a selection of precision measurement instruments from Bowers Group to improve turnaround times and deliver high-quality machining processes. Enhancing its operations with both a Baty Venture vision system and a Trimos V7 height gauge, the company now offers the highest levels of accuracy to customers by measuring to very tight tolerances with consistent precision.

“Buying any equipment is a consideration as there are so many factors involved, not least the investment of capital,” says Jon Aconley, managing director at Alrose Products. “However, knowing the reputation of Bowers Group and understanding what’s on offer made it far easier. The equipment was agreed and ordered, delivered on time and to specification, while the back-up service has been faultless.”

Bowers says that its instruments adhere to strict tolerance standards, ensuring consistent and reliable measurements across all operations. This consistency eliminates the potential for operator-induced variations, providing the business with enhanced accuracy and confidence in their measurement data.

The Baty Venture Vision System features powerful optics and intuitive software in support of measurement capabilities that include dimensional analysis, surface inspection and defect detection.Key features include high-resolution cameras, precision motorised stages and intuitive software interface, which allow for rapid and accurate measurement of complex parts with minimal user intervention. According to Bowers, the system’s robust construction and ergonomic design ensure reliability and ease of use in demanding manufacturing environments.

The Trimos V7 height gauge features a touch-display and lateral insert holders, serving as a versatile tool for workshop environments.

For further information www.bowersgroup.co.uk

Affordable CMMs gain extra accuracy

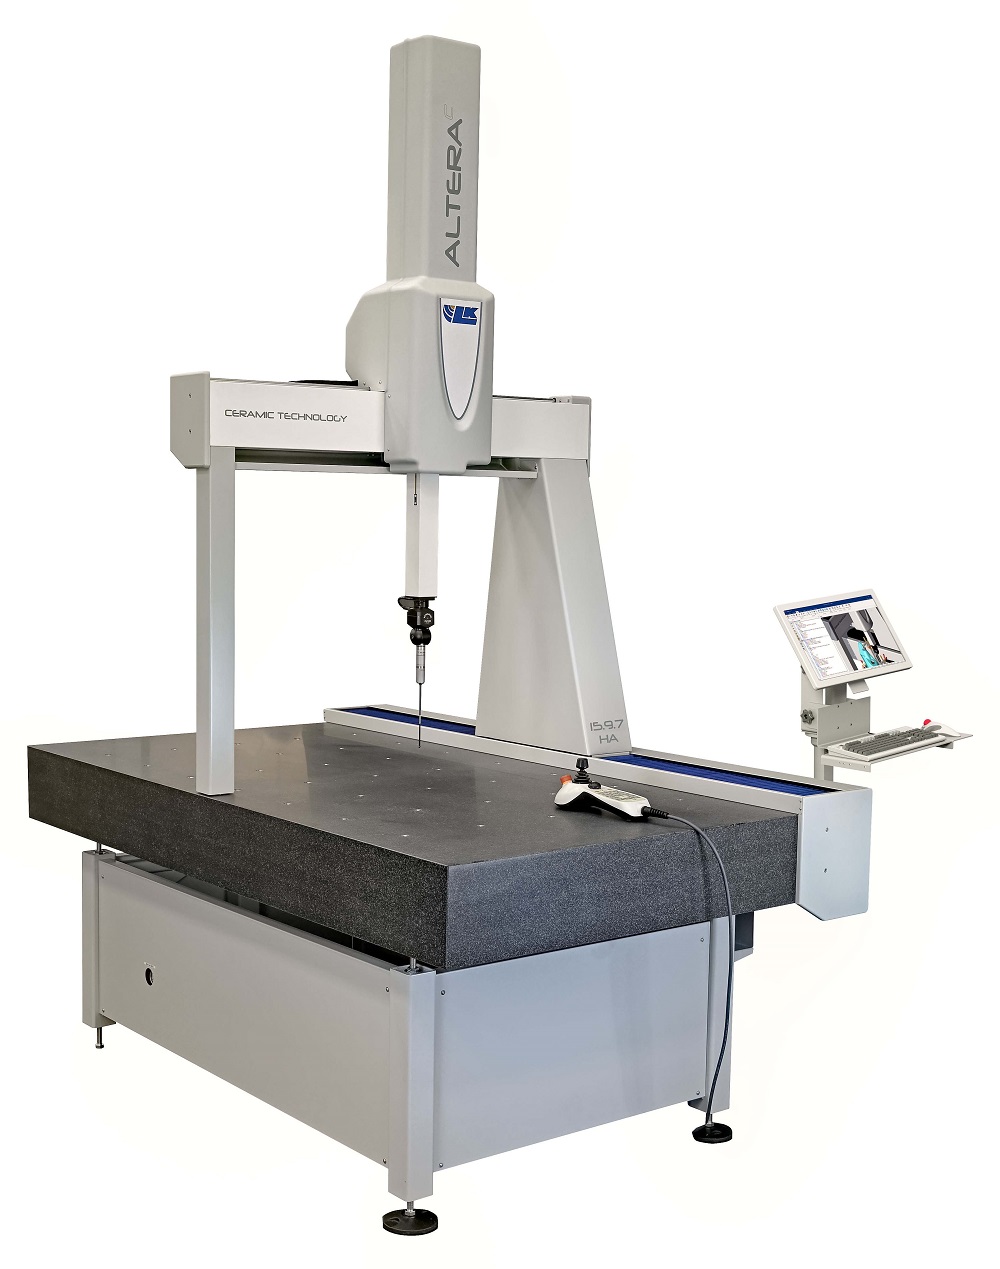
Manufacturers wishing to inspect components machined to tight tolerances, but unwilling to invest in an expensive, ultra-high-accuracy CMM, now have the option of selecting theAltera C HA (high accuracy) from LK Metrology. Available in five sizes, the largest 15.9.7 model was exhibited on the company’s stand at the MACH 2024 exhibition in Birminghamlast month.

These ceramic-bridge machines are constructed from the same components as the standard Altera C range, but are optimised during build at the company’s Derbyshire production facility to deliver 16% higher accuracy during a measuring cycle, with 13% better repeatability and 50% more accurate scanning. Volumetric accuracy is from 1.3+L/350, repeatability from 0.0013 mm and scanning accuracy from 0.002 mm.

When implementing design improvements to the Altera C HA, the company paid particular attention to upgrading the moving bridge. The spread of the air bearings supporting the main drive leg is now wider to increase the stiffness of the bridge assembly by 17% overall, which is particularly beneficial during high-speed movements. Advantages to the user are considerable, as measuring uncertainty when chasing tolerances down to microns is significantly better. For the same reason, LK further stiffened the bearing mountings and improved their alignment.


The pre-loaded, wrap-around air bearing configuration runs with a reduced air film thickness for low energy consumption and gives repeatable measurement results, even at fast axis speeds, reports LK. Friction drives provide smooth motion together with exact positioning at continuously varying speeds, as well as zero backlash and overload protection.


Multi-sensor capability is provided, with the Renishaw PH10M motorised probe head able to deploy a touch-trigger probe, scanning probe or laser scanner.

For further information www.lkmetrology.com

Raising the experience for QC professionals

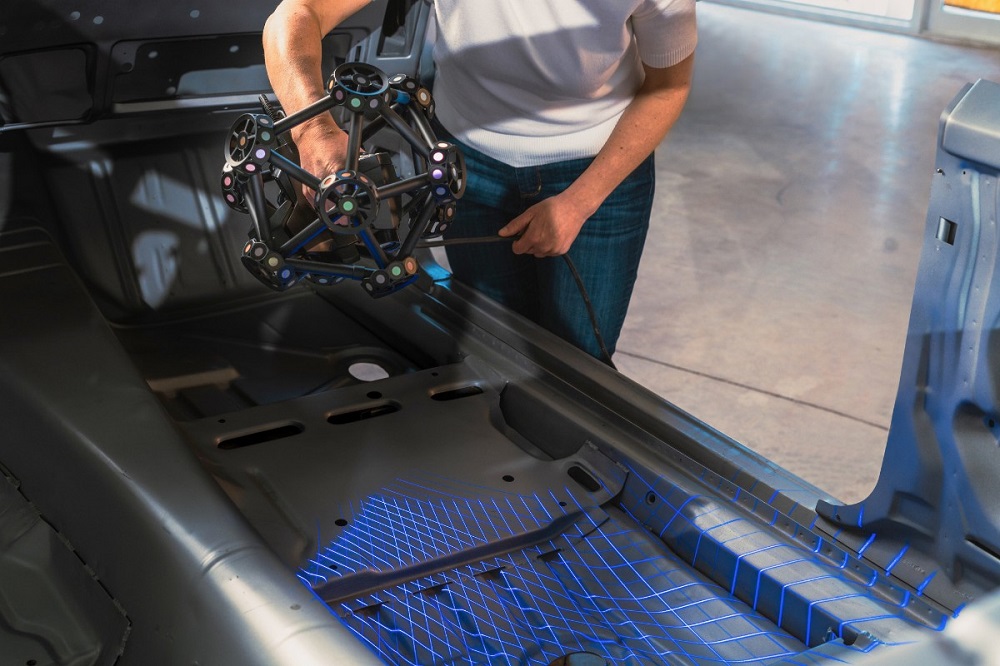
Creaform, a business of Ametek and a worldwide provider of automated and portable 3D measurement solutions, is releasing its MetraScan Black+, MetraScan Black+Elite and HandyProbe Next+, all latest versions of the company’s suite of optical CMM 3D scanners and probes.

Leveraging new ISO 10360 certifications and set-up assistance tools, this latest-generation MetraScan 3D line-up aims to provide professionals with sophisticated tools that optimise operations.Guaranteeing confidence in the stated specifications, the sensor acceptance test procedure is based on ISO 10360, an international standard which ensures intense testing to define specifications and qualify sensor performance.Performance tests take place at Creaform’s ISO/IEC 17025-2017 accredited laboratories, which ensures the quality of facilities and equipment, the traceability of artefacts, and the quality of validation methods.

Enabling the simple and precise measurement of large parts, the expansion of this line-up marks a strategic move by Creaform to meet the evolving needs of quality control (QC) experts. The products now offer an accuracy specification of up to 0.025 mm + 0.015 mm/m in the extended measuring volume, ensuring trust in the performance and accuracy of the QC process on large parts.

Another stand-out feature is 360° magnetic targets. Visible from all angles, these reusable and durable targets are easy to set up. They offer automatic detectionto support the fast delivery of results.

Guidance tools are available to provide visual guidance feedback on positioning targets when creating a set-up, which is especially useful for non-experts, while troubleshooting tools offer advanced set-up diagnostics if required.

For further information www.creaform3d.com