Crowds expected at Expo Manufactura

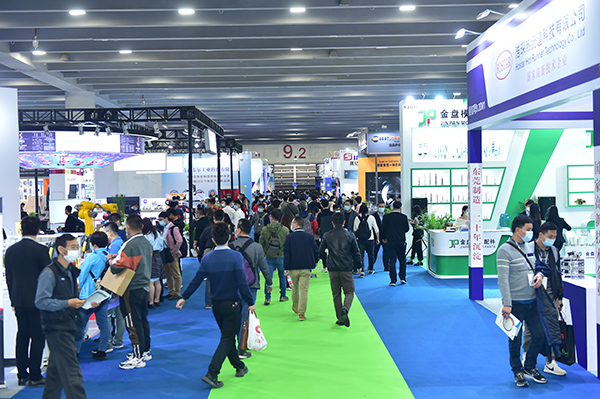
The most important manufacturing event in Mexico, Expo Manufactura, is set to get underway on 6-8 February. Last year, over 330 exhibitors (91 from overseas) presented their products and services to around 12,400 visitors, and similar if not higher numbers are expected in 2018.

Staged at the Cintermex venue in Monterrey, among the special areas at the 22nd edition of the show are automation and robotics, additive manufacturing, medical manufacturing and plastics manufacturing. The LA Times recently reported that “Mexico is in the throes of a manufacturing boom”, with exports jumping 13% since 2012. The country has also climbed to become the world’s seventh largest producer of cars. MTI will once again be among the exhibitors at Expo Manufactura, where the team will be busy handing out copies of the show issue to all visitors interested in acquiring machine tools and associated equipment.
For further information www.expomanufactura.com.mx

Blum helps firm achieve 2 μm precision

A complex component incorporating four long slots among other features was posing problems for Timo Lehmann, the CEO of Karlheinz Lehmann GmbH in Oberwolfach, Germany. The solution for the subcontract manufacturer was ultimately provided by a Citizen Cincom M32 turning centre and a TC76-Digilog touch probe from Blum-Novotest.

“Highly complex components are part and parcel of our business, but manufacturing a quick-coupler for a compressed-air input was a tough nut to crack,” says Lehmann of the challenges posed by a project for customer Parker Hannifin GmbH. “The key components are made from hardened and coated free-cutting steel with threads, bores and four lightly tapered slots. The slots were the crucial point of the whole design.”
The parallelism of the slots was only allowed to vary by 2 μm from the reference values. Otherwise the fully automated machine that assembles the component unit at Parker-Hannifin, would abruptly stop. Moreover, the quick-coupling would not work if the tolerance was exceeded.
Blum’s TC76-Digilog touch probe proved the only cost-effective means of verifying the design’s dimensional accuracy. Analogue measurement is always advantageous for assessing areas or lines. If a switching digital probe were to be used in the Lehmann application, a very large number of points on the slots would have to be measured in order to attain an adequate resolution. In contrast, the TC76-Digilog scans across the surface at a measuring speed of 2 m/min. As this is happening, the system generates an extremely large number of values (50,000 per second in fact) in a fraction of the time required for analogue data acquisition.
For further information www.blum-novotest.com

Length gauge for harsh environments

A new incremental length gauge for precision measuring and in-process control applications in harsh environments has been introduced by Heidenhain. The length gauge is suitable for use in the working area of grinding machines, lathes and other metal-cutting machine tools, and produces results accurate to ±1 μm over its 30 mm measuring range.

Called Specto ST 3087RC, the unit has a special housing to protect its mechanism. A built-in spring keeps the plunger, surrounded by a rubber bellows, retracted behind a guard and splash cap when the gauge is in its rest position. The extension of the plunger to the measuring position is actuated by compressed air, normally with the coolant switched off.
An increase in productivity and a reduction in floor-to-floor time result from not having to transfer components to a measuring station external to the machine tool, or to a quality control department. Should rework be necessary after metrology functions have been completed, in-process gauging preserves accuracy by eliminating the need to set the component up again for a second operation.
High-accuracy positional values over the full stroke of the gauge allow diverse components to be measured from the same fixture. Furthermore, internal photoelectric scanning of plunger position by means
of a DIADUR scale grating with a 20 μm period, together with the use of a durable ball-bush guide, permit consistent repeatability of probing even when measuring oblique or curved surfaces.
The IP67-rated ST 3087 RC is protected against ingress of dust and unaffected by high-pressure coolant jets – and even short periods of immersion. The length gauge is also tolerant to extremes of temperature, vibration and shock.
For further information www.heidenhain.com

IAP measuring equipment made available in UK

A new range of measuring equipment by India-based Innovative Automation Products is now available in the UK and Ireland from Master Abrasives. The Innovative Automation equipment for grinding processes covers optical, air, co-ordinate and other areas of metrology.

Ian Meredith, applications engineering manager at Master Abrasives, says: “Adding measuring equipment to our range of products means we can offer a more complete package for grinding processes alongside machines, abrasives and coolant nozzles. I visited Innovative Automation Products last year and was impressed with their manufacturing capabilities and portfolio of solutions. As a result, we have agreed to become their official UK and Ireland representative, and our showroom is now equipped with their 2D height gauge, air gauge and profile projector.”
Innovative Automation Products offers a 1D and 2D height gauge that are manual or motorised with a measuring length of 325, 625, 1025 or 1150 mm. A 3D CMM is also available as manual, motorised or CNC type. The air gauges are available with single or multi-channel, and single or double displays. Both vertical and horizontal profile projectors are available: the V400-HP with a screen diameter of 400 mm is on display in Master Abrasives’ showroom.
Innovative Automation Products’ V400-HP profile projector combines optical non-contact measurement and inspection with a measuring range of 250 x 150 mm. The vertical light-path arrangement is suited to the inspection of parts such as cutting-tool inserts, machined components and shafts weighing up to 10 kg.
For further information www.master-abrasives.co.uk

Fives grows machine service offer

Fives Machining Systems Inc, a global machine tool and manufacturing solutions provider, has acquired Konecranes Machine Tool Service division, a USA-based provider of machine-tool service.

Konecranes MTS division has facilities located in Erlanger, Kentucky and Massillon, Ohio, both of which will remain key operating locations. “Our mission is to be the primary service and solutions provider for machine tool productivity enhancements and service support to aerospace and industrial manufacturers,” says Steve Thiry, president & CEO of Fives Machining Systems.
For further information www.fivegroup.com